|
Southern Pacific
9010
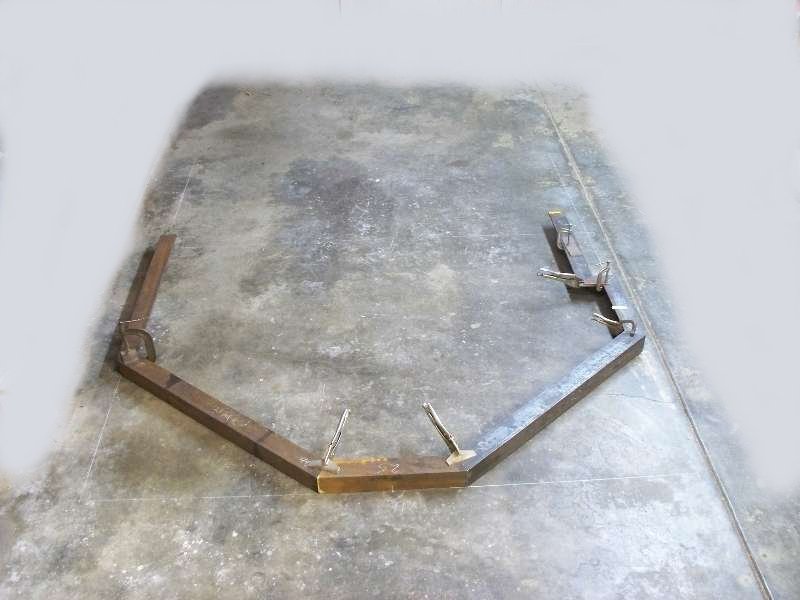
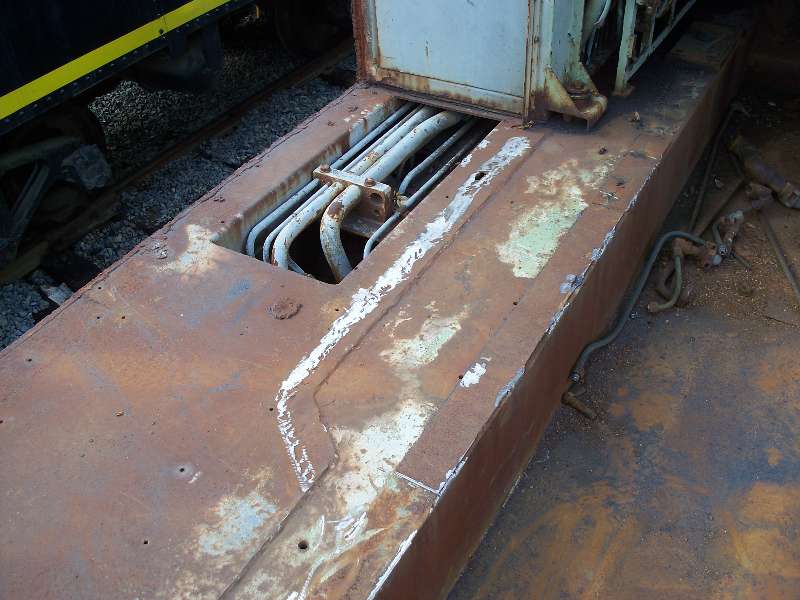
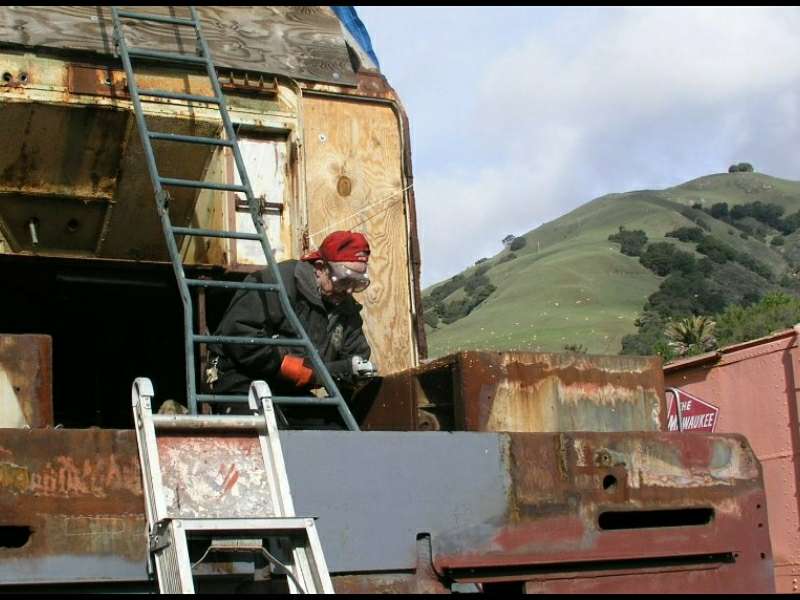
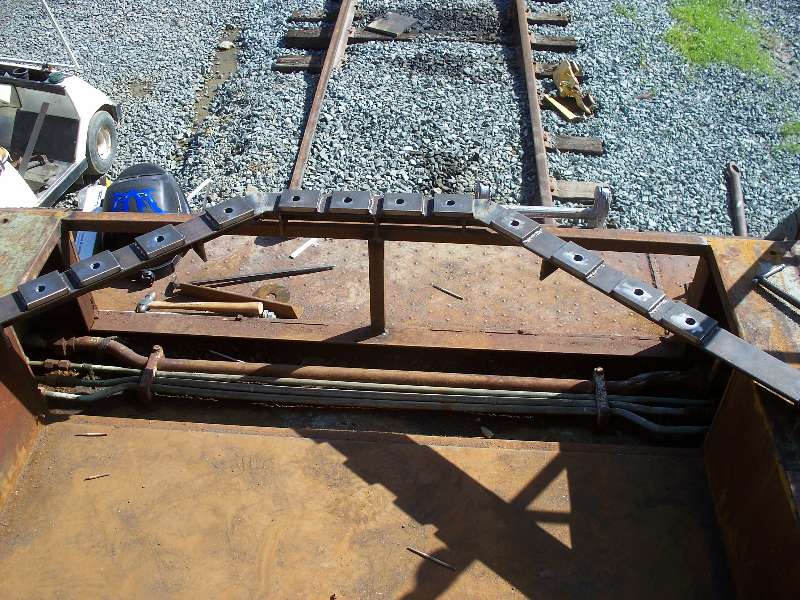
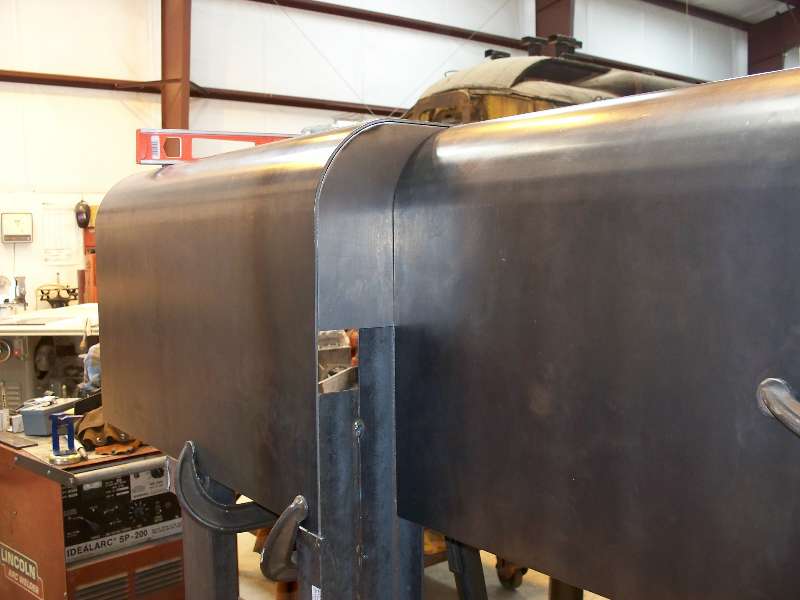
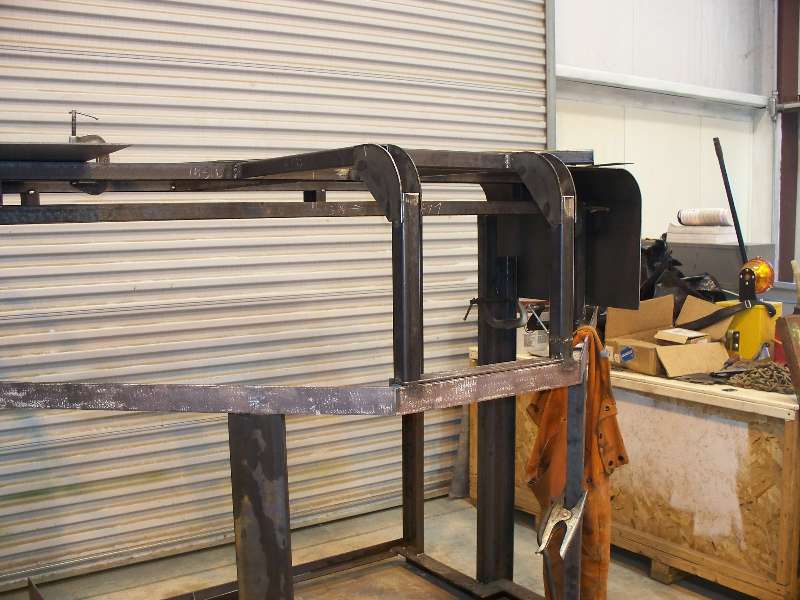
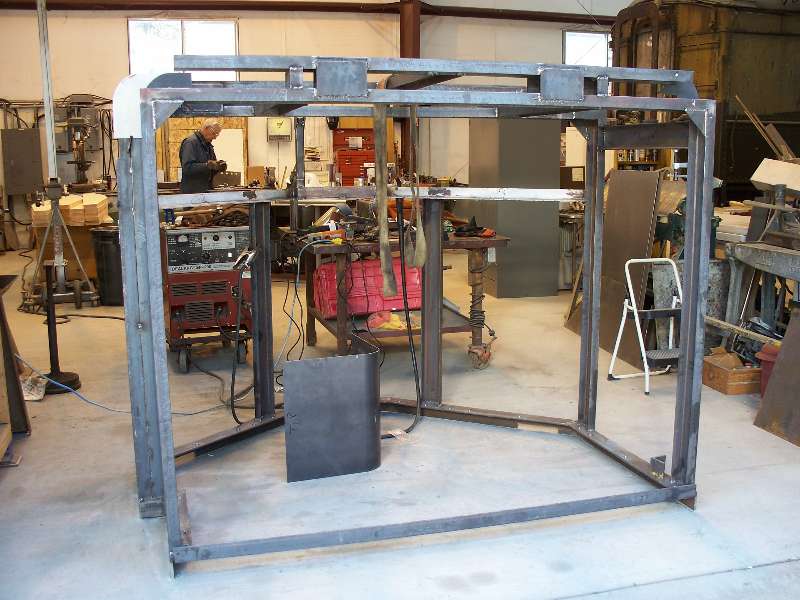
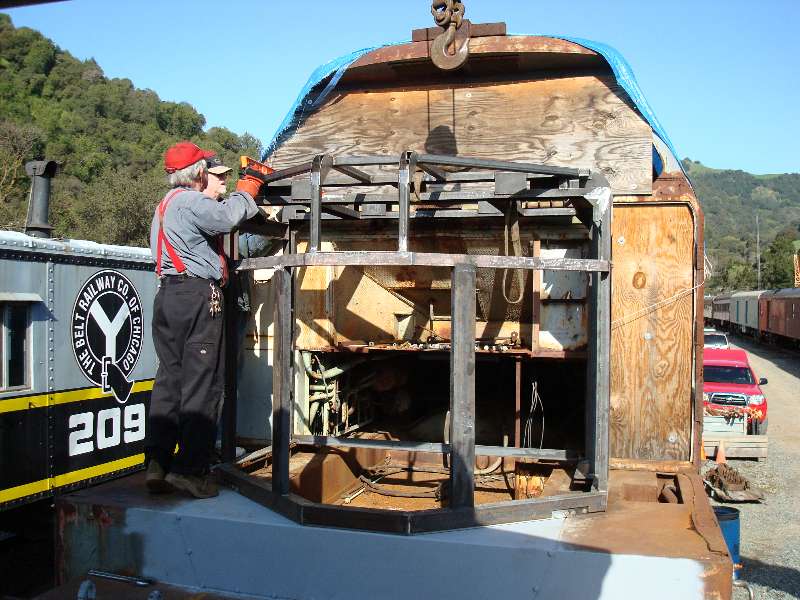
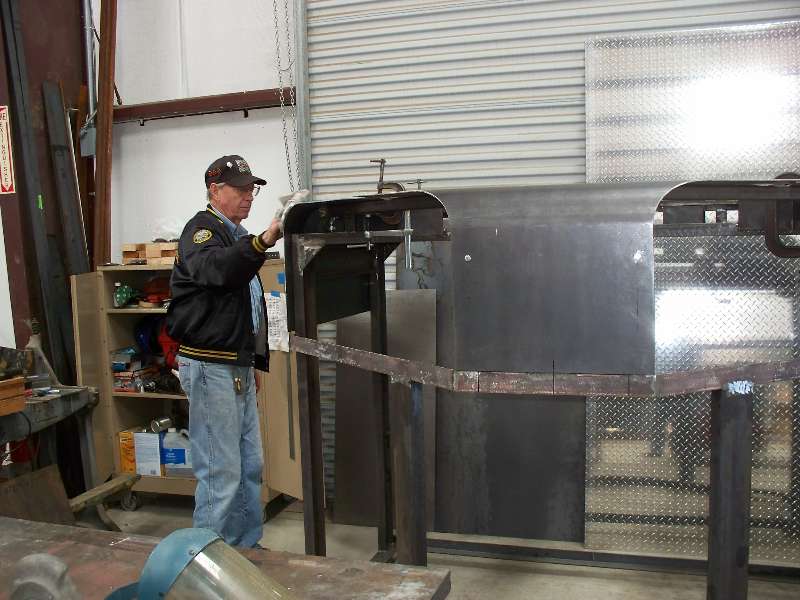
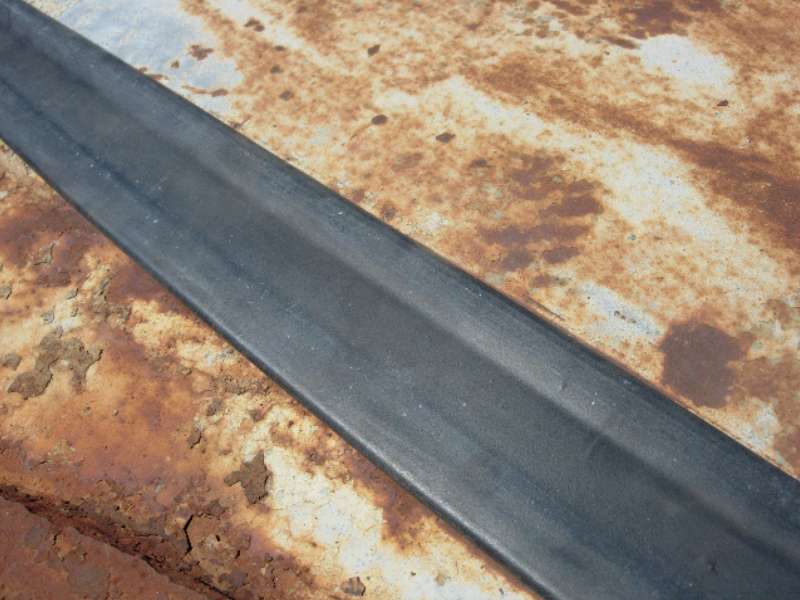
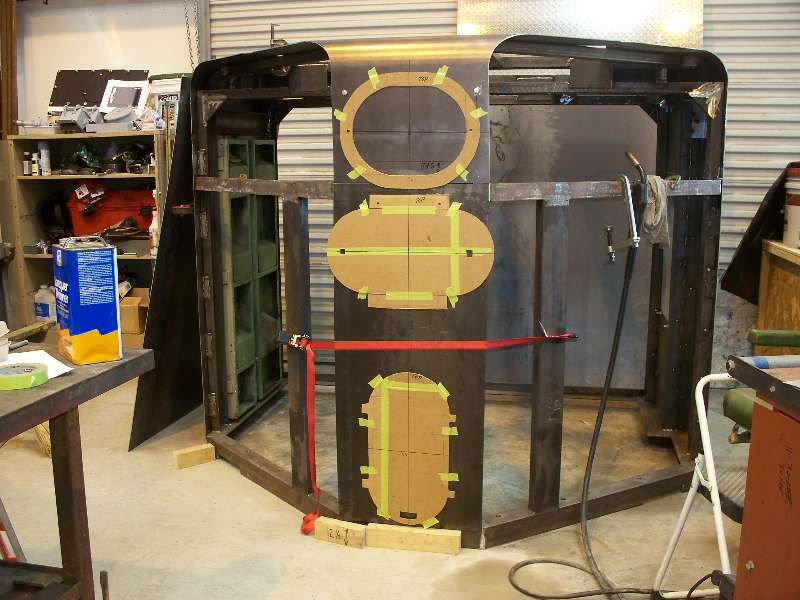
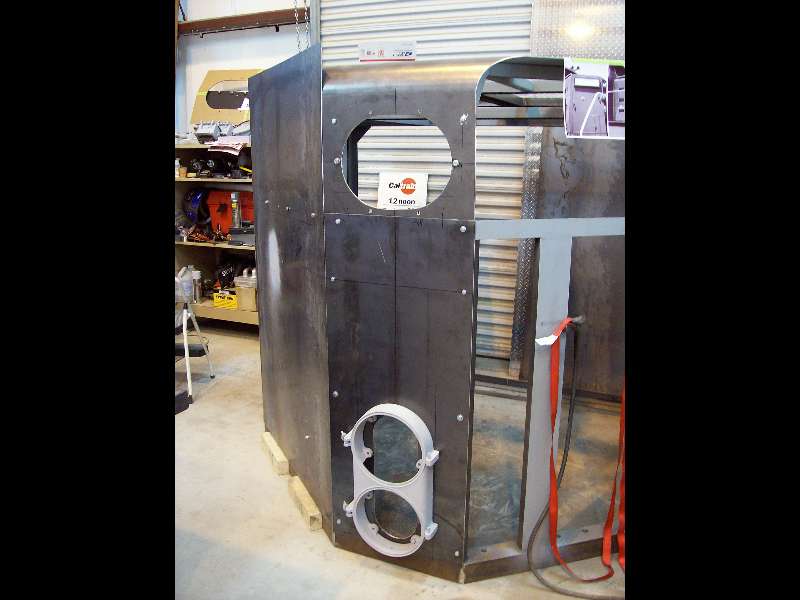
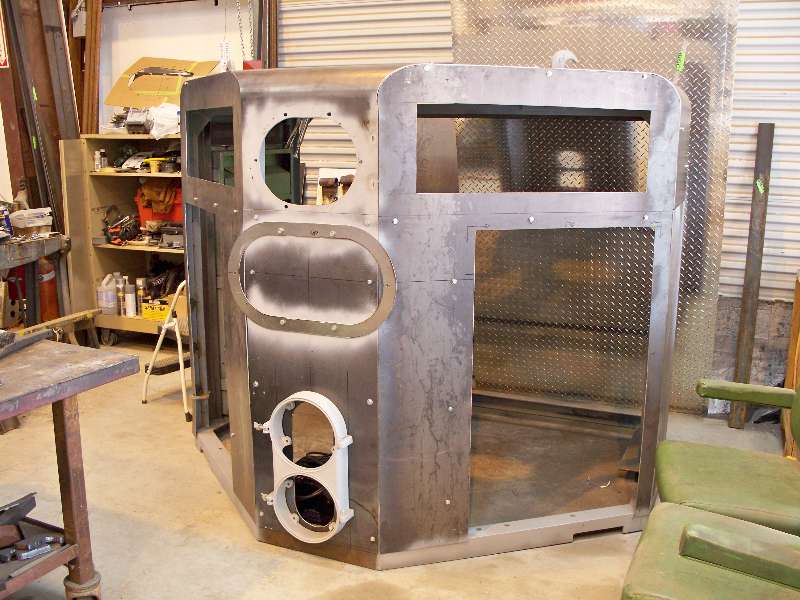
Short Hood Reconstruction Page 1 -- The Beginning, February 02, 2009 -- The 9010 does not have a nose. No schnoz. Negative proboscis. What do we do about that? We build a replacement. Working from a single Krauss-Maffei drawing provided by CSRM and many highly detailed photos, we got a good idea of how the nose was constructed . Fortunately, the nose, like other hood sections, is designed to be removed from the locomotive frame. In particular, the nose would be removed for heavy work on or remove the front transmission. I say "fortunately" because this will allow us to build the nose on a shop floor and then install it on the locomotive. The nose has a frame around the bottom that sits on a base made of 3/8" by 2 1/2" angle iron which is welded to the locomotive chassis. The nose frame is made of 3/8" by 3" angle iron. The first task was to build the nose frame which could then be used as a pattern for the base. Individual pieces of the nose frame were cut out and assembled over a chalk outline on my garage floor. The notch in the frame shown in the second photo provides a recess in the nose for the fireman's side front door. Without this recess, the walkway on that side would be extremely narrow.
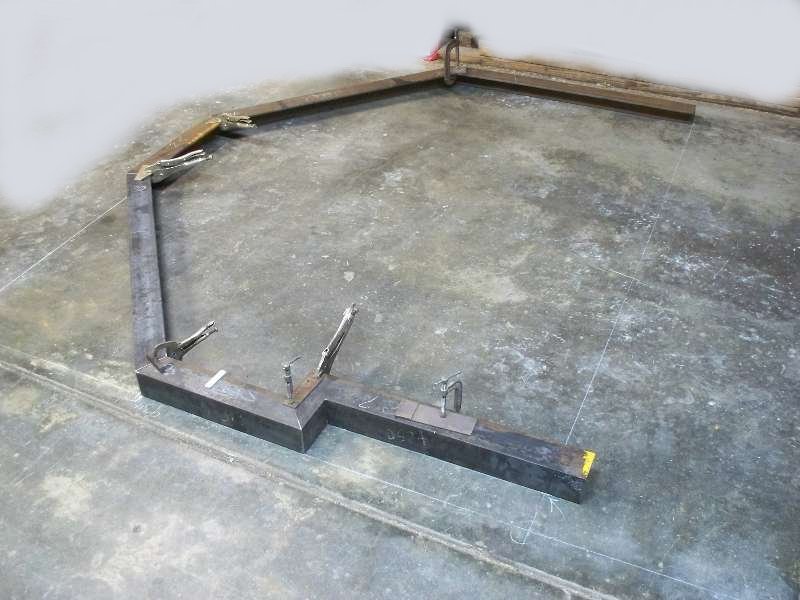
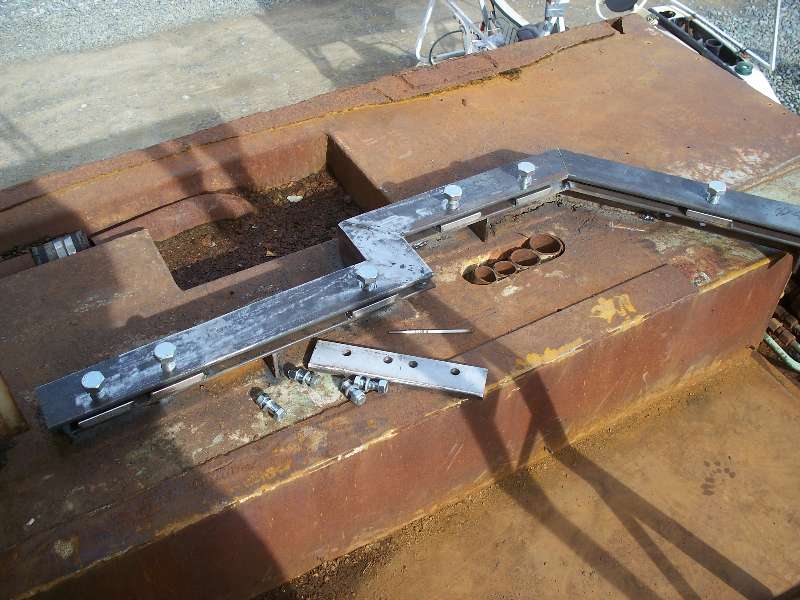
As mentioned, the frame shown above sits on and is bolted to another frame, slightly smaller, which is in turn welded to the locomotive chassis. The photo below left was taken of the frame below the rear nose door. All of the hood mounting on the 9010 is constructed the same way so this is a good model of what will be the nose frame. You can see that the frame section in the right photo duplicates the existing construction. The bolt shown on the left goes through the top piece of angle and into the spacer block which is has a tapped hole. No nut is used. All of the frame pieces, both for the nose and its mount will be complete with the spacer blocks welded on and holes tapped before any frame assembly is attempted. During test assembly of the frame pieces, it was discovered that some of the angle iron did not form a good 90 degree angle and would thus not look right when the nose base was bolted down to the base frame. A quick trip to the 50 ton hydraulic press corrected this issue in short order.
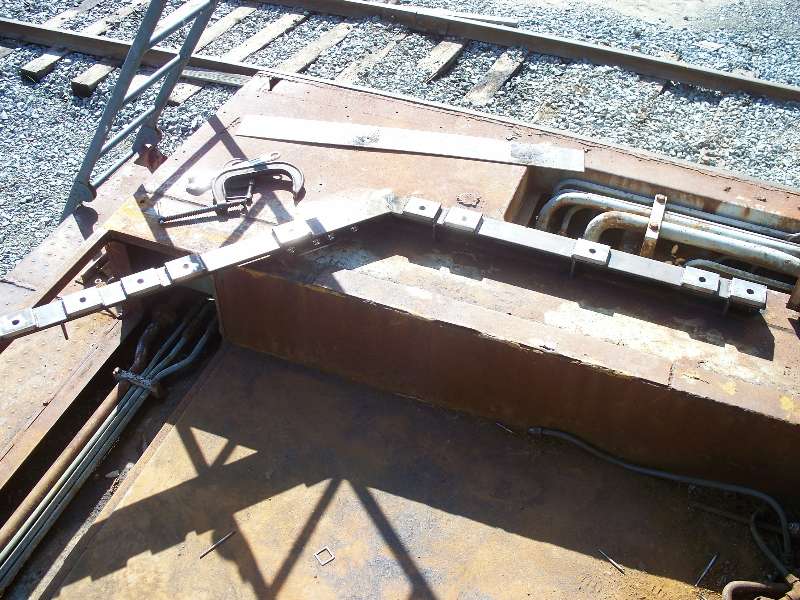
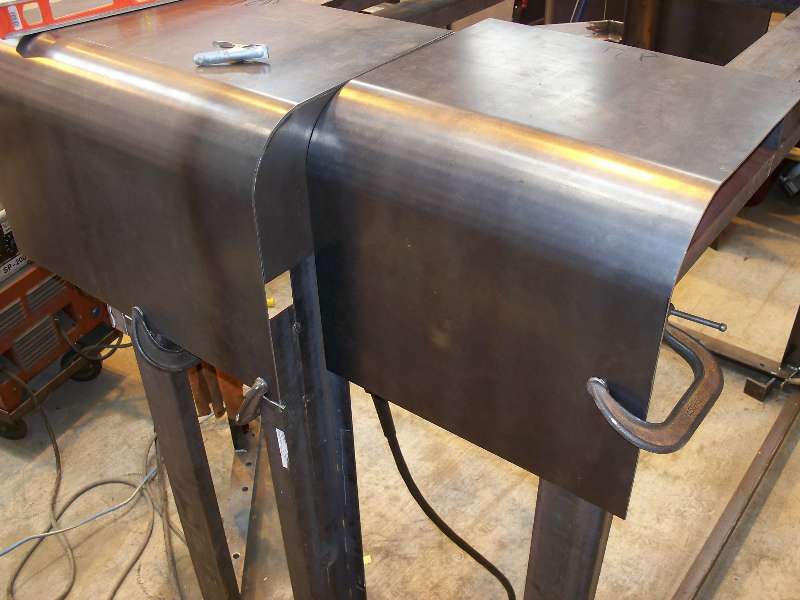
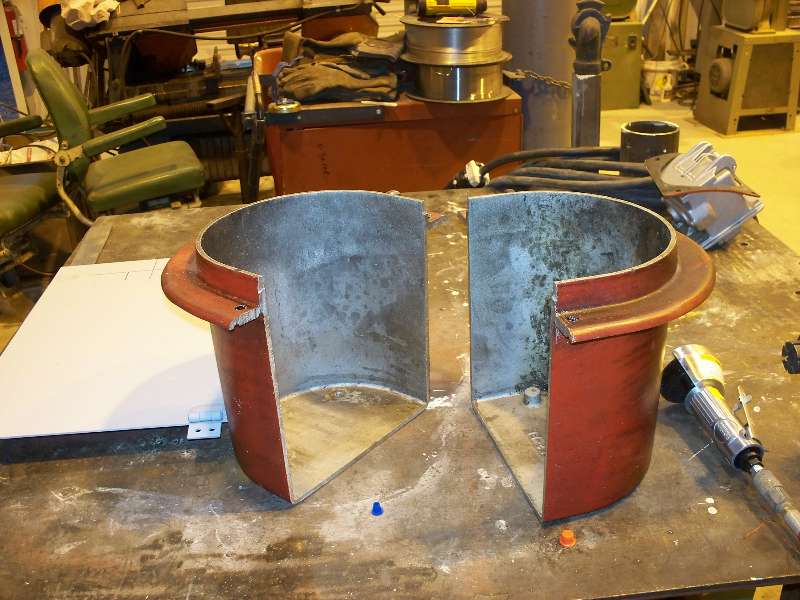
Below is a photo of the "split" required in the frame to be welded to the locomotive chassis. This is necessary because the front part of the frame has to be removed in order to remove the front transmission. Granted that we do not have a front transmission but, in the interests of accuracy, I decided to duplicate the split anyway. The photo above the angle iron is the only view of this split that we have been able to find.
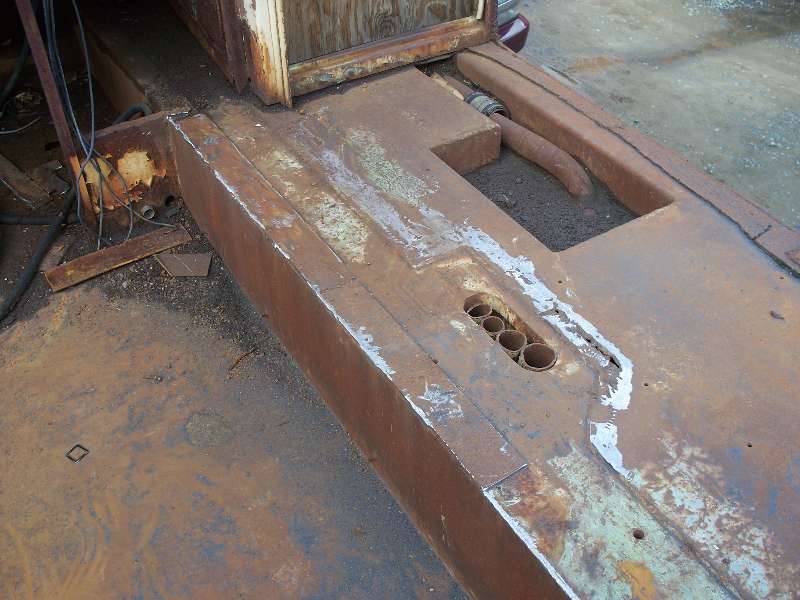
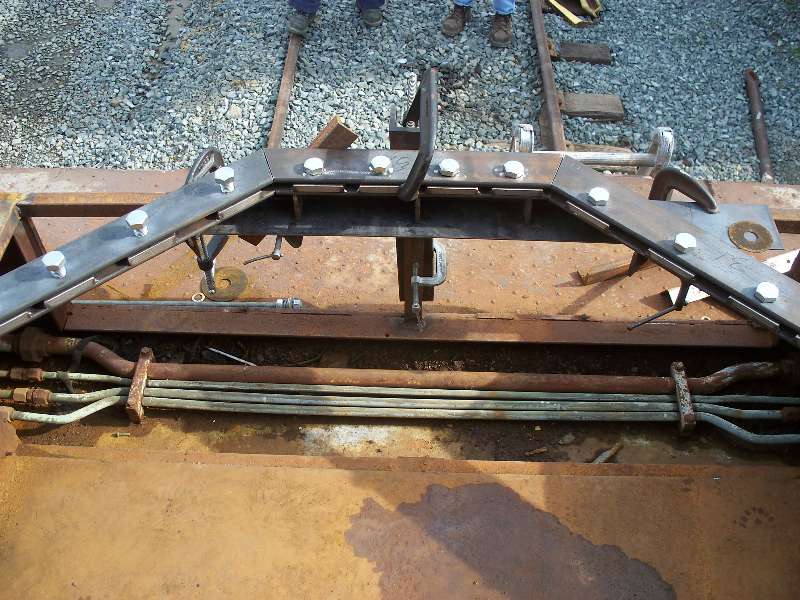
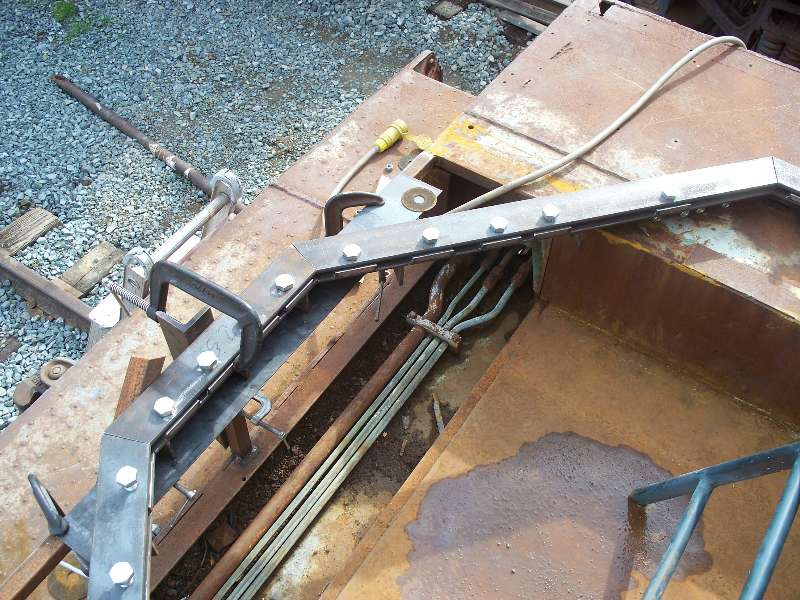
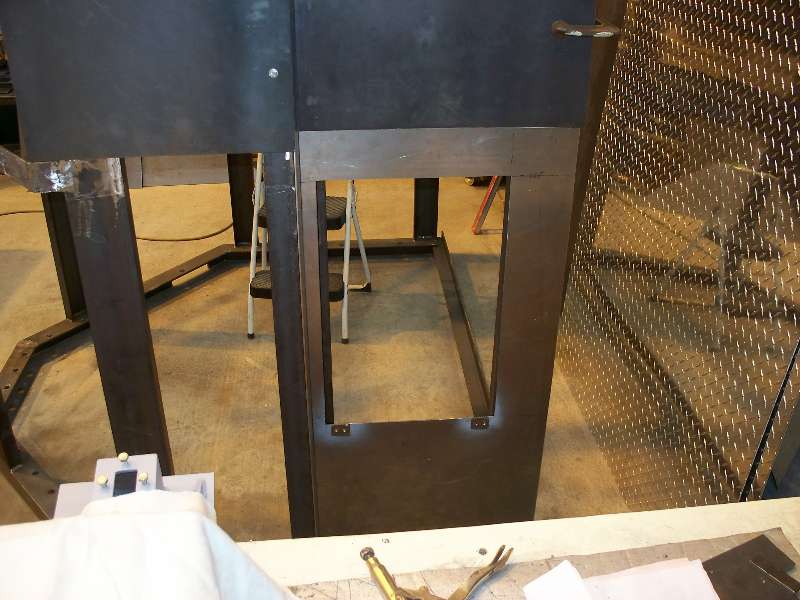
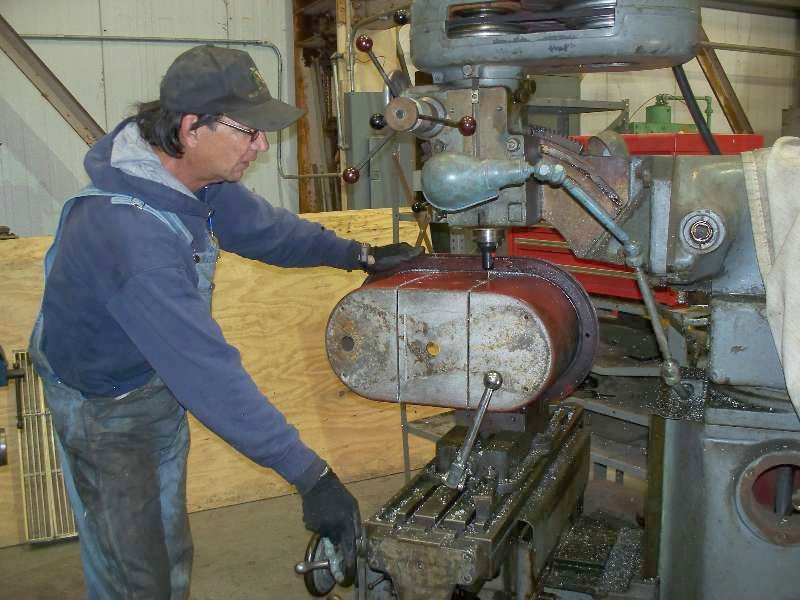
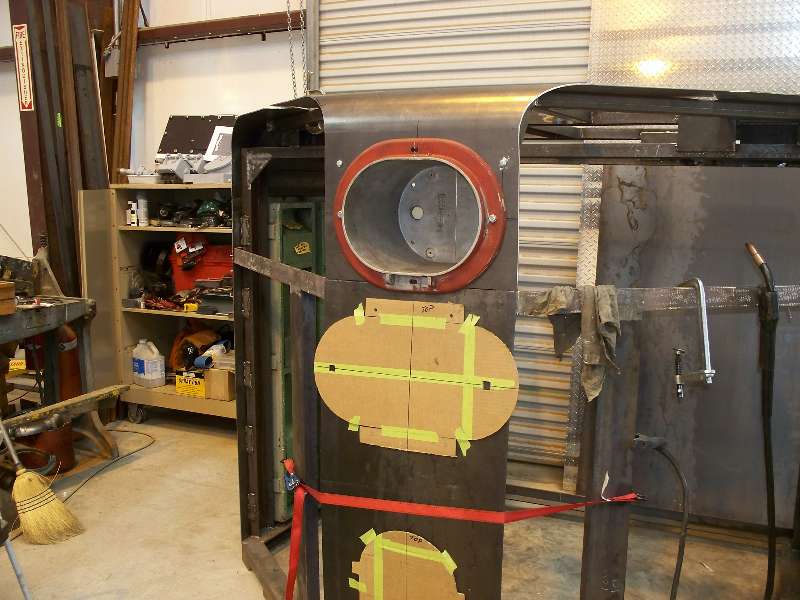
The next order of business was to clean up the area on the locomotive chassis where the nose base will go. I was pleasantly surprised to find that the surfaces were flat after grinding away all the old weld. The other area of concern is at the extreme front of the locomotive. Photo 3 illustrates a piece of 1/8" steel that covers the open area between the two sides. It bends over the sides at the top and goes back under the nose base. It appears that this is all that supports the front of the base. I know that there is no way that this would be strong enough nor would Krauss-Maffei build it that way. But, having no drawing for the area, the original design is a mystery. I decided to make a frame from square tubing, weld it in place and then weld in a center leg which would add strength. By the way, the four cut-off tubes showing in the second photo were used to contain the wiring for the front Dynastarter and transmission control. Pat Warren caught me making sparks on the deck.
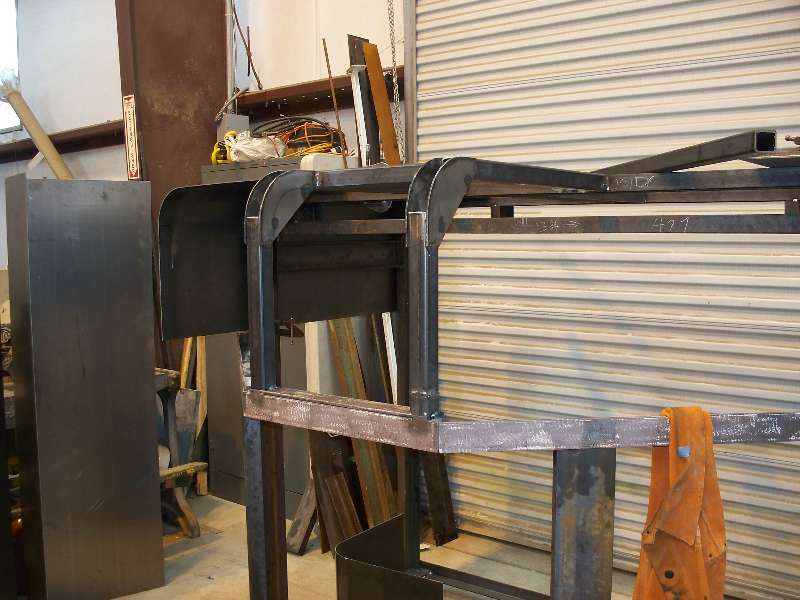
Next, the base frame needs to be welded to the chassis. The photos show both frames (base and nose), bolted together in place on the chassis with the base frame being welded down. The lines seen crossing the chassis in the second photo are the 4 air MU lines passing from one side of the locomotive to the other. Once the base was firmly welded down, the nose frame pieces were welded together. Much thanks with this fabrication go to our friend in Vienna, Austria, Gerold Eckl professional welder and K-M enthusiast who kindly answered all my questions about welding angle joints.
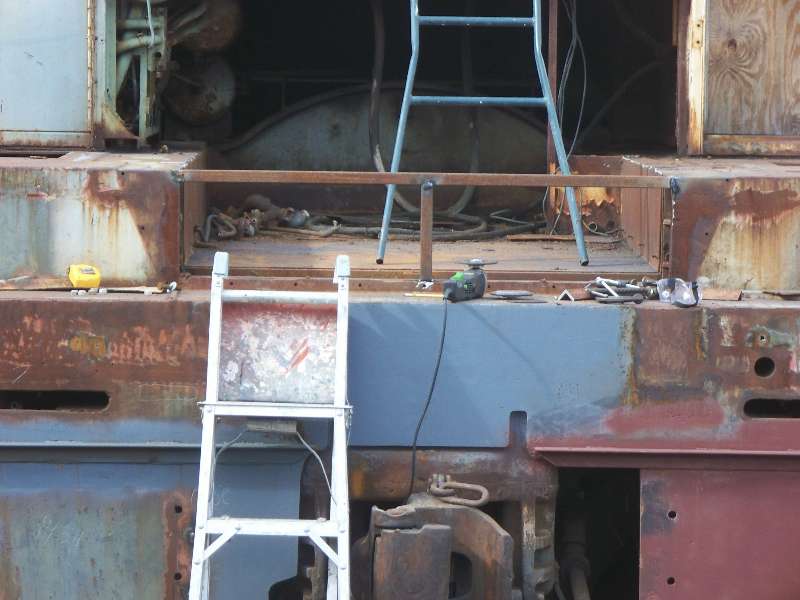
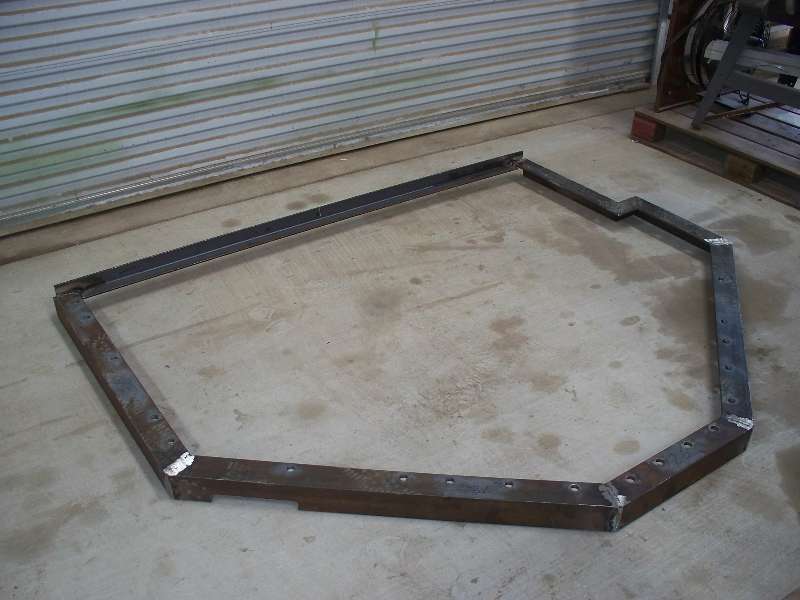
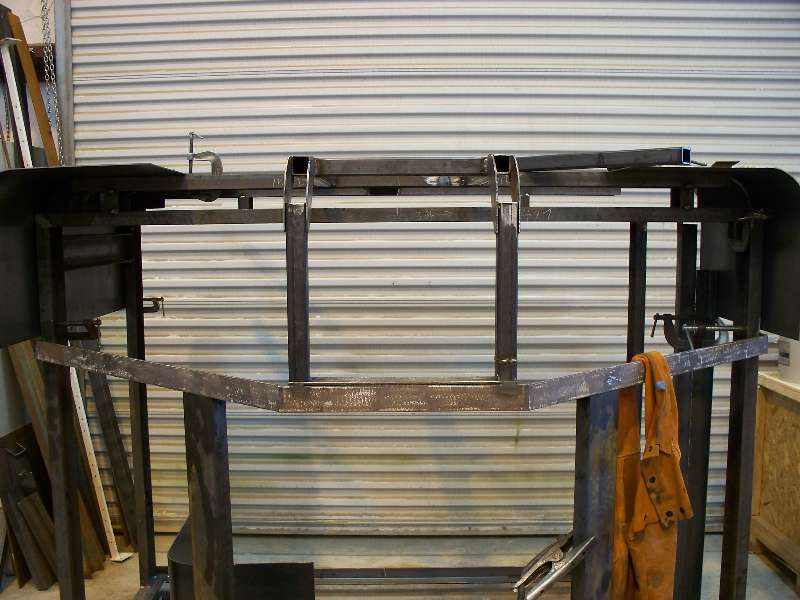
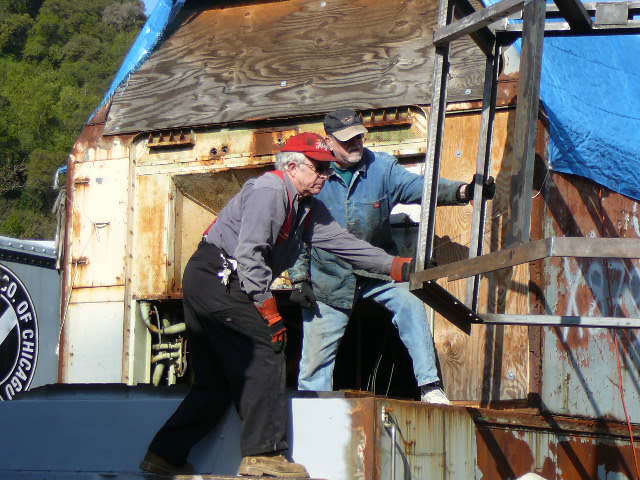
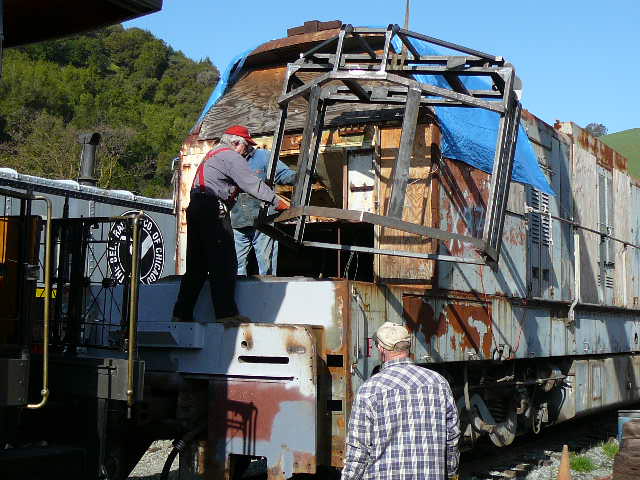
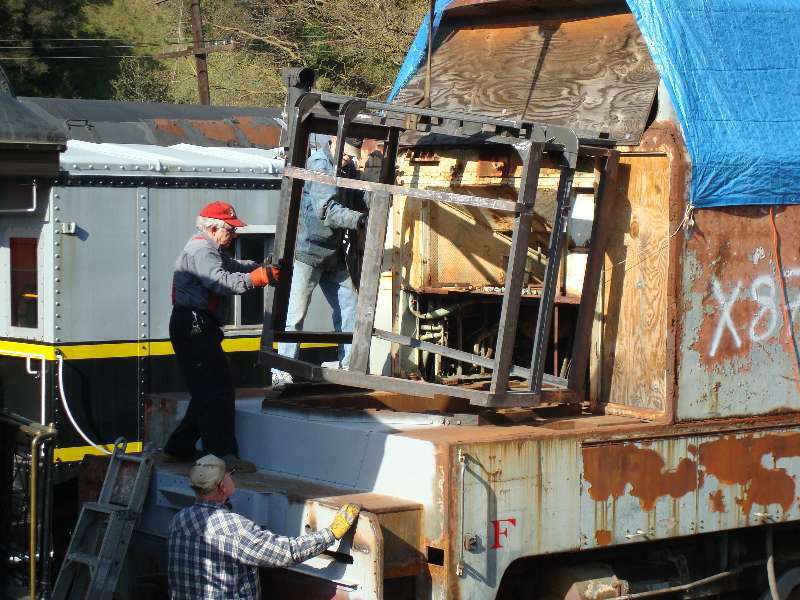
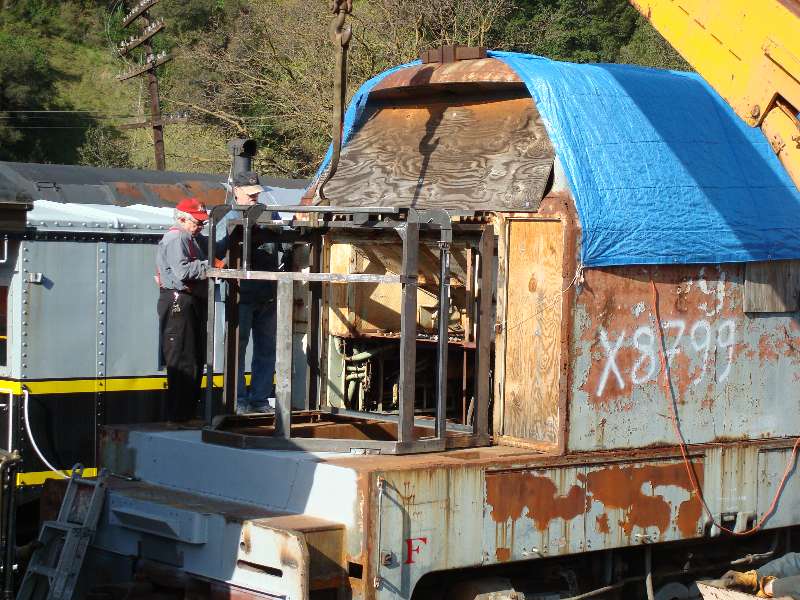
-- Update February 19, 2009 -- The 24 bolts were removed and the nose frame lifted off with a fork lift. This reveals the base frame and all its tapped bolting pads. Finally, the nose base was taken to its new temporary home on the floor of our car shop building where construction of the nose will take place.
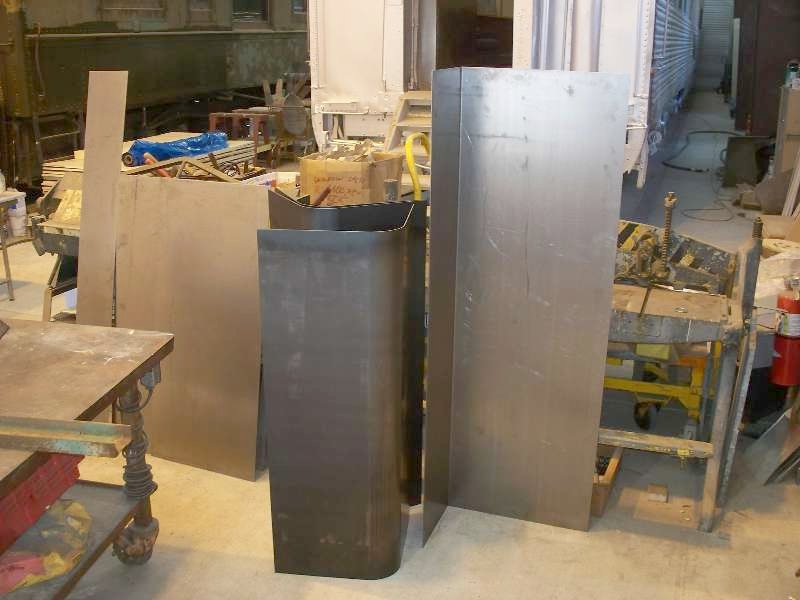
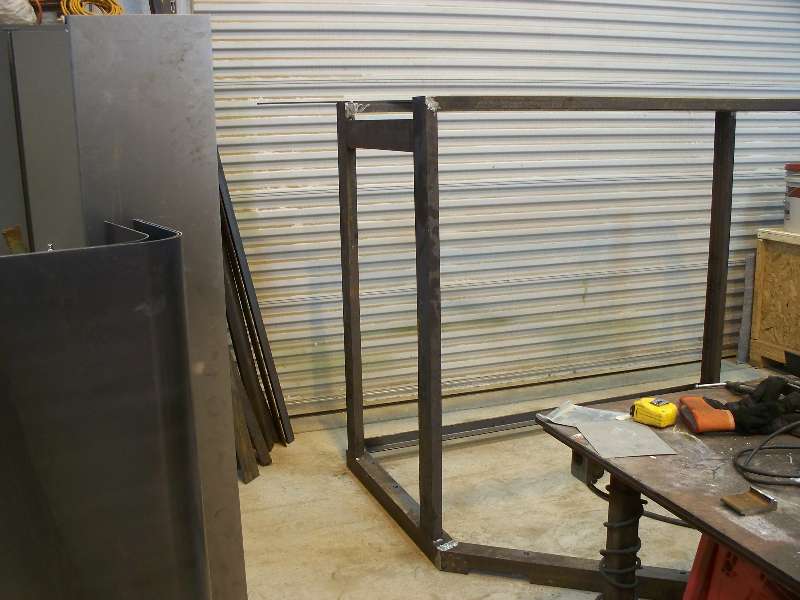
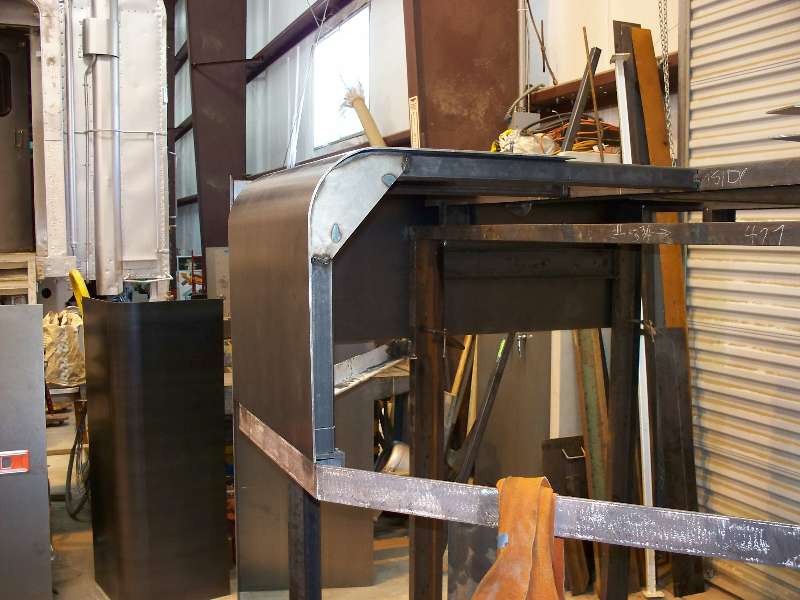
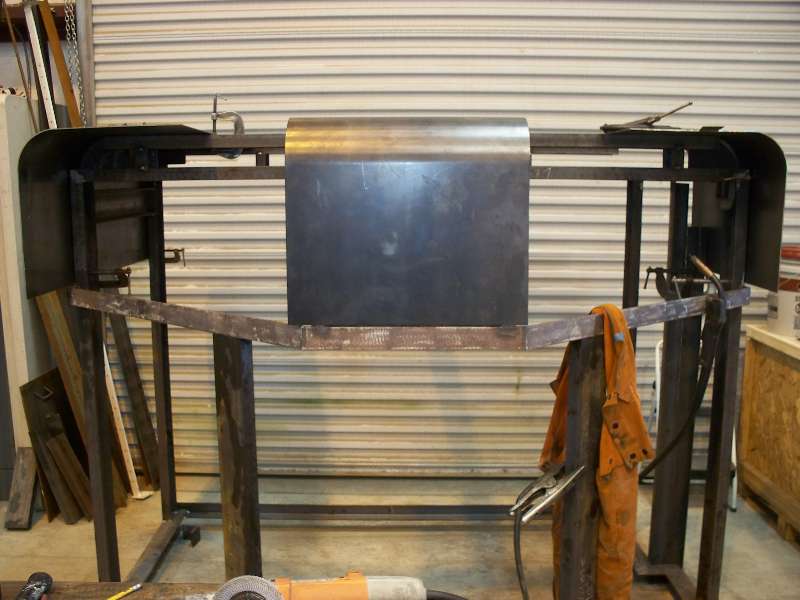
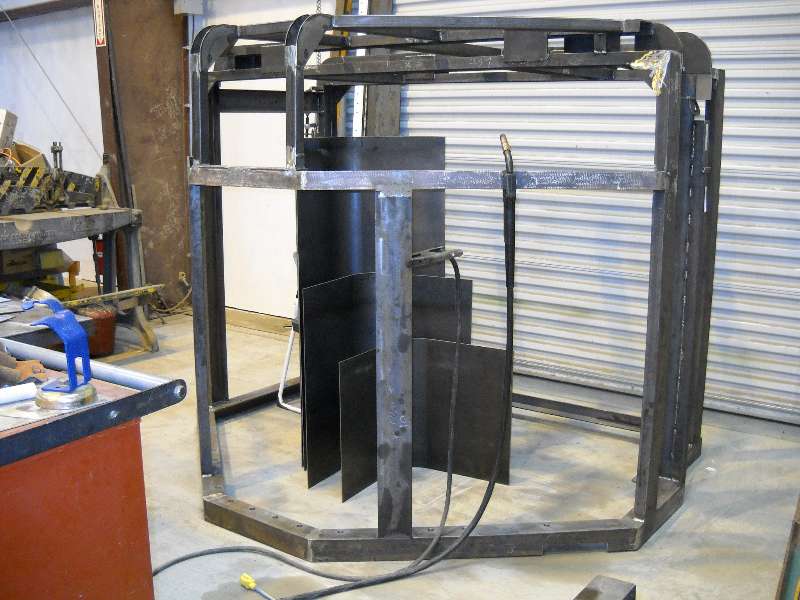
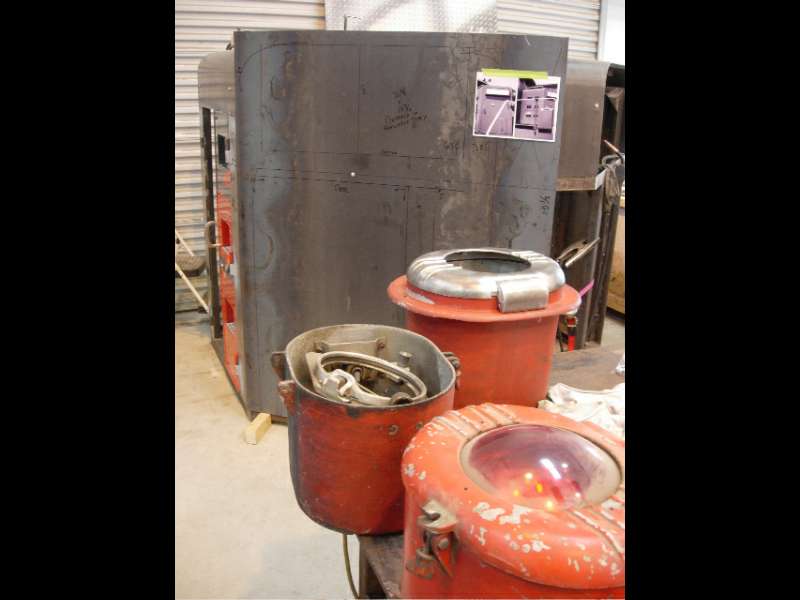
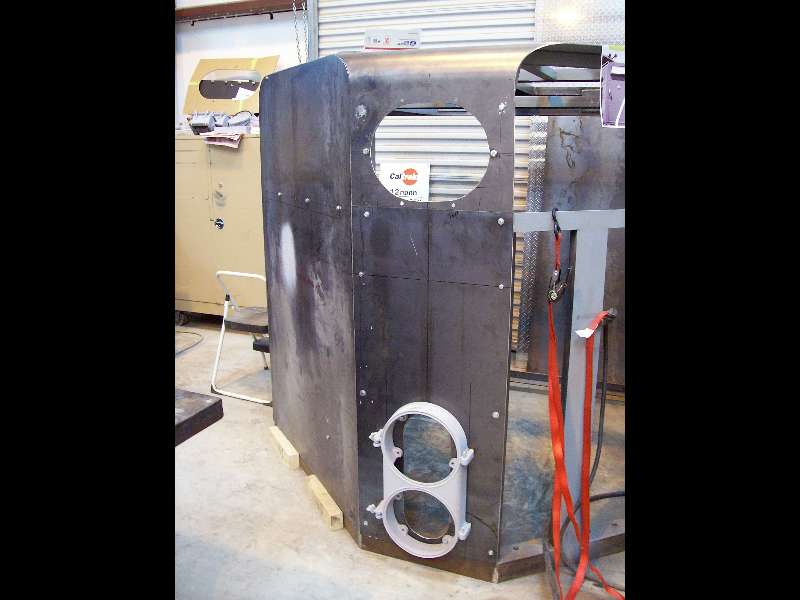
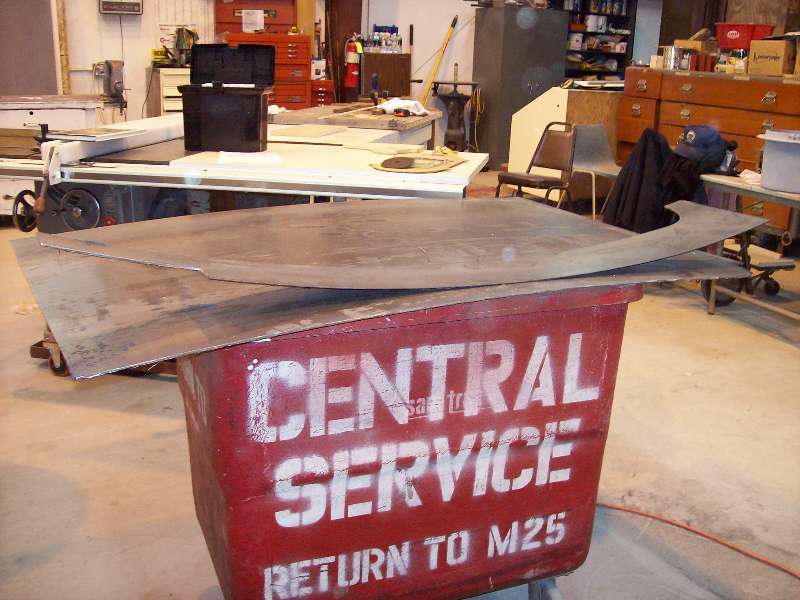
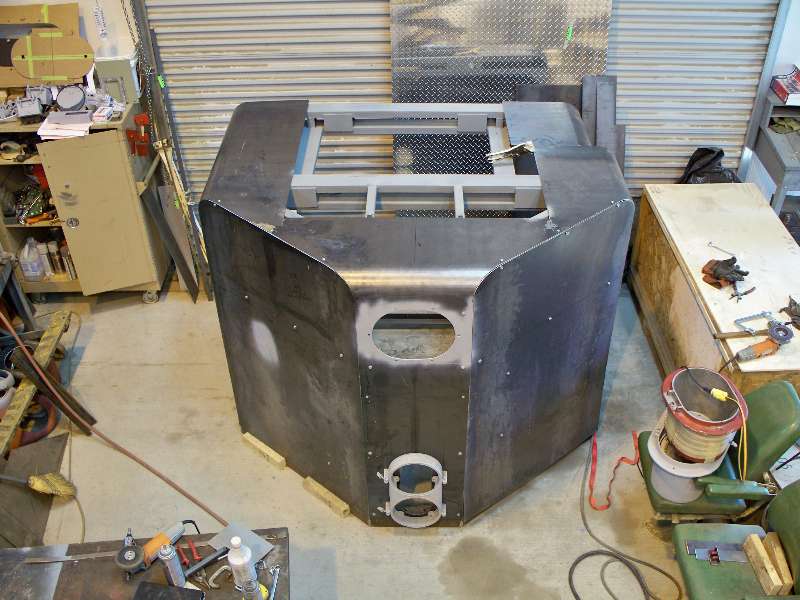
-- Update March 05, 2009 -- We have taken delivery of the formed sheet metal that will become the radiused sections of the nose. This is a big step! And, it wasn't cheap. The piece of metal standing to the right is the cover for the front lower section of the nose. Soon after that arrival, we received the order for the structural iron for building the nose framework so Rich Al and I dug into the pile of channel iron and made the first section of the nose skeleton. On the next work day, we fabricated the other major "rib" and welded both pieces onto the base frame along with some temporary material to keep things reasonably rigid and the basic structure square. From here on for a while, we will be constructing the skeleton and fitting pieces of 1/8" steel nose skin.
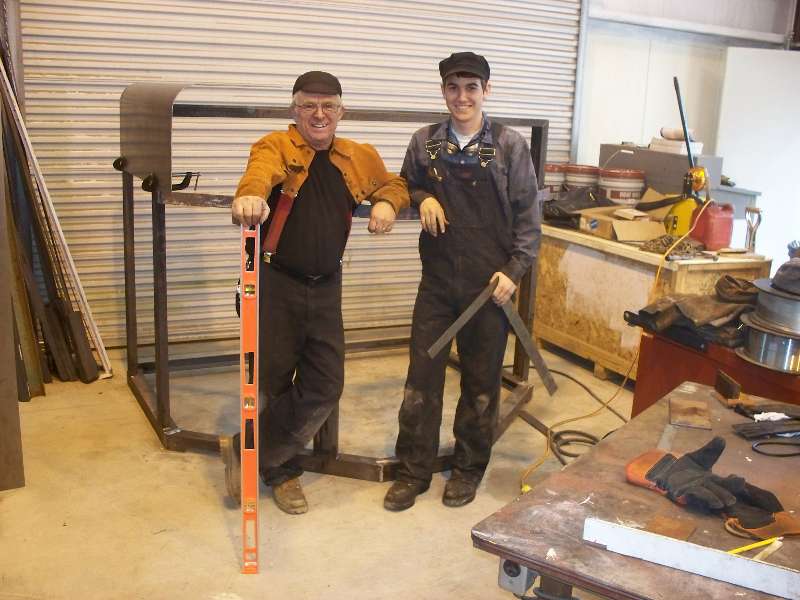
This photo illustrates a joint case of unadulterated glee on the part of yours truly and my helper for a day, Charles Franz. Charles is in college studying mechanical engineering so his time is valuable and it is a treat to have his help. We were obviously happy about completing another section of the nose skeleton. Charles was the driving force behind rescuing the 9010 from death in the scrap yard.
-- Update March 12, 2009 -- And here are more detail photos of the skeleton construction.
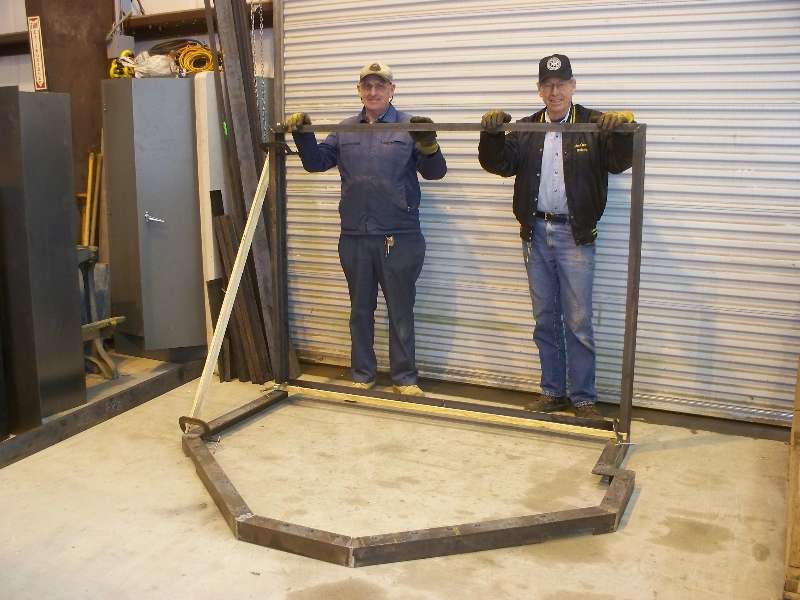
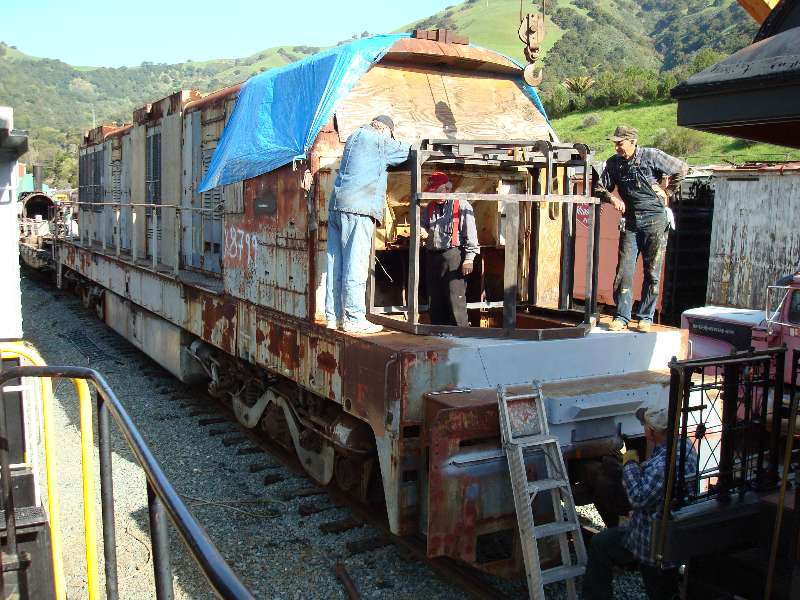
-- Update March 25, 2009 -- And then, it came time for a test fit onto the locomotive. Fortunately, it went reasonably well. The last photo is the K-M crew. Left to right they are, Jon, Rich, Al, and yours truly. Thanks go to Jeff Coker and Gerry Feeney for being there to take photos.
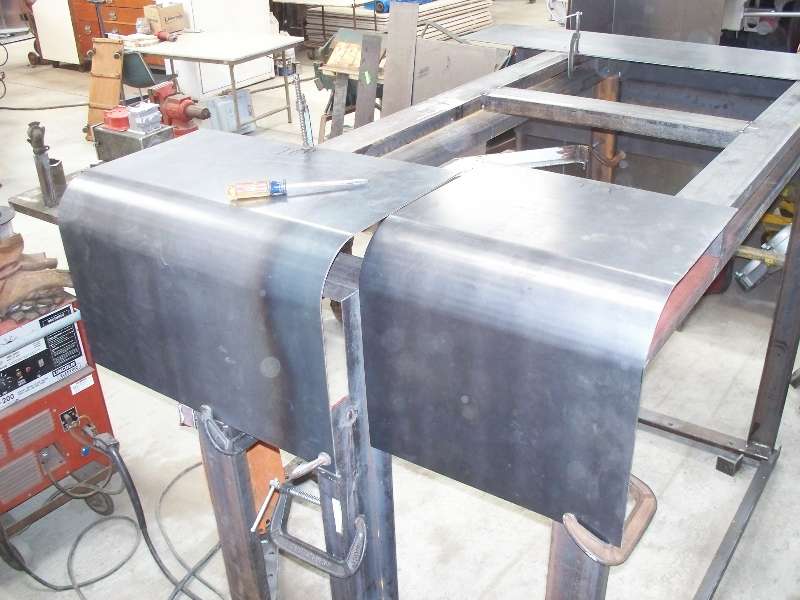
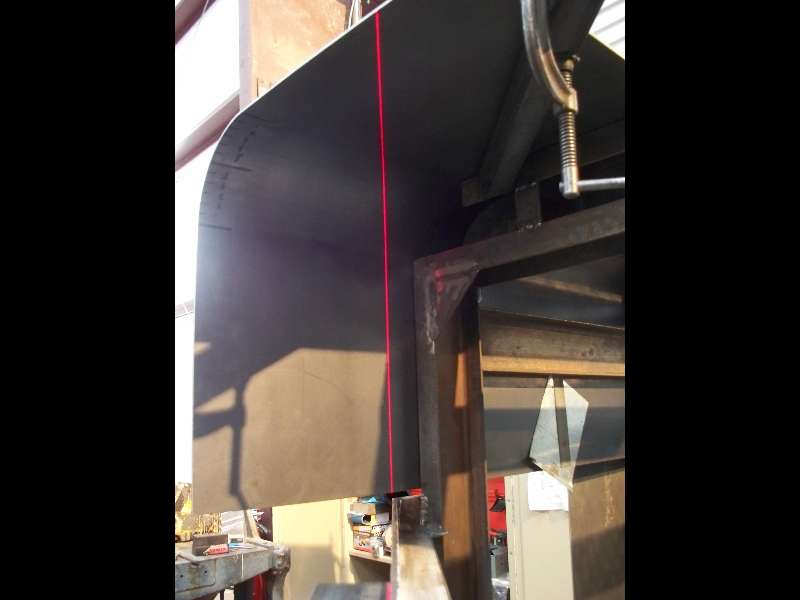
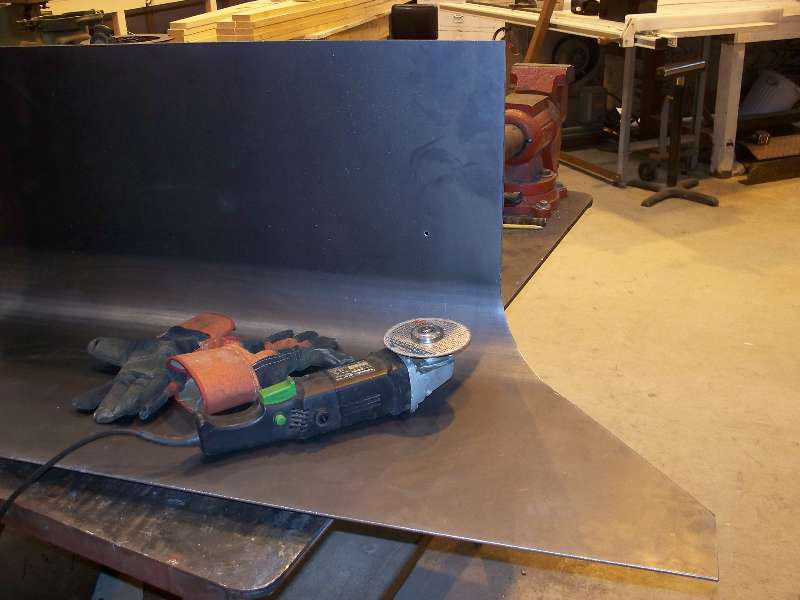
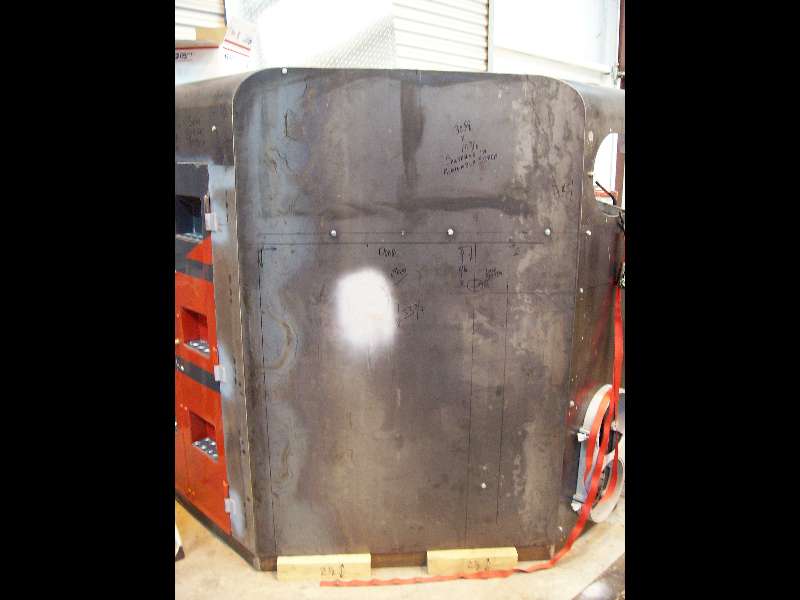
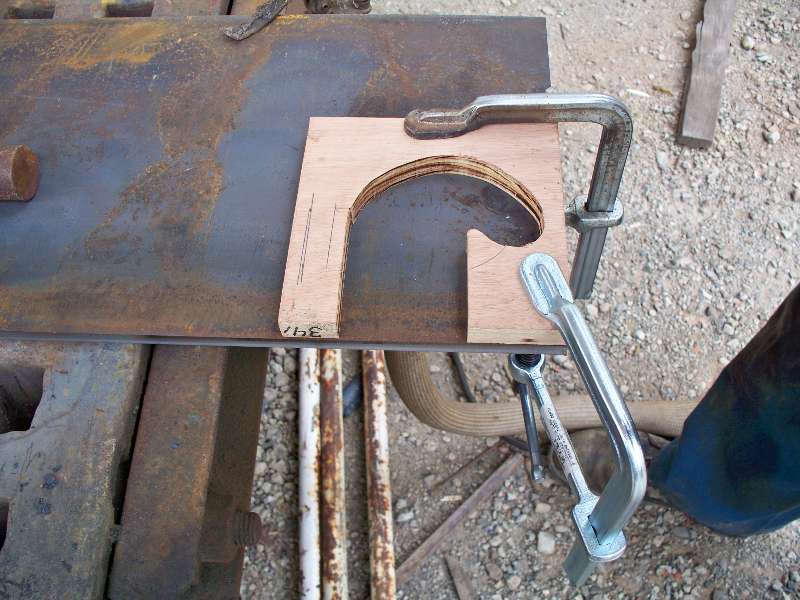
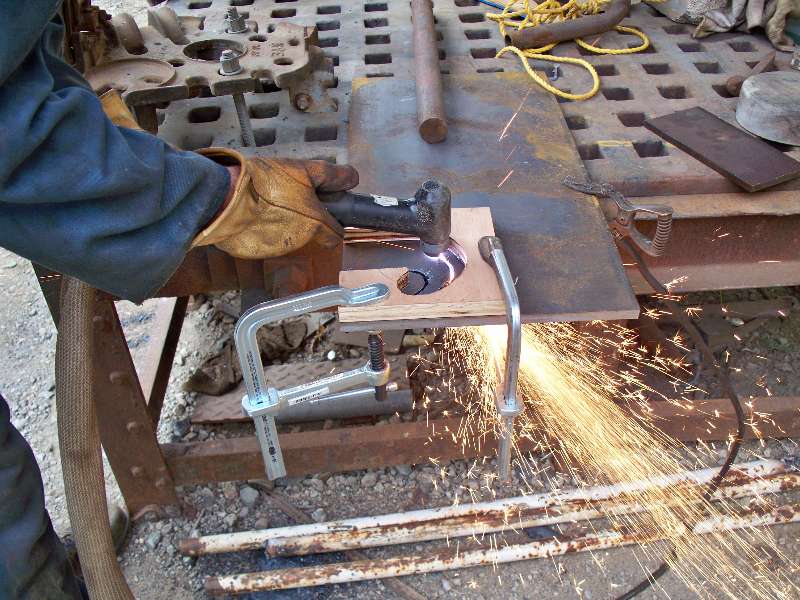
-- Update April 04, 2009 -- Once back in the shop, the next order of business became the sheet metal. The nose has angular cuts across the edge and and front pieces which butt against the flat front sections where the number boards reside. Marking the metal for these cuts has been a matter to ponder for some time until I happened to spot a small laser which is capable of drawing a straight line between two points. I picked one up for the princely sum of $3.99 and with some creative positioning, found that it drew a beautiful line, exactly where it needed to be. The red laser line was over drawn with a black felt tip pen and the metal was removed from the skeleton to be cut to size with a cutoff wheel. The last two photos show the center section before and after cutting. Rich was overcome with the desire to keep things clean and I was very glad that there was no furniture wax within his reach. Thank goodness one of us likes to be neat.
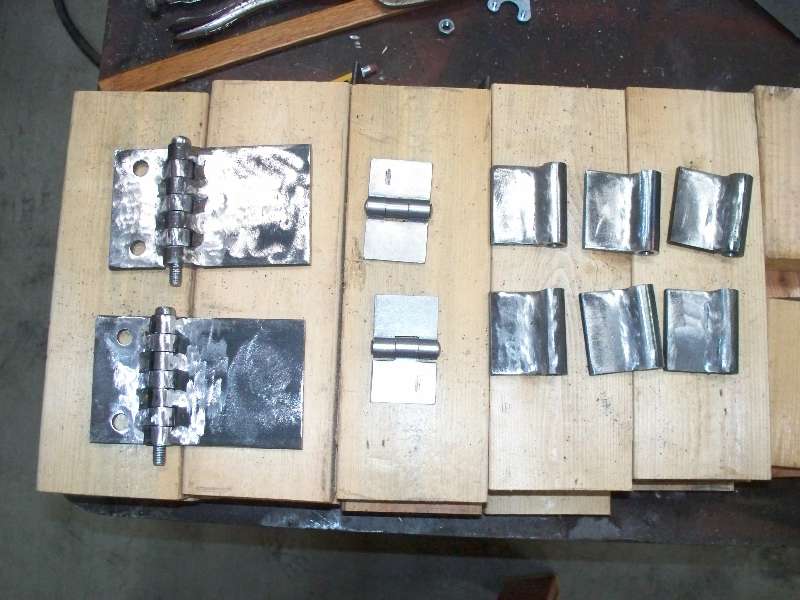
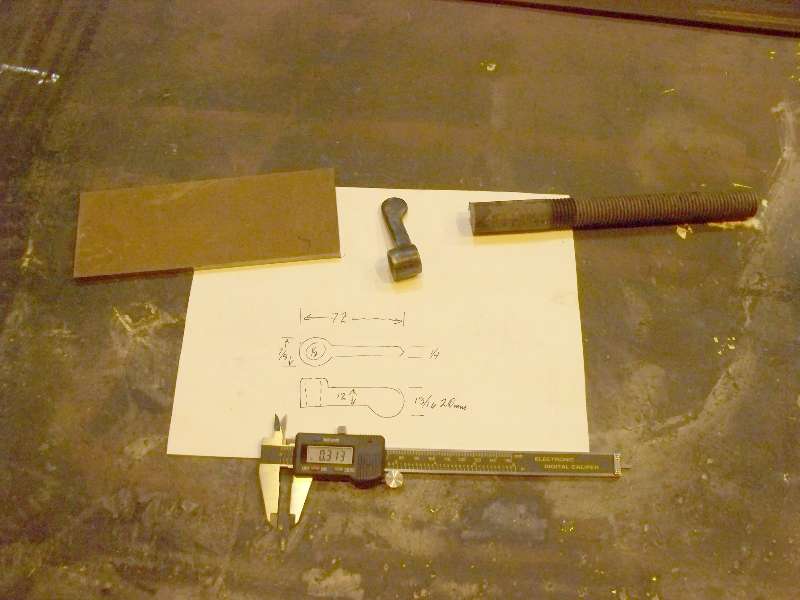
It is no surprise that almost no missing parts of the 9010 are commercially available, especially in the U.S. It is therefore necessary to build everything from scratch. These hinges are a good example of that. The large pair on the left are for the front cab door. They have to be on before the nose is installed because of the way they are mounted to the cab. The small pair are for the small hatch in the side of the nose on the fireman's side and were cut down from an available hardware store set. The 6 items on the right are the lower parts of the hinges used on all of the hood doors on the 9010 and these will be used for the "step doors" on the engineers side. All in all, twenty eight pair of these hinges need to be fabricated. Oh joy!
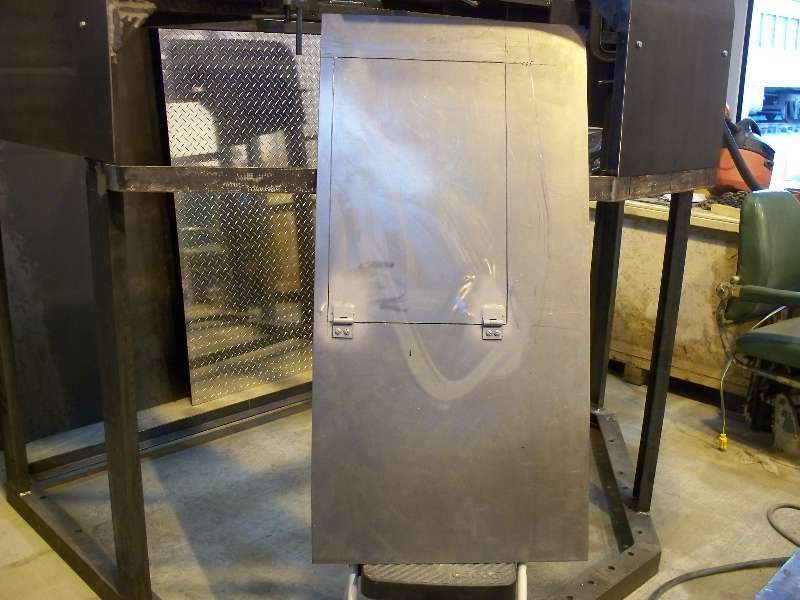
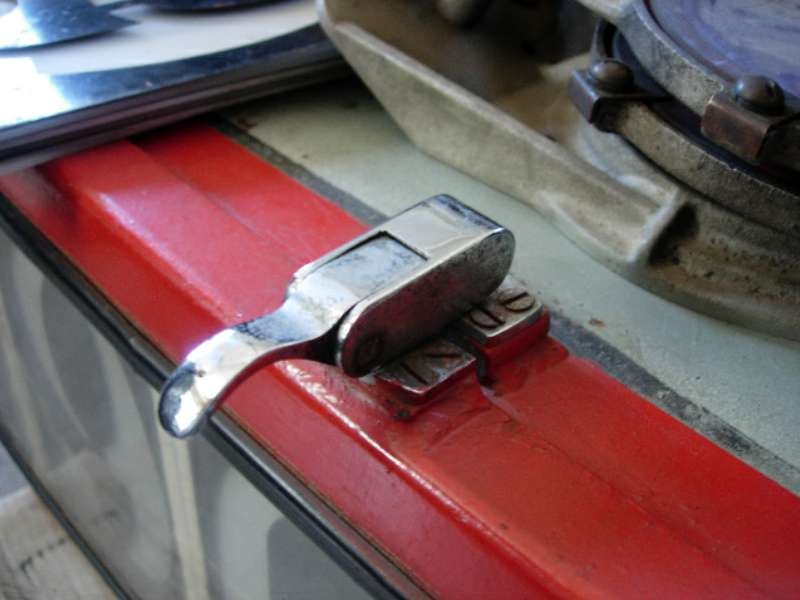
-- Update April 11, 2009 -- There is a hatch on the right side of the nose which gives access to the some of the control for the front transmission. While we do not have a front transmission, the hatch is still required for cosmetic purposes. First, the hatch was laid out on a piece of steel which had been previously cut to size. Then, cuts were made along the bottom edge off the hatch and part way up the sides. At this time, the hinges were installed and then the cuts completed around the hatch. Installing the hinges in this manner increases the chances of a decent fit. The hatch is held closed by two small levers which were fortunately the same as those keeping the air intake filter housing doors closed. These were duplicated and will be installed later.
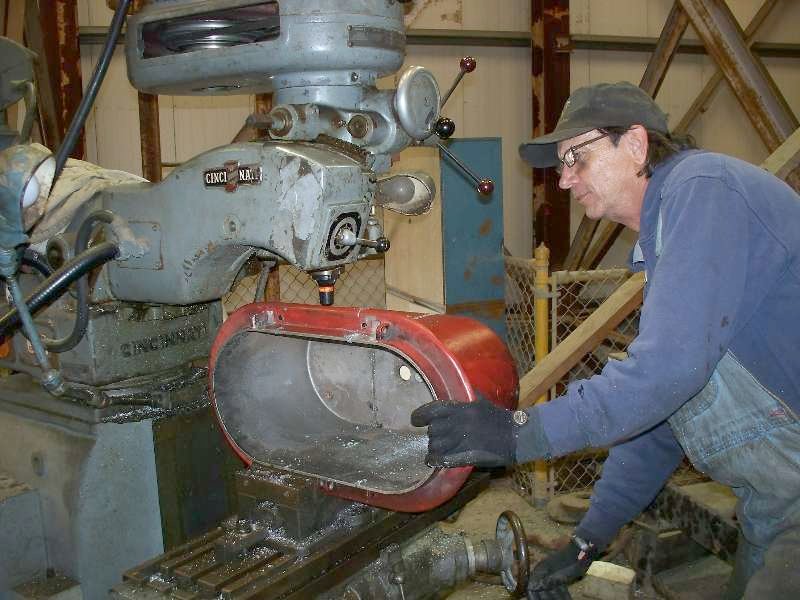
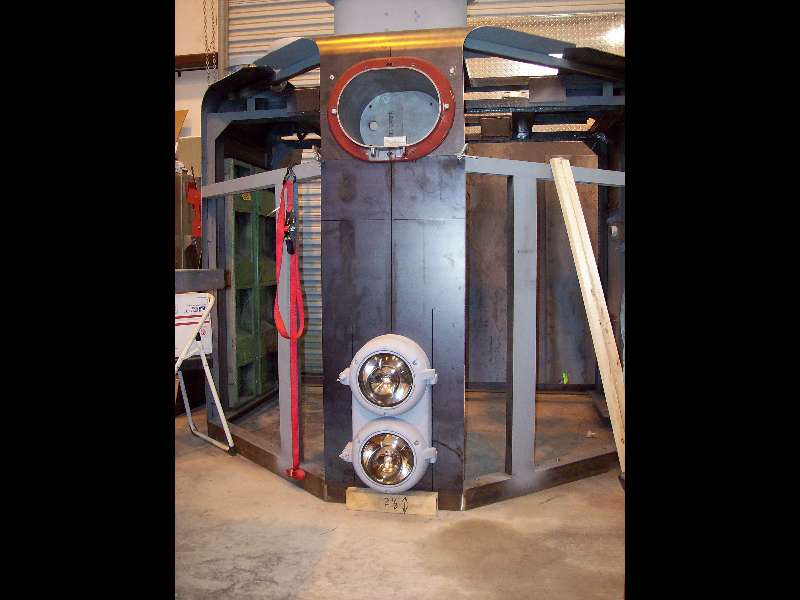
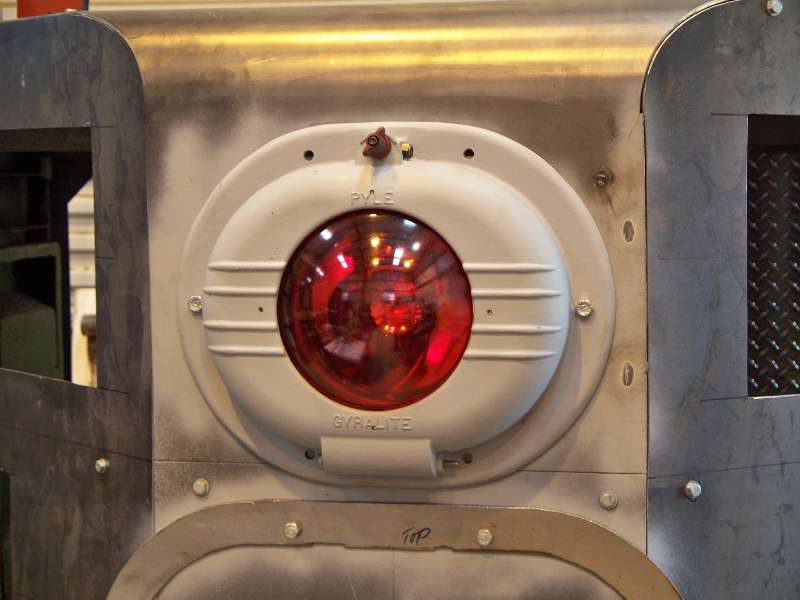
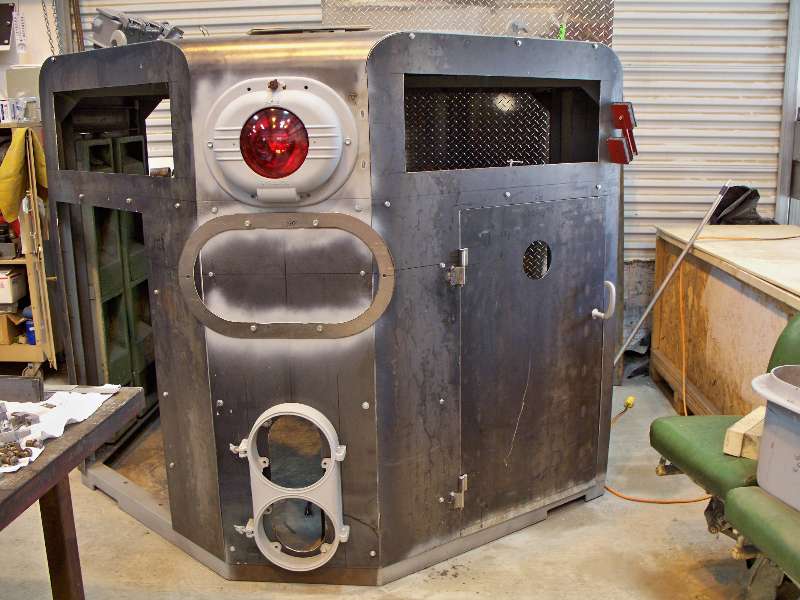
Our machinist Jeff Coker is busy modifying a dual white gyrolight casing into one for the single red light. The Krauss-Maffei uses a flush mount red light which is very unusual and was apparently not used on any other SP locomotive. Lacking the proper casing, it was determined that a dual white could be cut down to what we need.
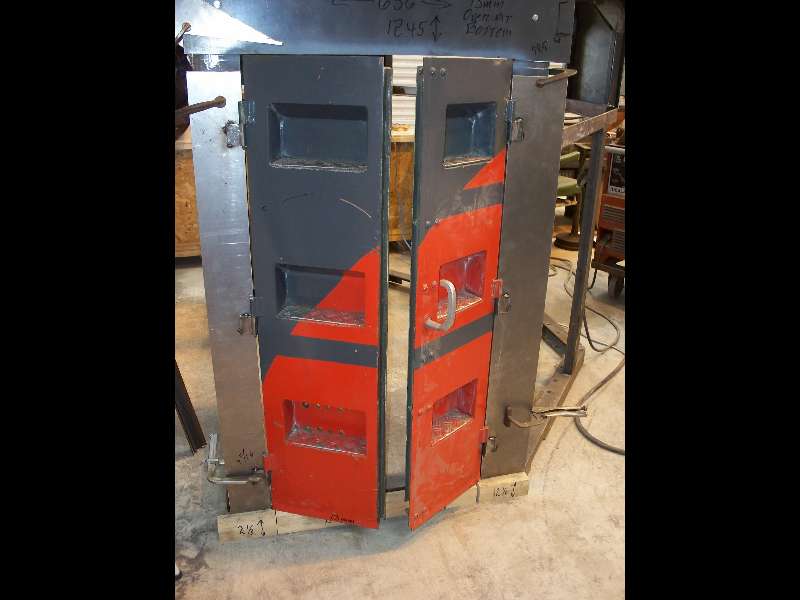
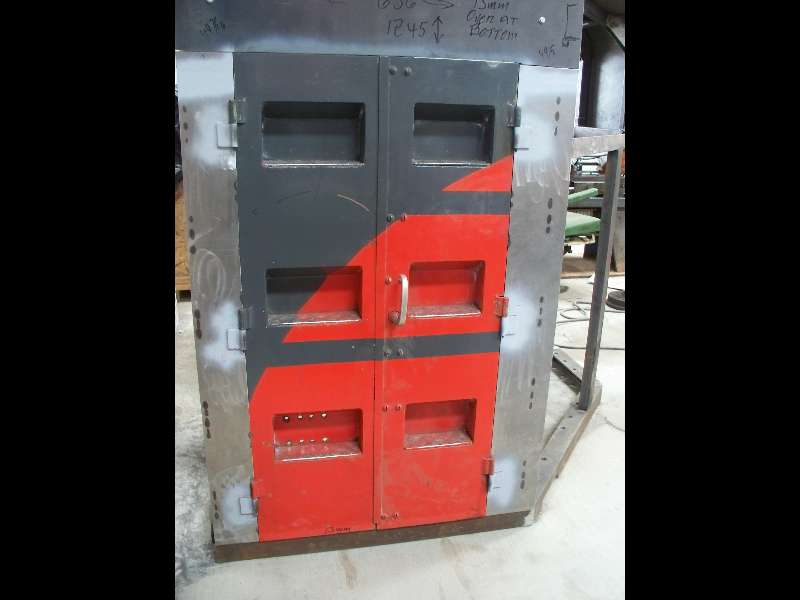
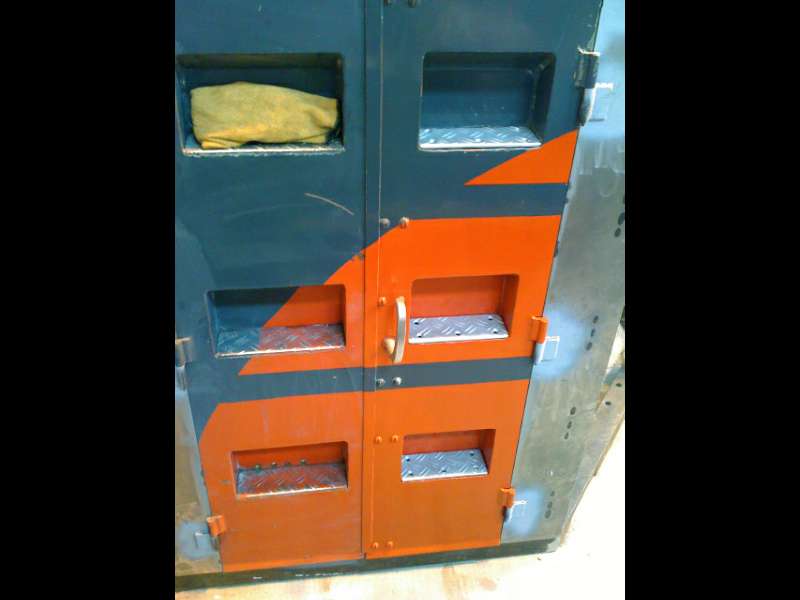
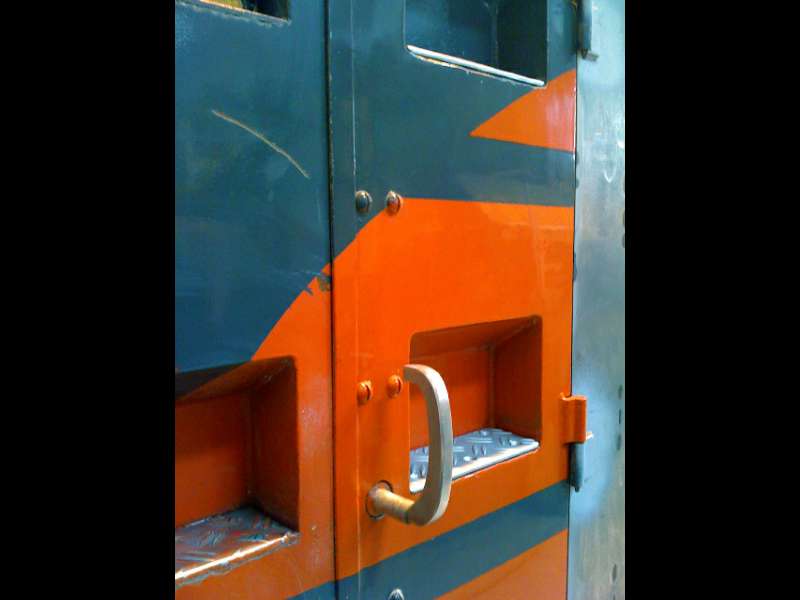
And, of course, the big news is the acquisition of K-M parts that Bob Zenk saved from the scrapper back in his youth. The nose doors he bought that rainy day in Sacramento are being installed in our new construction. Today saw the fabrication of the door frames and attachment thereto of the bottom hinges. For a short story about the parts, see pieces.
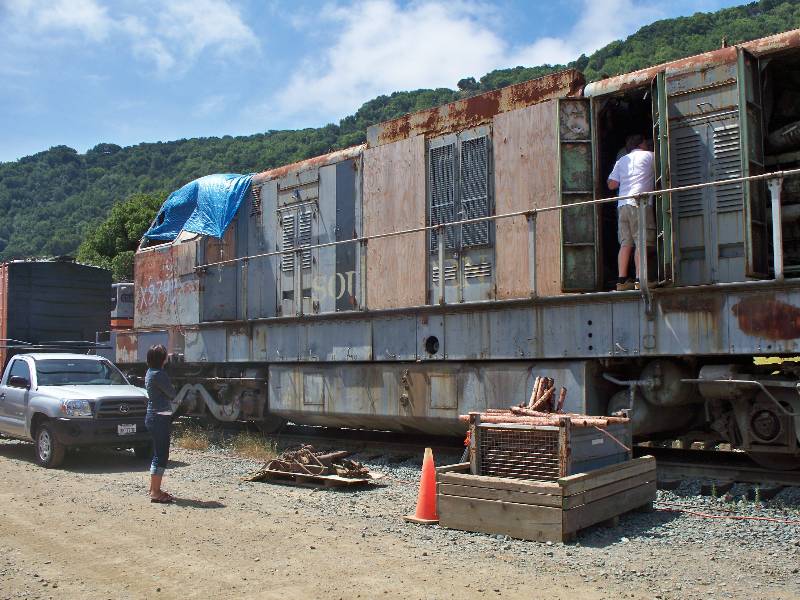
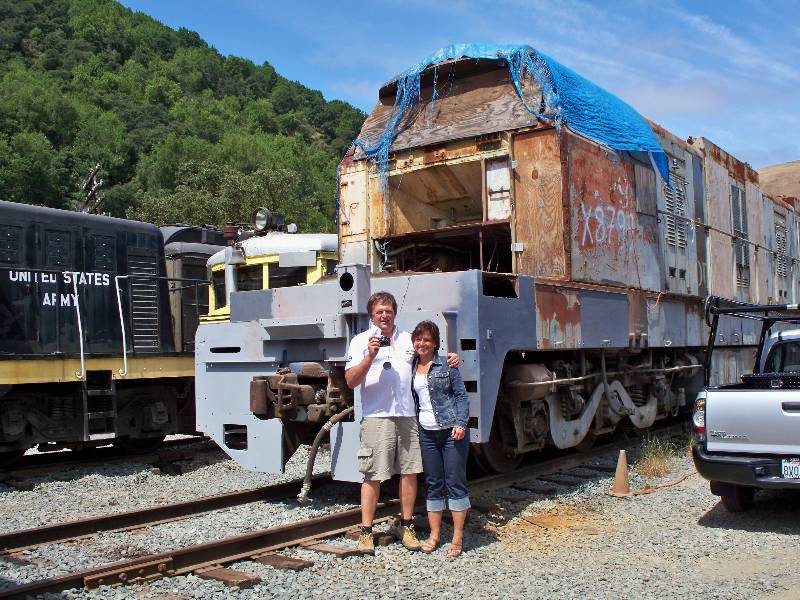
-- Update April 24, 2009 -- From guest columnist and hard worker Bob Zenk, we have the following update contribution: Thanks, Howard... and here's today top story in K-M! (Hey, who could pass up a 'news team' toss like that?) After working with Howard on the 9010 project from my desktop in Seattle for six months, I had the pleasure of spending three days in the Canyon last week, getting to know SP 9010 again after not having seen the beast for about fifteen years. The progress to date is really amazing, and there's quite a buzz around it, both at the PLA and with fans. The big draw for me, of course, was that I got to see how the doors my Dad and I saved from 9004/9107 have been joined to the new schnoz. I spent a few hours buffing the old SP paint and cleaning up the aluminum step plates.
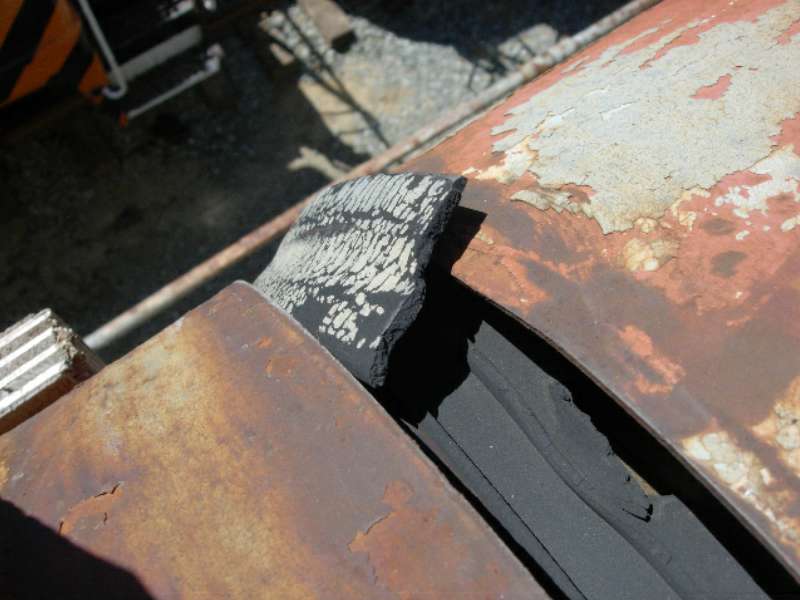
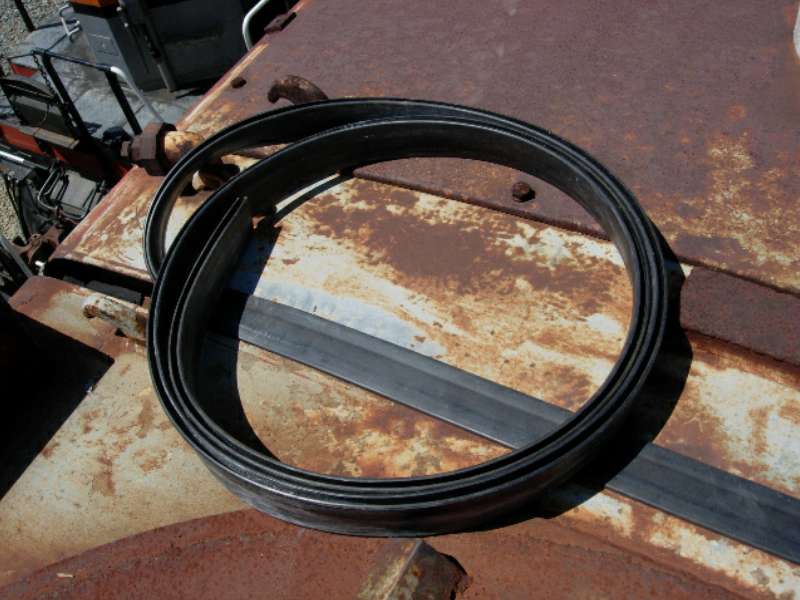
They've been indoors for 40 years, so the paint that SP put on during the 'R7' rebuild in 1966 is still remarkably un-faded. It's possible we'll elect to preserve this one bit of semi-originality, since everything else on 9010 is too far gone to keep as it is. We'll see how they look from 50 feet when the rest of the locomotive is freshly painted. I was also able to pick up the reproduction rubber hood seals from a supplier in Oregon on my way down. These custom H-section gaskets go between every segment of the hood structure, and have deteriorated to the point of being either rock hard or missing entirely. The new ones are made of long-lasting neoprene to the original design. They'll get fitted first between the new nose and the cab, then to the rest of the hood sections after painting. It's one of those unique K-M details that we can point to when the locomotive is done. And they're a good example of the quality of the restoration efforts.
Howard was ready to cut the holes in the nose for lights. By researching the photos contributed by various interested people here and in Germany, we were able to figure out the exact style of Pyle-National signal and headlight that K-M used on 9010. It seems that all P-N headlights of the same basic type were not created identical through the years! Who knew? Well, now we do. We haven't got everything yet, but we're still looking and are pretty sure we can find the exact combination of little lettering cast into the doors that K-M applied new.
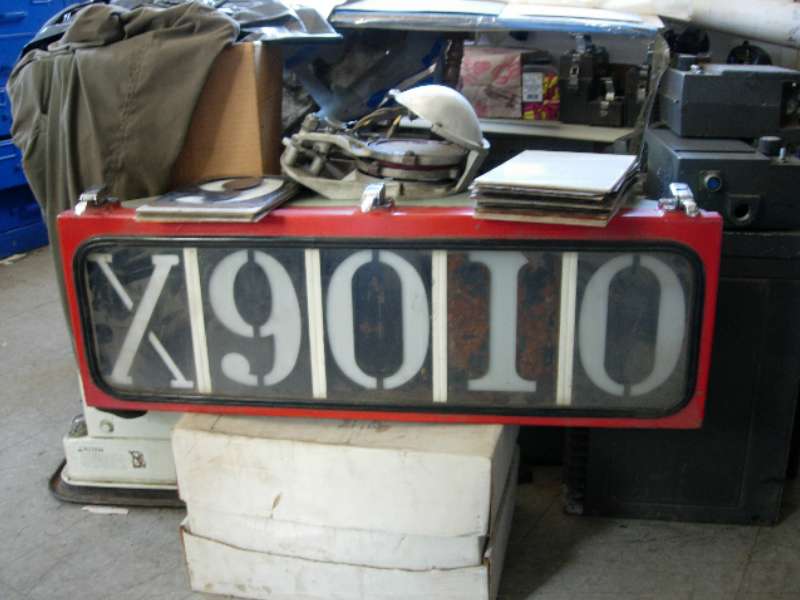
And finally, the numberboard I pulled off the engineer's side of 9107 was finally 'corrected' for SP 9010! Those little chrome over-center latches are probably from the OEM stock of some German convertible top manufacturer, but we've yet to identify the source. They'll be reproduced or replaced when Howard builds the matching numberboard for the fireman's side. Needless to say, he suggested that I go back in time and get the other one!
Thanks to Howard and my friends at the PLA for a great week! As that Austrian governor guy said once in a movie... "I'll be back!" After Bob had to return to his real life, I decided to prepare the red light mounting hole. I also did some measurements for the locations of the dual white light and the headlight housing but could not go any further because the piece of metal we got was severely warped. Once a replacement is received, work will proceed on that front.
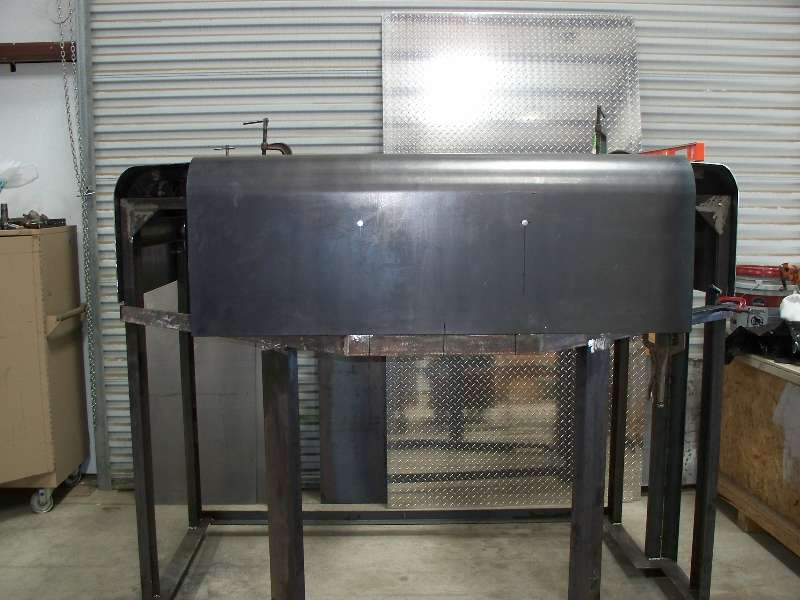
-- Update May 14, 2009 -- When I returned from a 2 week vacation, I found that the new front end metal had been delivered so it was made to fit and temporarily bolted to the frame. The dual beam headlight fixture was then attached. The dual white gyrolight will have to wait until later as its mounting is quite complicated. Then we set to work on the large front sheet on the engineer's side. It required a great deal of fitting, cutting and grinding to make it fit properly within the opening. It, like the center piece, is temporarily bolted in place as there is a lot of welding to do that will be much easier without the plate in the way. Efforts will now turn to the same plate on the other side.
While trimming the other front piece, I experienced and interesting and annoying phenomenon. The large piece of metal has a slight curvature which can be seen in the second photo. When I started cutting off the excess metal, that small piece began to curve severely upwards (first photo), forming an arc opposite the curve in the main piece. As seen in the second photo, the piece had a terrible curve when finally cut all the way off but the main piece did not seem to be effected. Finally, I offer an overhead view of the nose with both front pieces temporarily bolted in place. The only piece of metal missing now is the top.
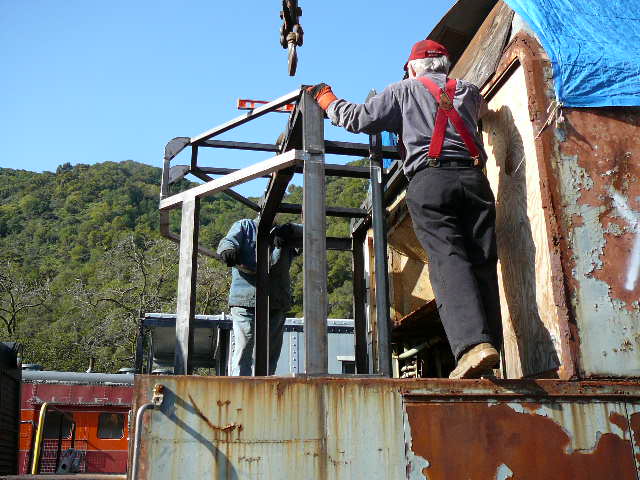
-- Update May 21, 2009 -- We need 4 lifting hooks for the top of the nose and of course, the local hardware store did not have them. So, once again, it was time to make parts. A pattern was cut out of plywood and was used to guide our plasma cutter. With Rich at the controls, 6 blanks (2 spares) were cut out of the half inch steel plate. Once they were ground to their final shape, holes were cut in the top sheets and the hooks were welded to the nose skeleton.
-- Update June 04, 2009 -- Meanwhile, back at the sheet metal, the holes were cut for the number boxes and the front nose doors. The door faces were sent out to have the class light holes cut and have the bottom 1" formed up, the same as on the side doors. This lip provides a sort of water deflector. Our machinist Jeff Coker finished all the milling work on the red Pyle oscillating light and we assembled it into its case today. In addition to the usual still photo of Jeff's masterpiece, there is a short video you can see by clicking HERE.
On Sunday, May 31, 2009, I had the great pleasure of meeting one of our Krauss-Maffei Crew, Franz Wunschik. He and his lovely wife were visiting the U.S. and were able to come visit the 9010. It was a most interesting several hours and I greatly enjoyed discussing our locomotive (and much of our other Southern Pacific equipment) with them. I hope that as time goes on, more of our friends from Europe can drop by for a chat.
-- Update June 18, 2009 -- When the 2 metal panels for the front nose doors returned from the fabricating shop, the efforts turned to building internal frames for the doors and attaching them to the front panels. Once the doors were made rigid by the frames, they were blocked in position and the hinges were welded to the front skin. The doors will not be functional for a number of reasons, not the least of which is that now, they serve no purpose other than cosmetic. Work will continue on this area for some time as there is a lot of work to do to get the panels properly aligned and the doors to fit correctly. Note the class light assembly mounted to the door. This light is one of the items saved from the scrappers in 1969 by Bob Zenk.
|


