Southern Pacific
9010
Other Body Work
Page 1
--
Update June 18, 2009 --
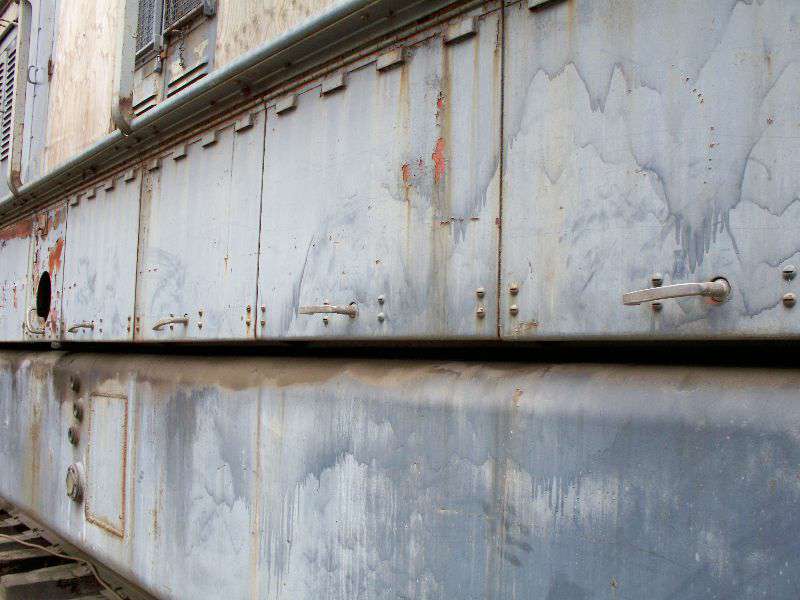
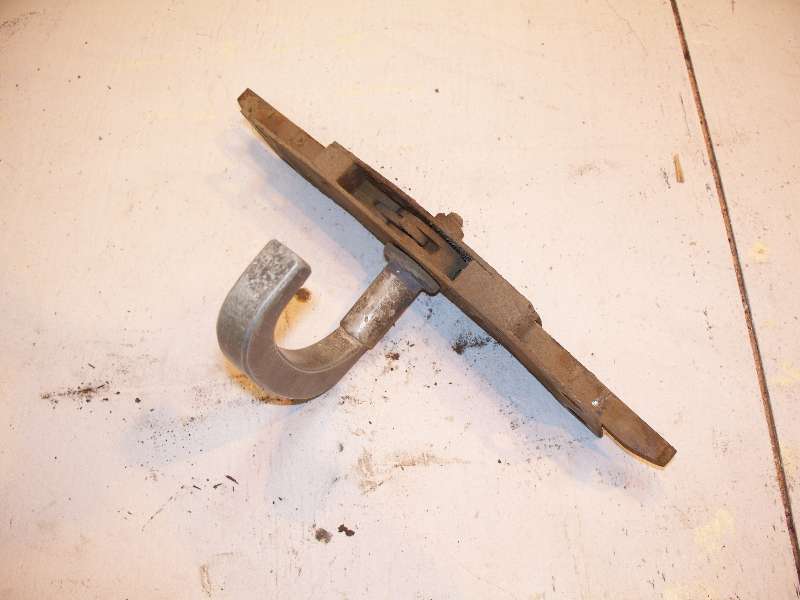
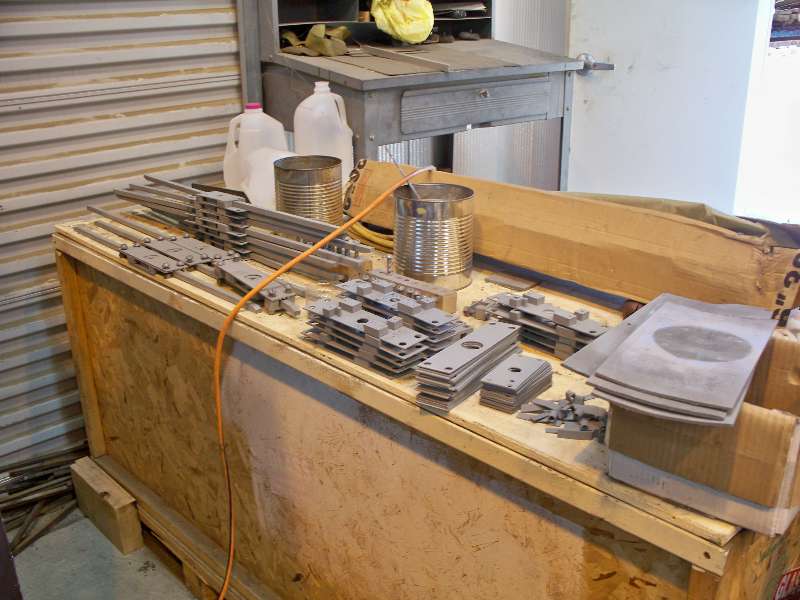
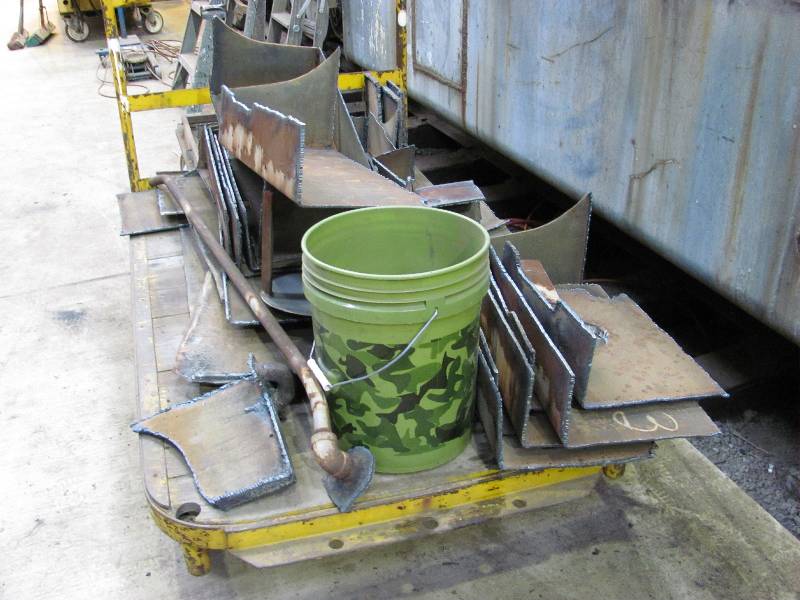
All of the frame doors
on the 9010 have the same basic latch which consists of two movable
rods and
a central mechanism which is operated by an aluminum handle.
A
number of the handles are missing or broken off and will have to be
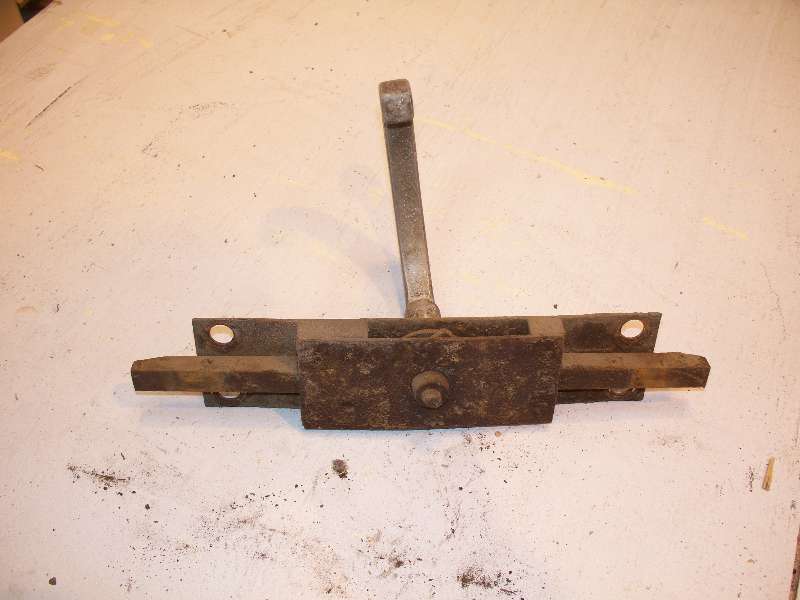
replaced somehow. Most of the latches are totally rusted and
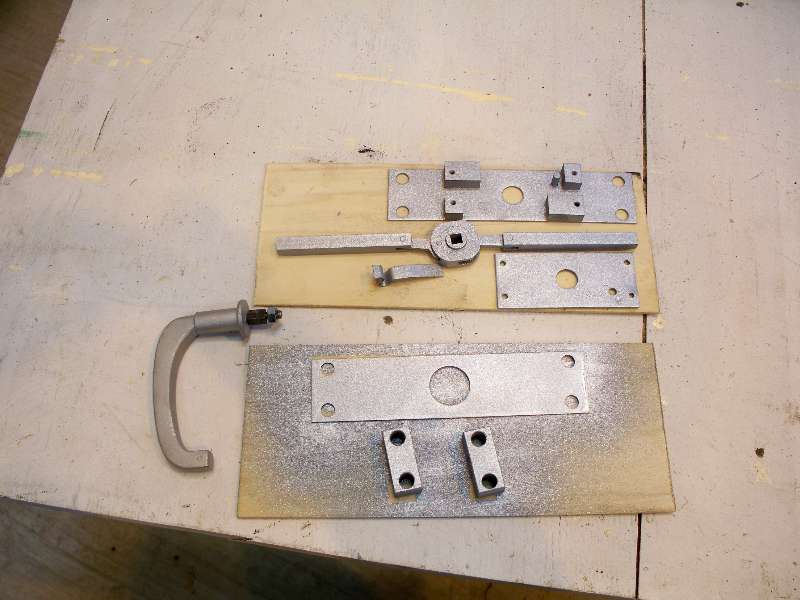
immovable. It was necessary to remove all of them,
disassemble
and then bead blast them. We then coated the parts with a
cold
galvanizing compound and reassembled them. Two of the handles
were removed from the fireman's side and will be used on the new front
doors on the nose. Hopefully, replacement handles will be
either
found or made at some point.
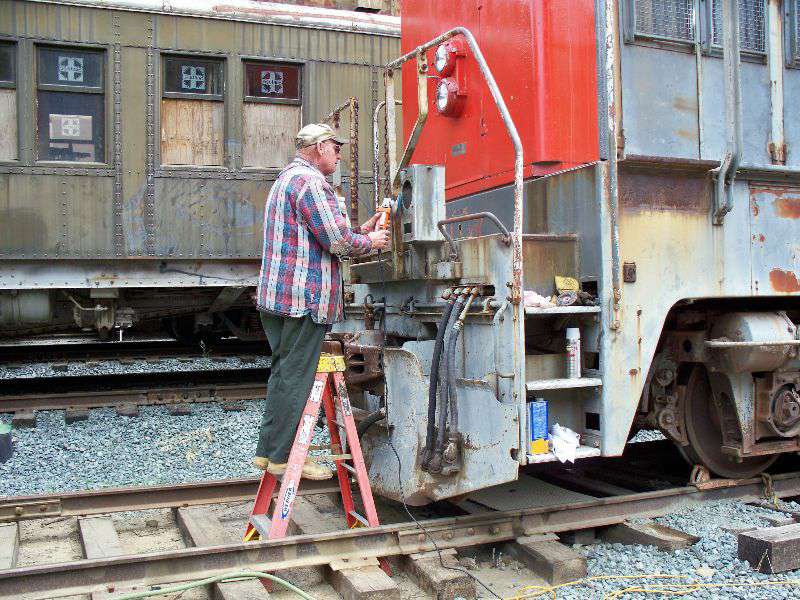
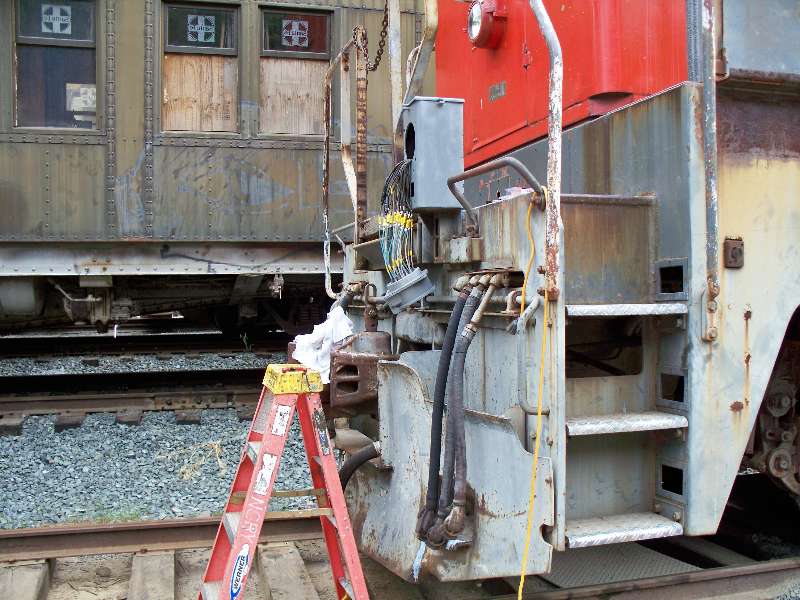
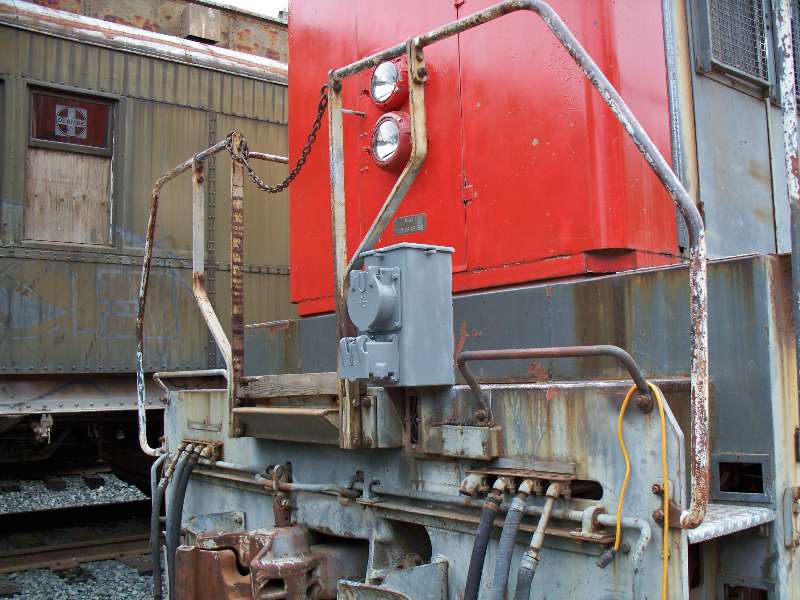
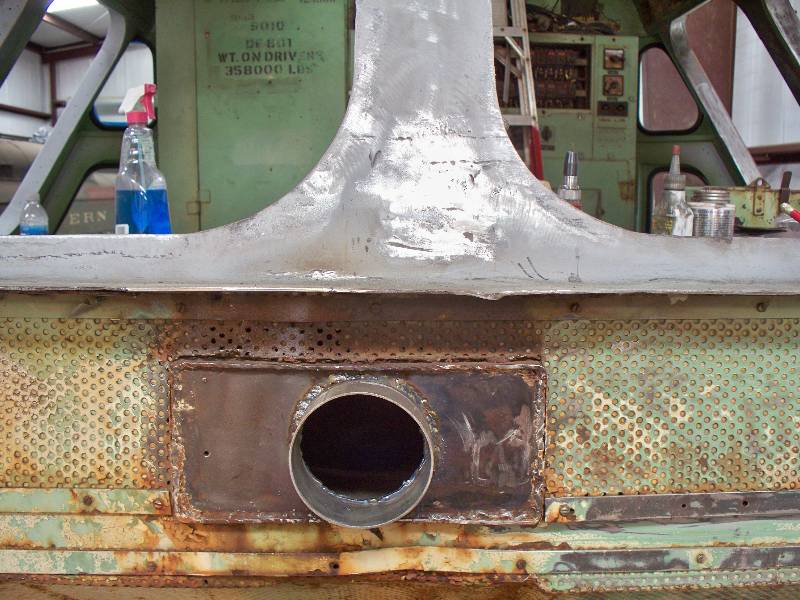
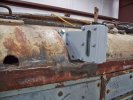
On
another front (or rear), Al has been busy cleaning up the rear MU box
so we can replace the MU and field loop connectors that were destroyed
some years ago. Fortunately, the MU wiring was intact and
were
able to splice the existing
wiring onto the replacement
connector.
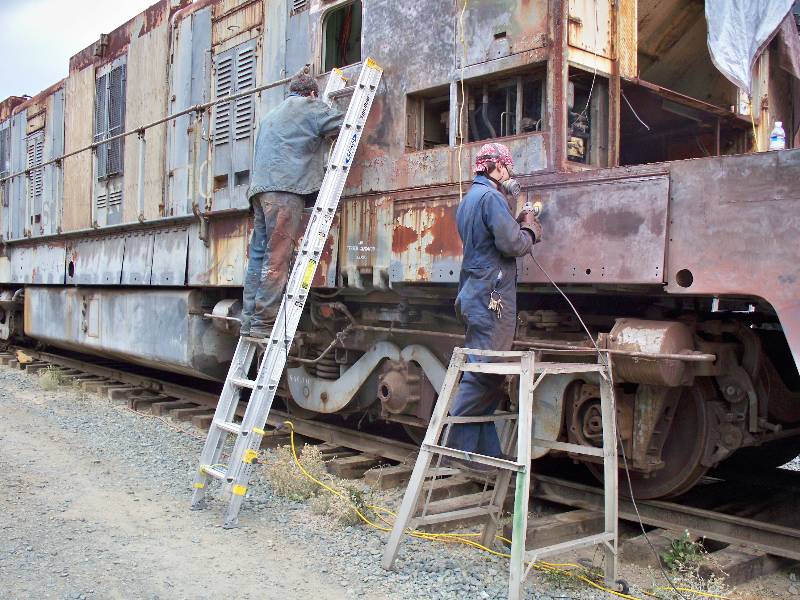
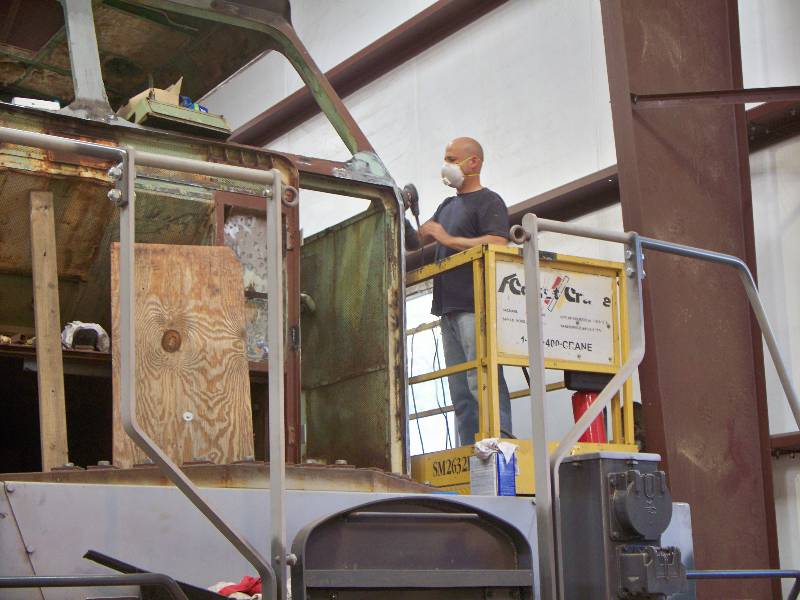
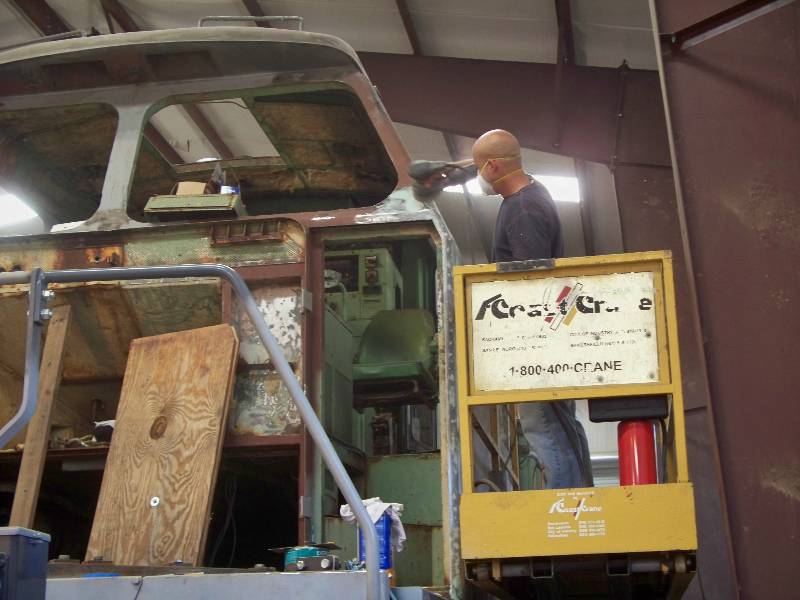
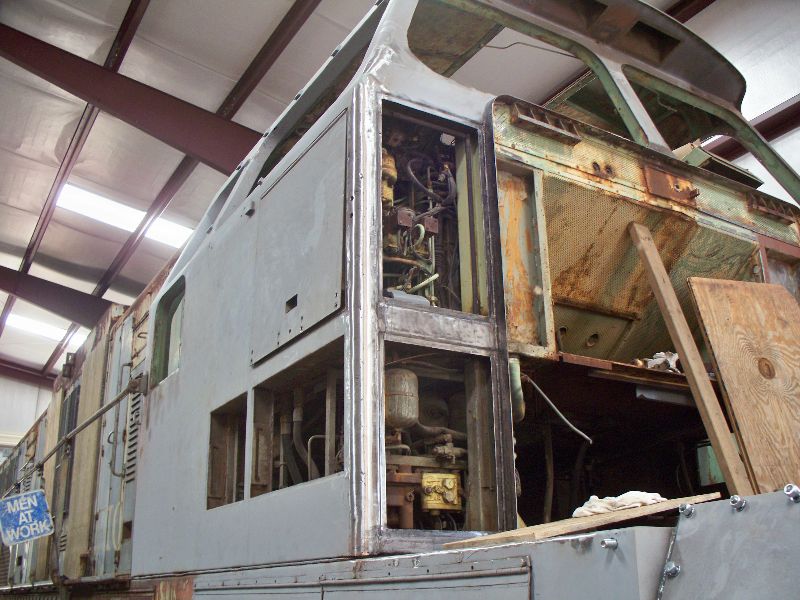
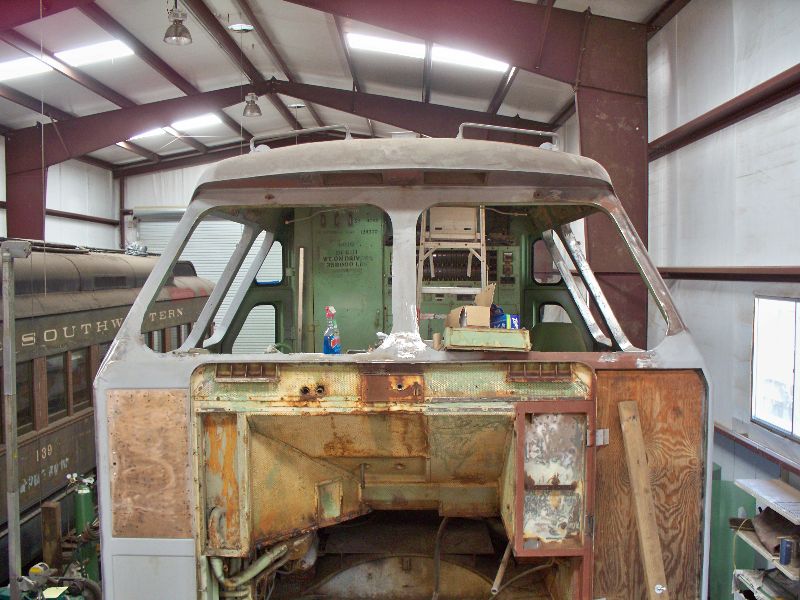
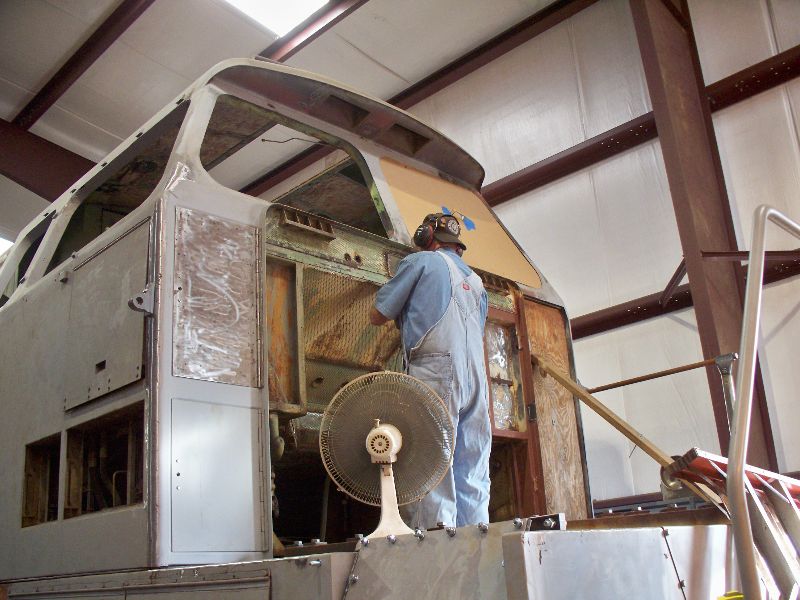
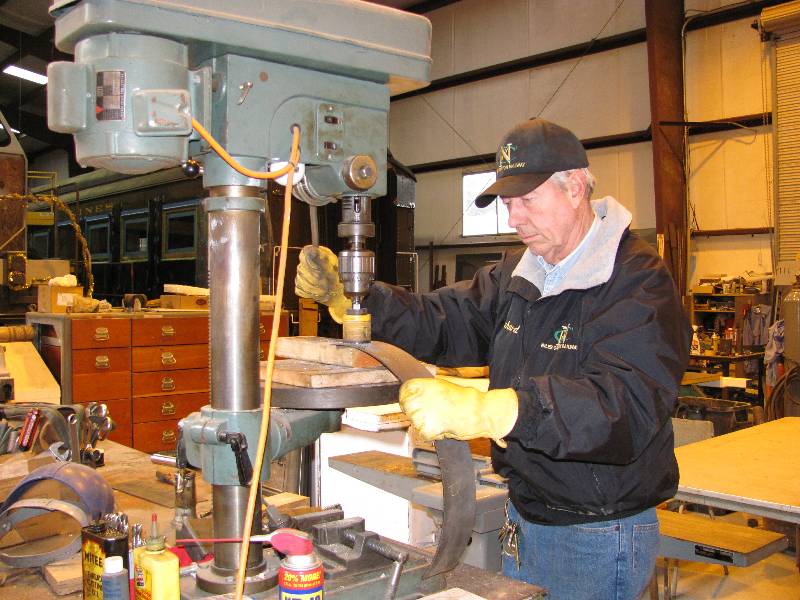
Dennis
and Charles were caught working on removing years of paint and rust on
the engineer's side of the cab and the front part of the frame.
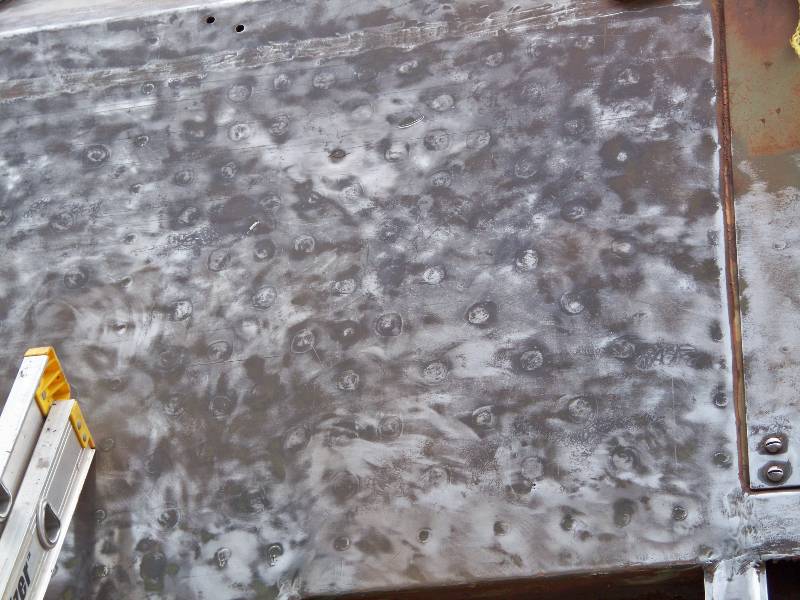
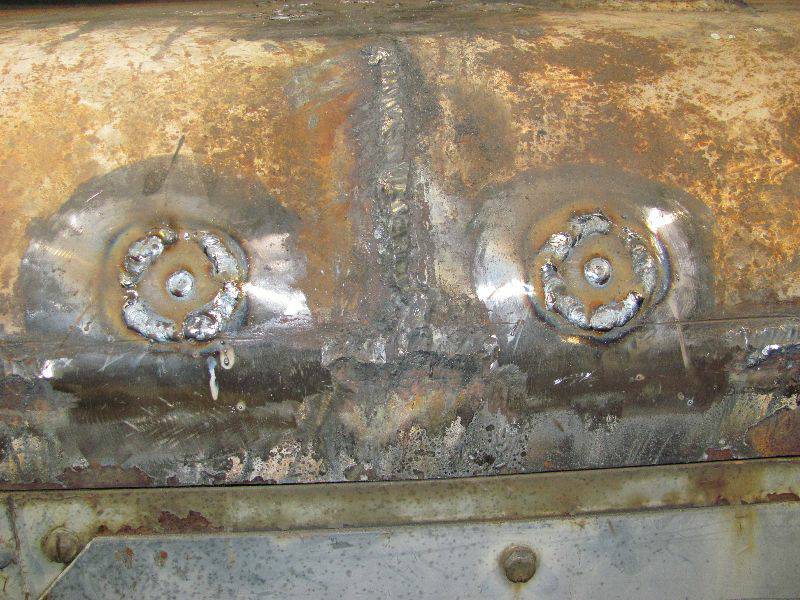
Dennis exposed a very odd looking surface on the cab side.
It looks like spot welds but the marks are irregularly spaced and quite
large. His cleaning also revealed some very rotten metal in
the
cab side. This will not be the only patching we will have to
do
on the cab exterior.
-- Update
February 1, 2010 --
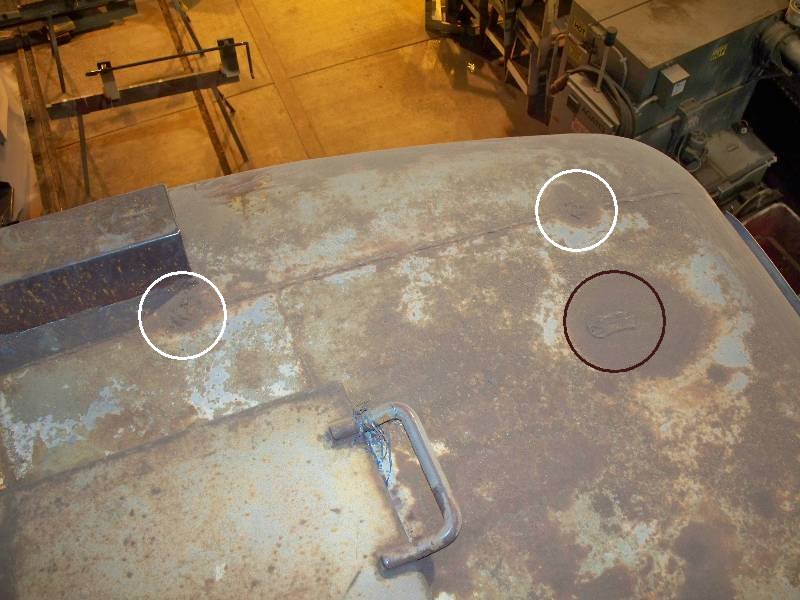
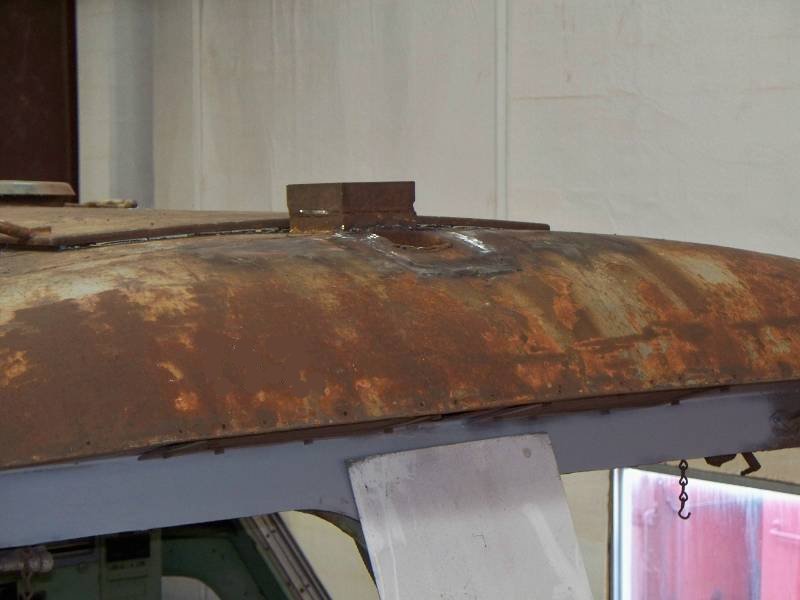
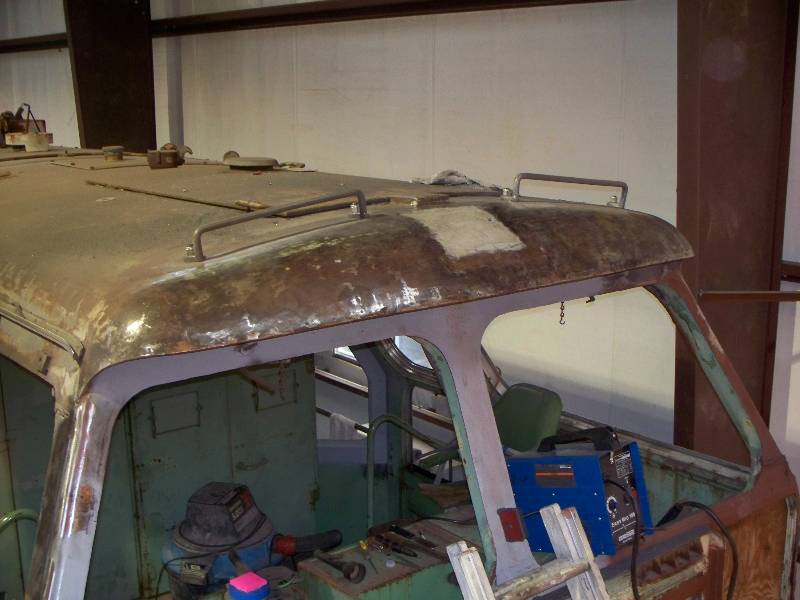
When
the Southern Pacific did the Camera Car conversion, they removed the 2
grab irons that were on the brow of the roof and the front 2 lifting
hooks that were nearby. I don't know why they removed the
hooks
but the inner grab iron ends were in the way of the microphone box they
installed. For some reason they also beat the roof
down in
the are of the box and since there is no way to straighten it, I plan
to cut it out and replace the section.
--
Update February 23, 2010 --
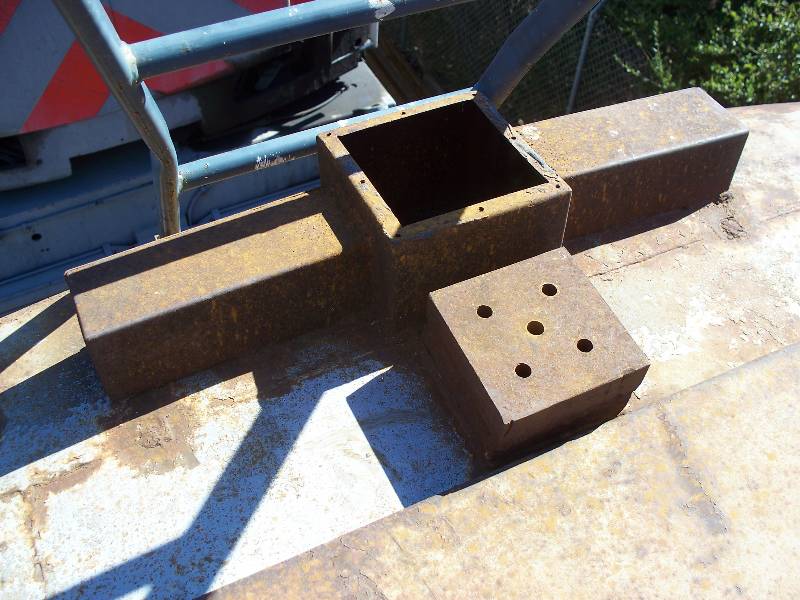
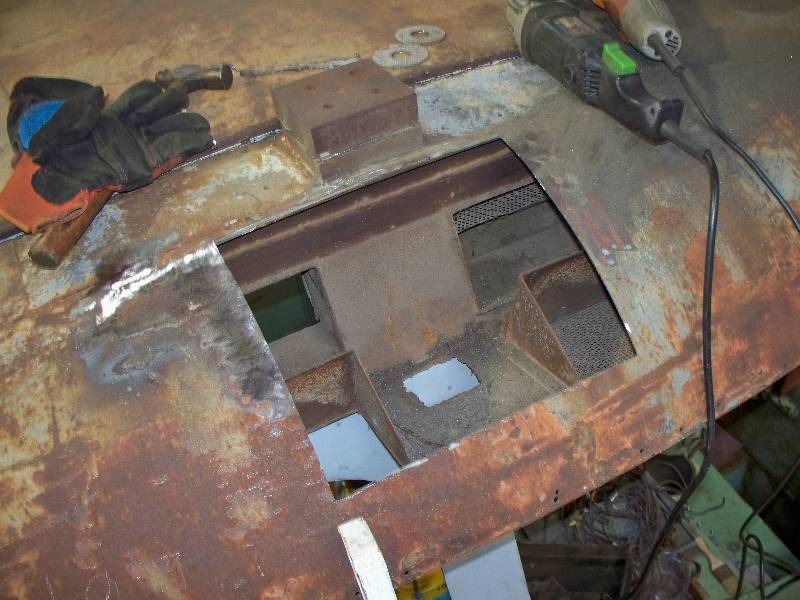
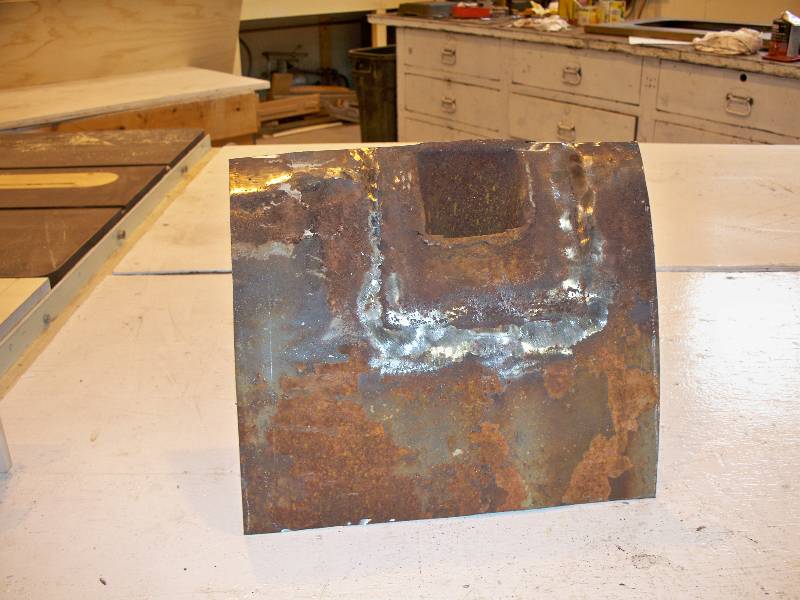
The
section was duly cut out,the base of the microphone box cut out and
a patch welded in. The 1 1/2" thick riser block
that was
used to raise the horn above the microphone box was removed.
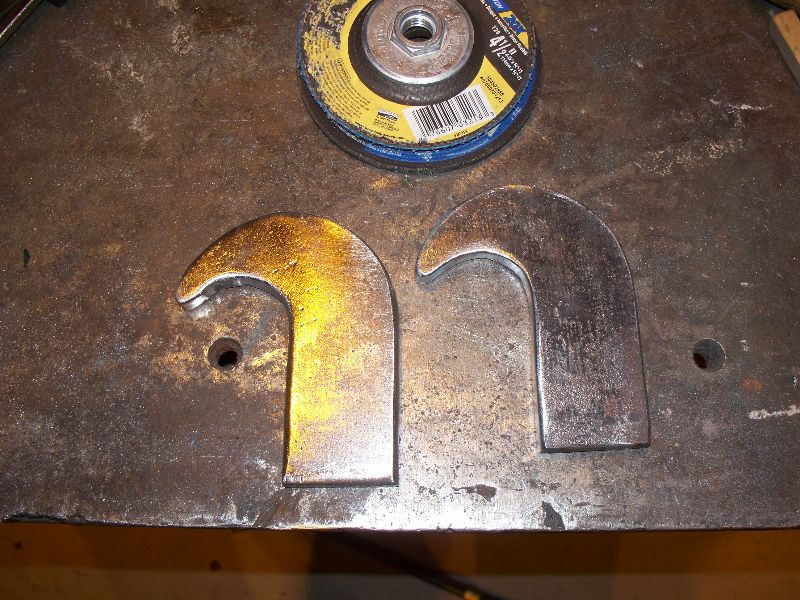
A
pair of newly forged grab irons were bolted to the roof and the section welded back in.
--
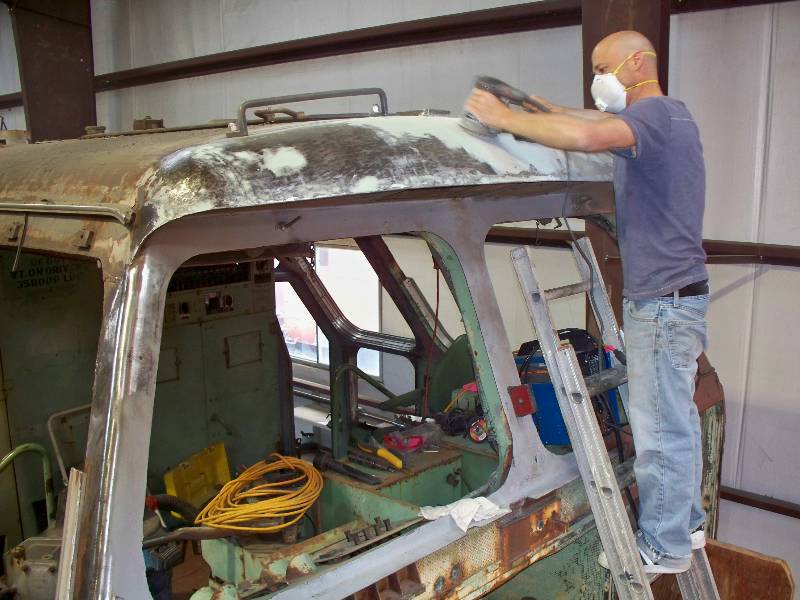
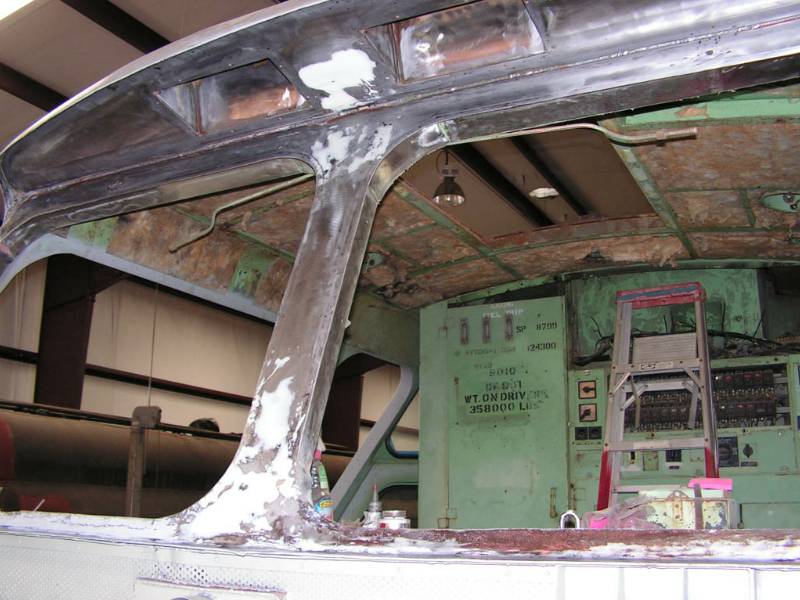
Update March 12, 2010 --
Dan Furtado took some time out from paint
stripping on the cab to finishing the body work on the "brow" over the
front windows.
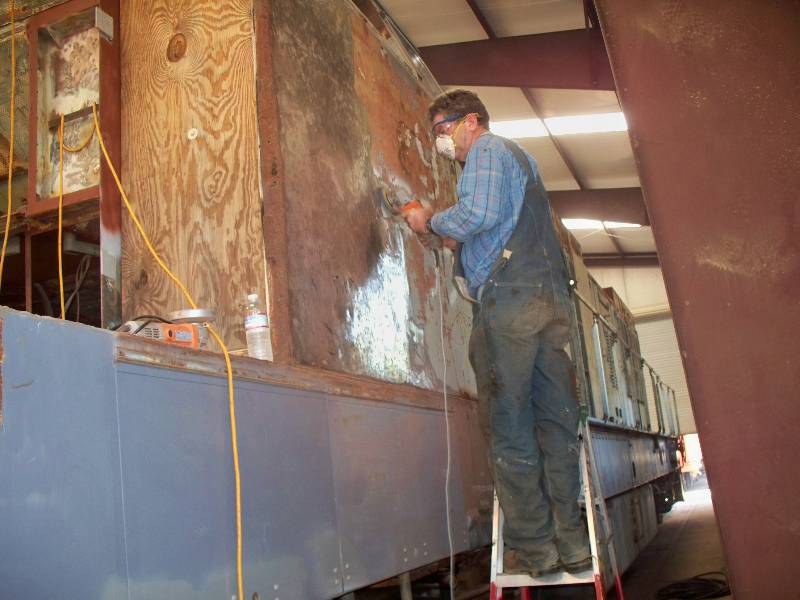
Dennis
Mann has spent a goodly number of volunteer hours grinding away the
layers of old paint, cutting through a flaky crust of old SP gray, red
oxide primer, and down through the very first Apple Green KM primer
layer to bare metal. Recently, he has been working his
muscles on
the cab sides.
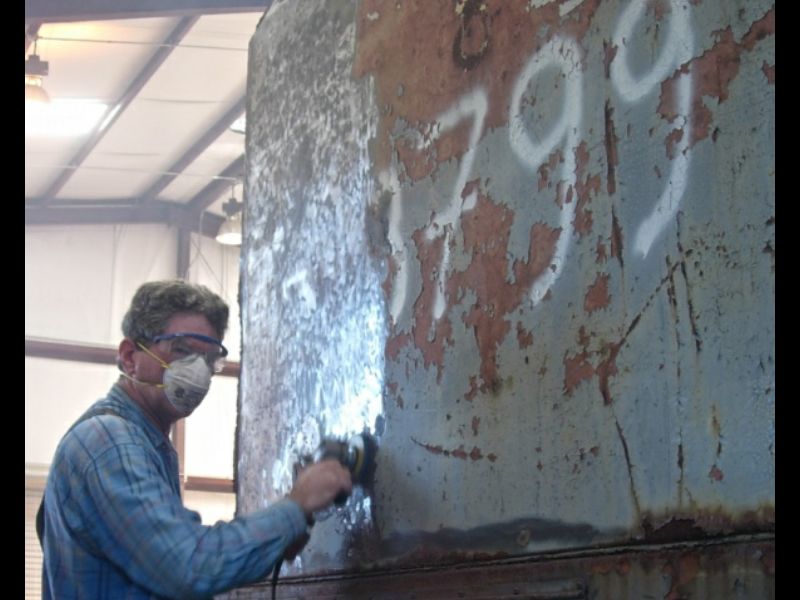
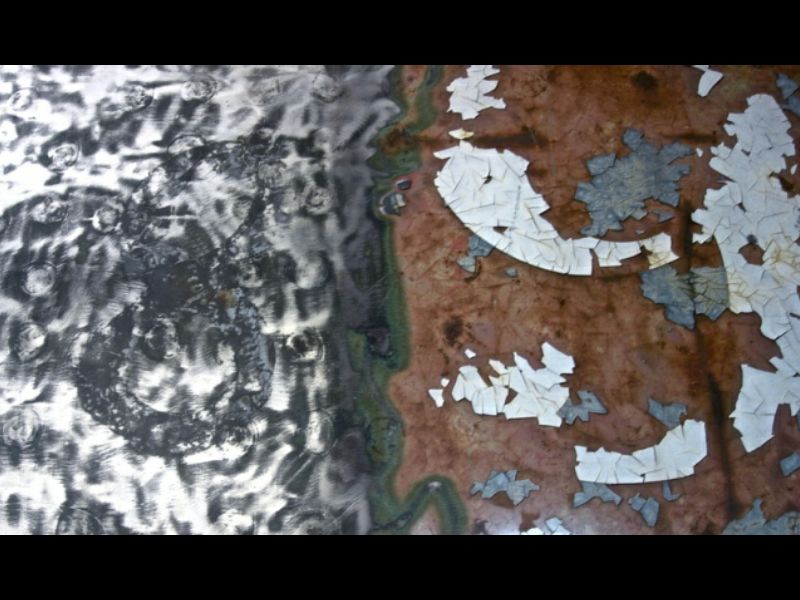
When
cleaning the fireman's side sheet metal of paint, Denny noticed a faint
number that did not seem to want to be ground away. When he
compared it to the 15" number "9" nearby (from the former Camera Car
number 8799), he noticed that the ghost number was considerably
shorter, not in SP lettering style, and seemed to be the
numeral
"8". It is a little hard to make out among the grinding marks
and
spot welds, but the lower part is quite distinct, and the upper part
also shows a clear trace.
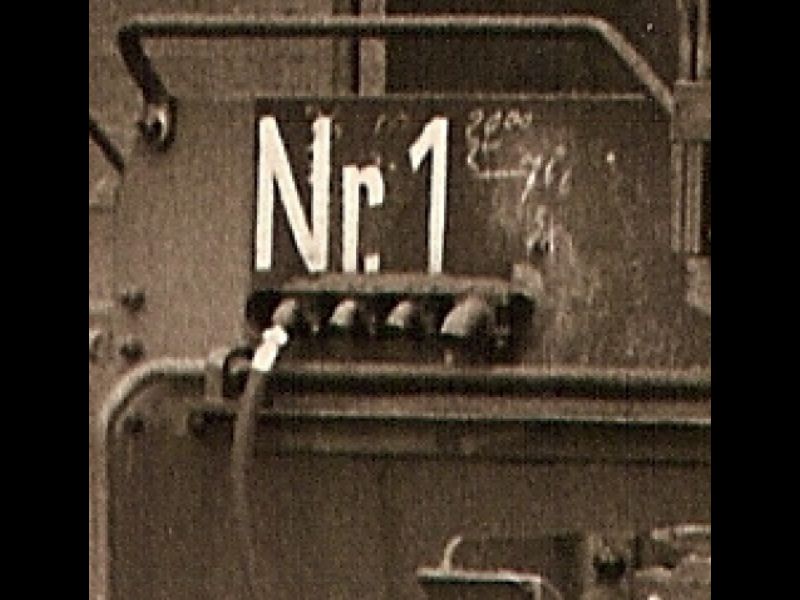
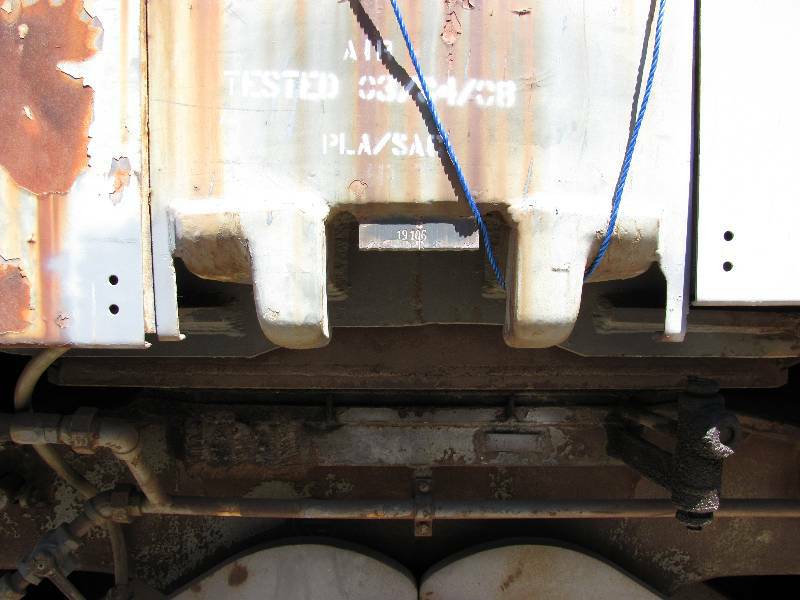
"Eight"
is the production line number of Chassis 19106, later to assigned road
number SP 9010. The shop forces at Krauss Maffei painted the
German abbreviation for "Number" (Nr.) and the series line number on
the front and rear pilot sheets of the fresh chassis (seen here on
Chassis Number 19099, later assigned SP 9003 as the first Series unit
off the line).
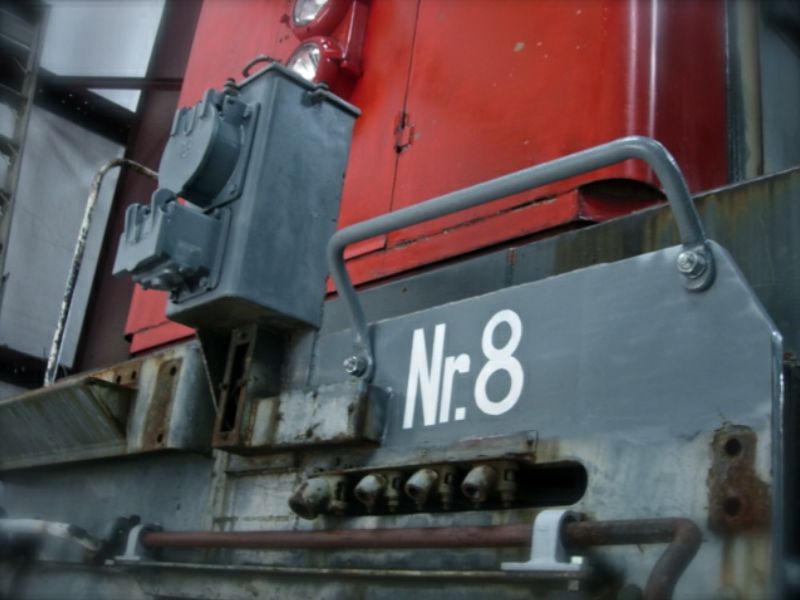
After
documenting the "8" on the cab side, (likely to connect the loose cab
to its destined chassis), a member of the 9010 crew had a little fun
and quickly hand-lettered "Nr. 8" in K-M style onto the rear pilot
sheet. It won't stay there for long, but it is a small
tribute to
the men who built our "Nr. 8" a couple of generations ago.
--
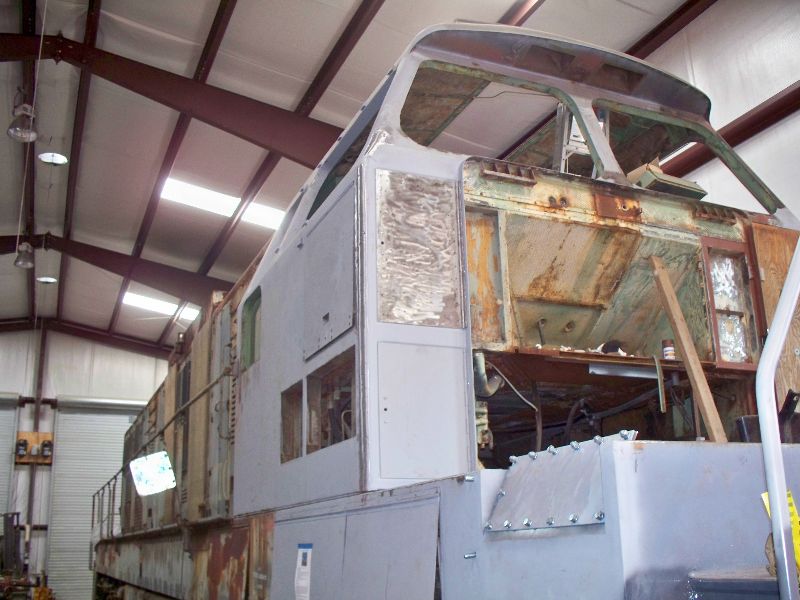
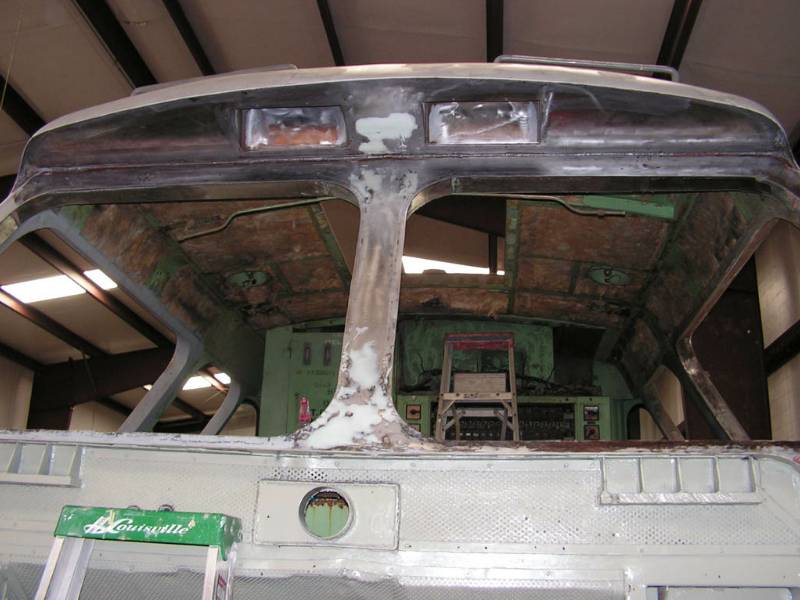
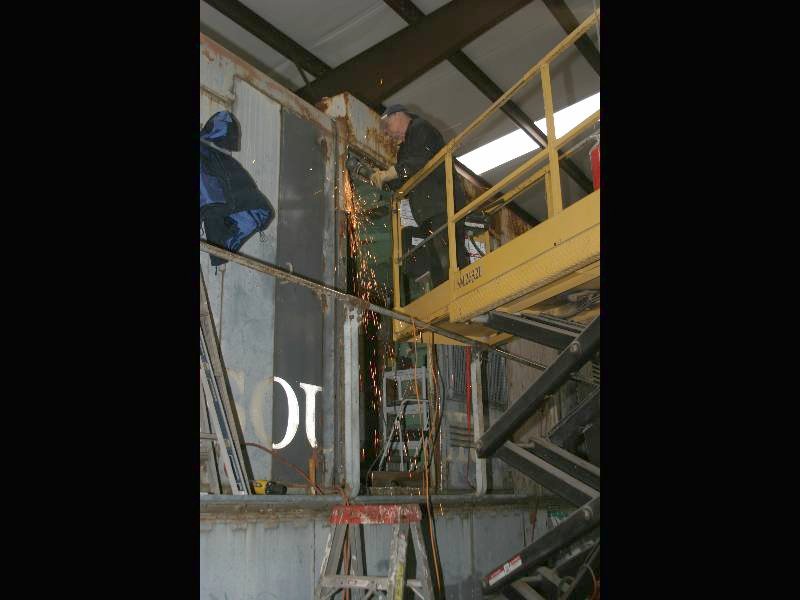
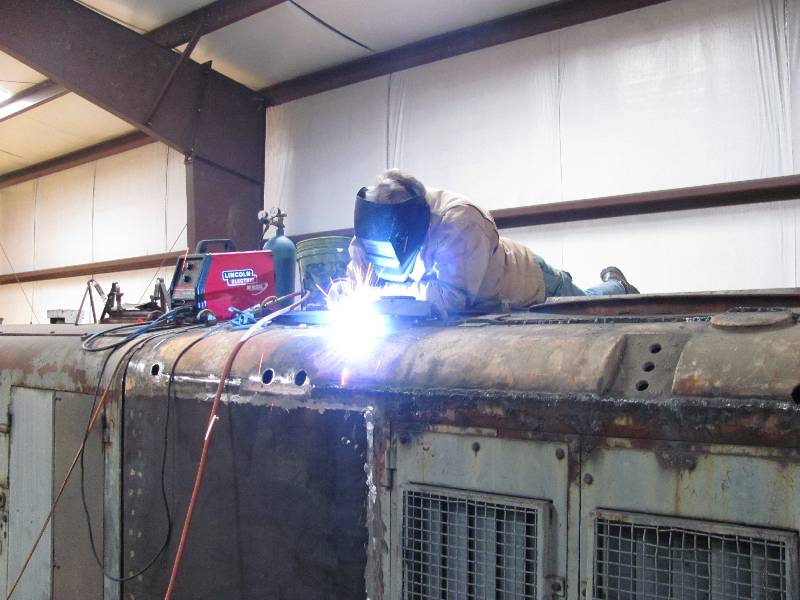
Update April 04, 2010 --
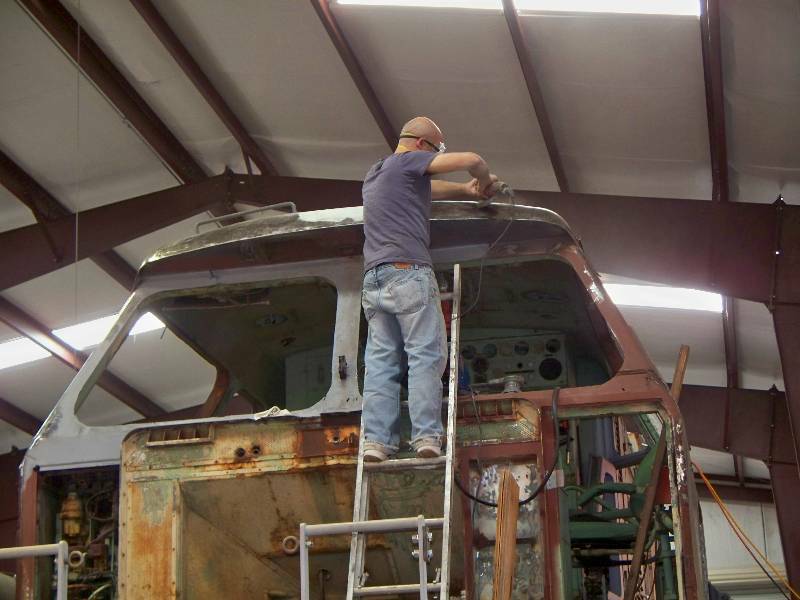
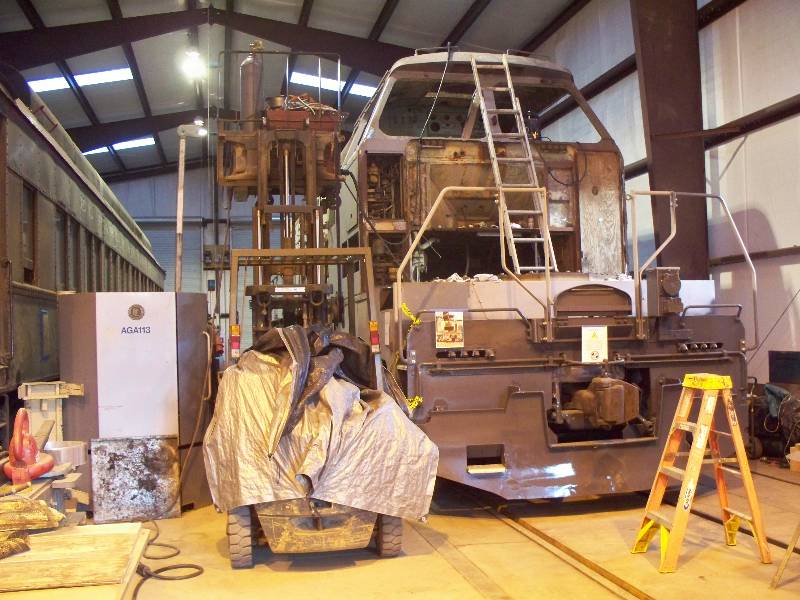
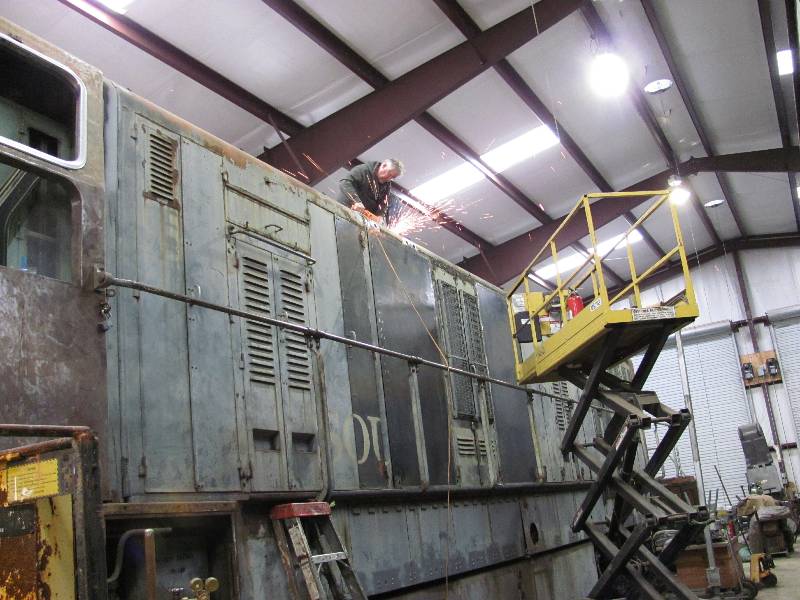
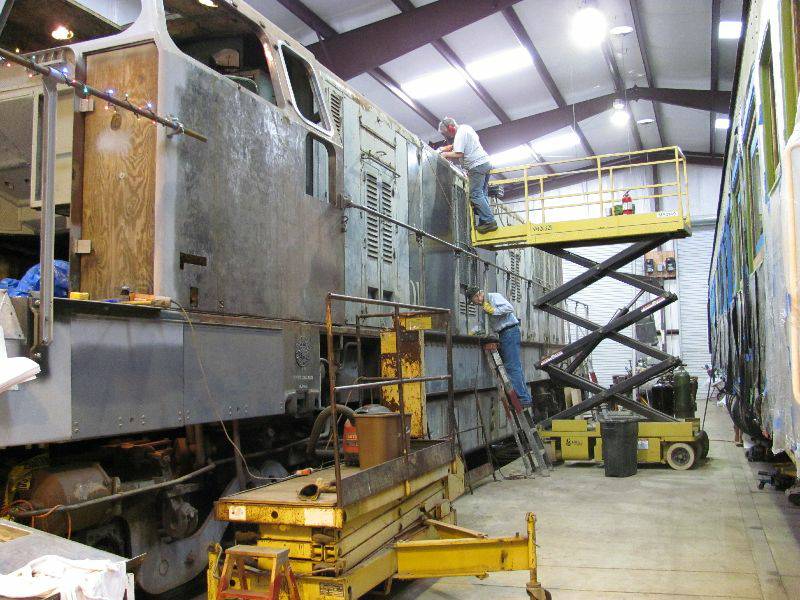
During
the Camera Car conversion, the SP cut off one pair of lifting hooks
from the top of the cab. We made a couple of extra when the
four
were made for the top of the nose and these were welded into place on
the cab. In order to weld the hooks to the cab top, the MIG
welder was raised on a fork lift. It looks a bit precarious
but
all went well.
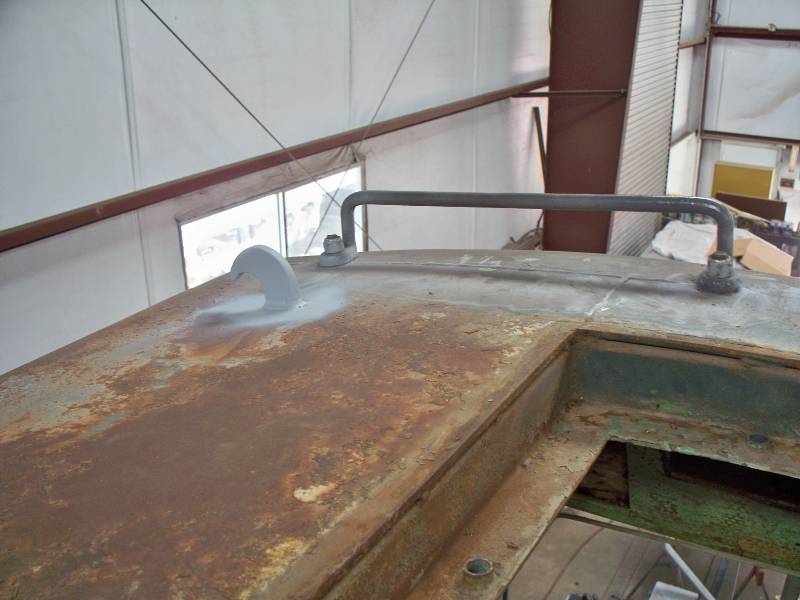
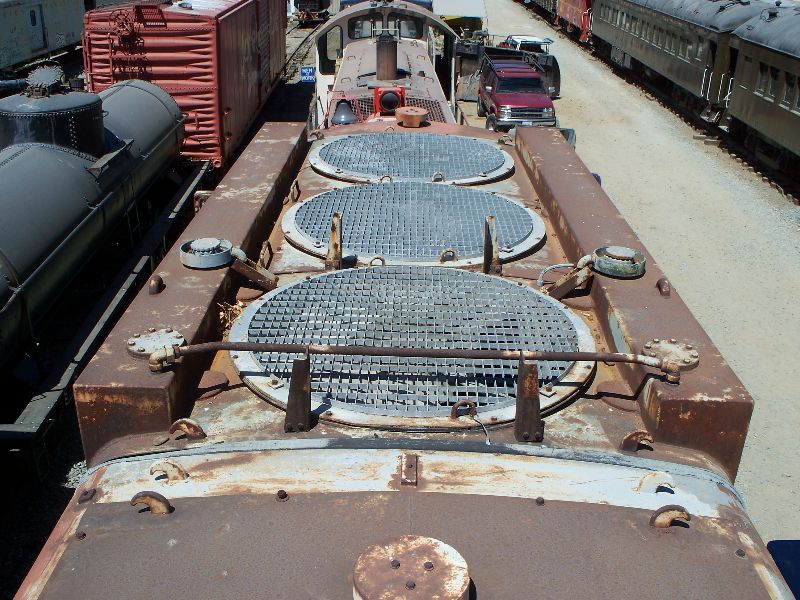
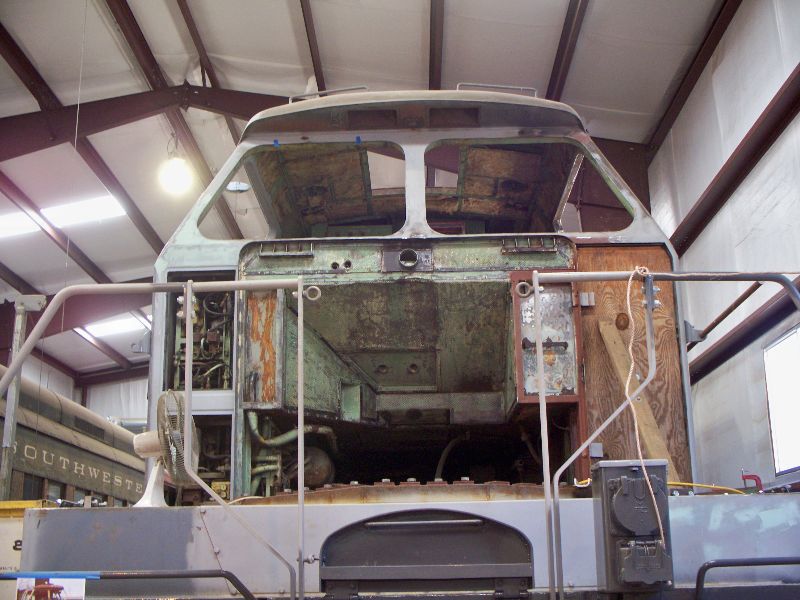
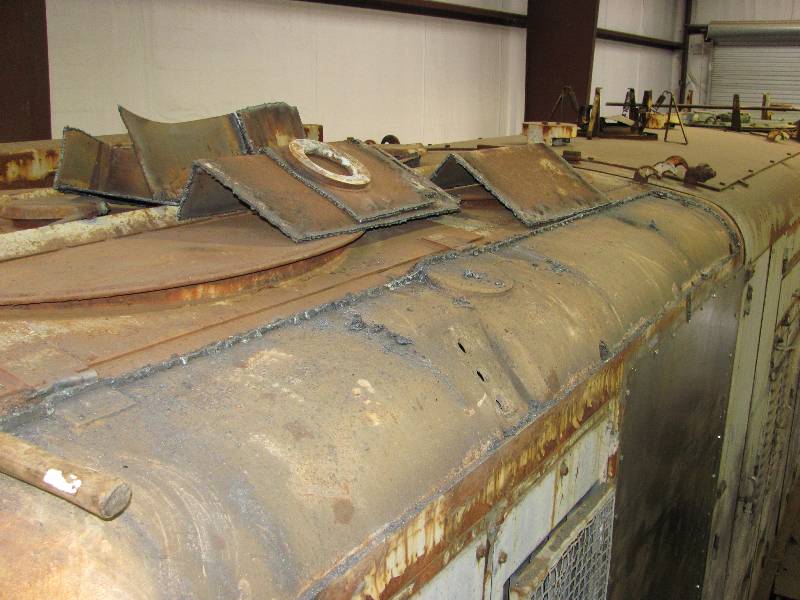
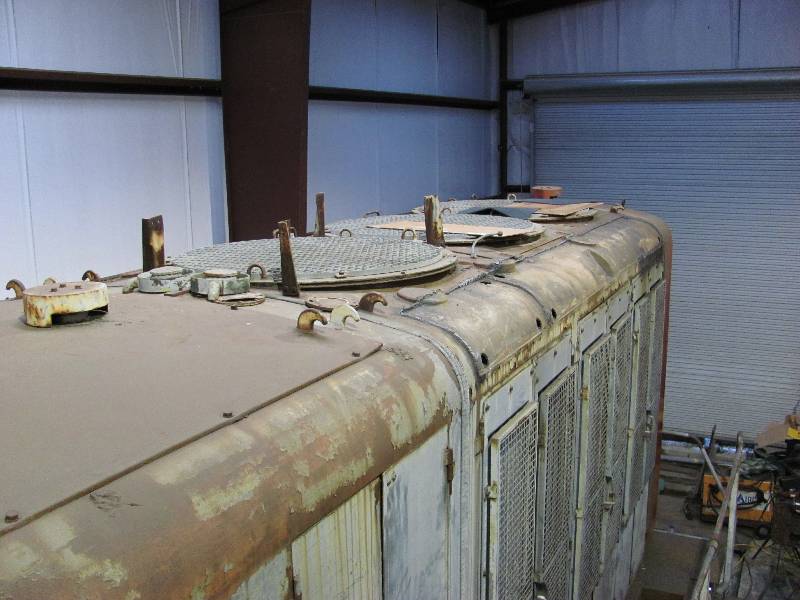
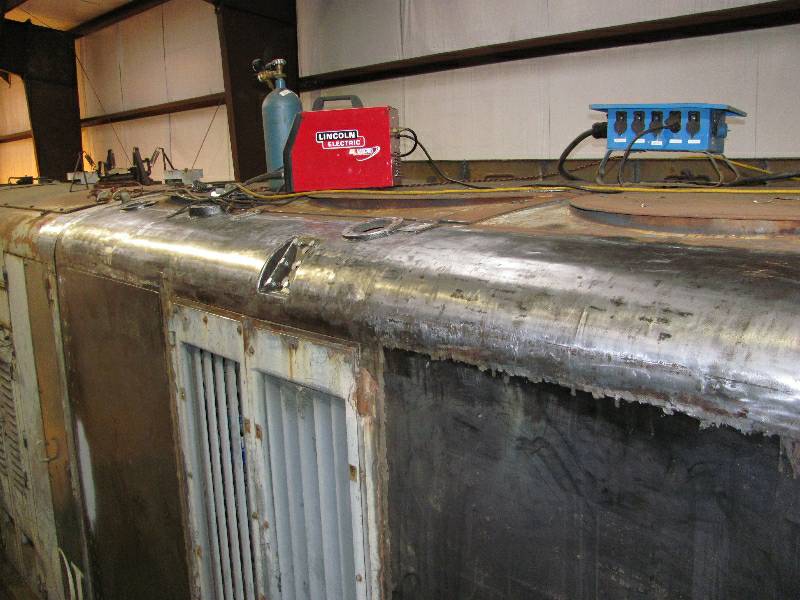
One
very conspicuous change to the locomotive was made when the SP added
the
"humps" to the 4 radiator expansion tanks in 1967. There has
been some debate about their removal but, given that we are restoring
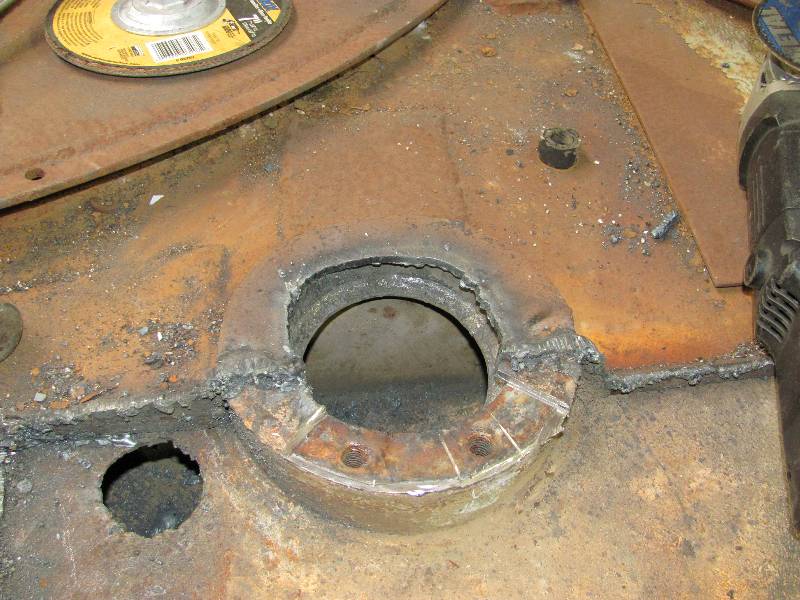
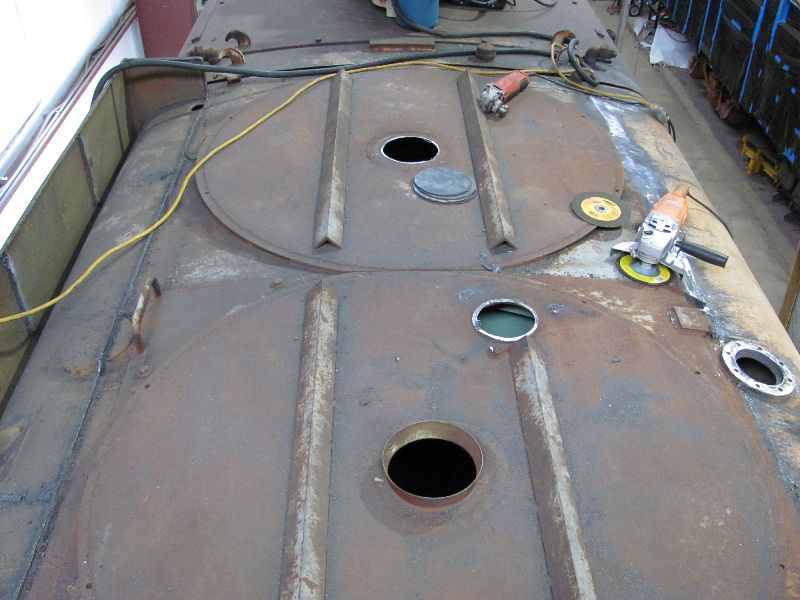
the locomotive to its 1964 appearance, they had to go.
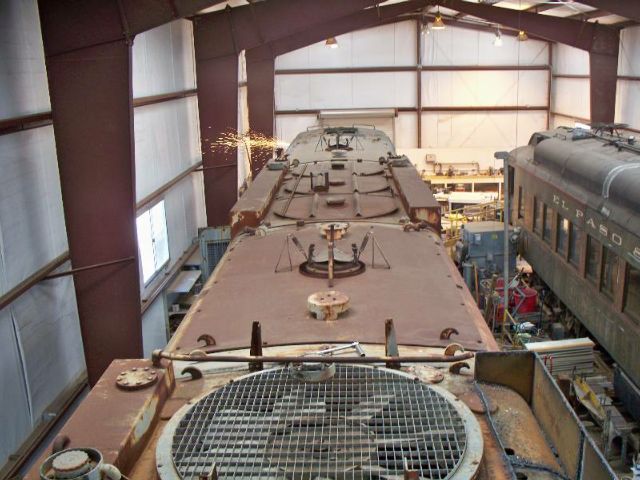
The liberal application of a cutting torch revealed a nearly
intact roof contour and even the original mounting location
for
the sight glasses. As time permits, all 4 of the "humps" will
be
removed and the roof restored to its original appearance. The
last photo includes sparks coming from Dan's window frame work in the
cab.
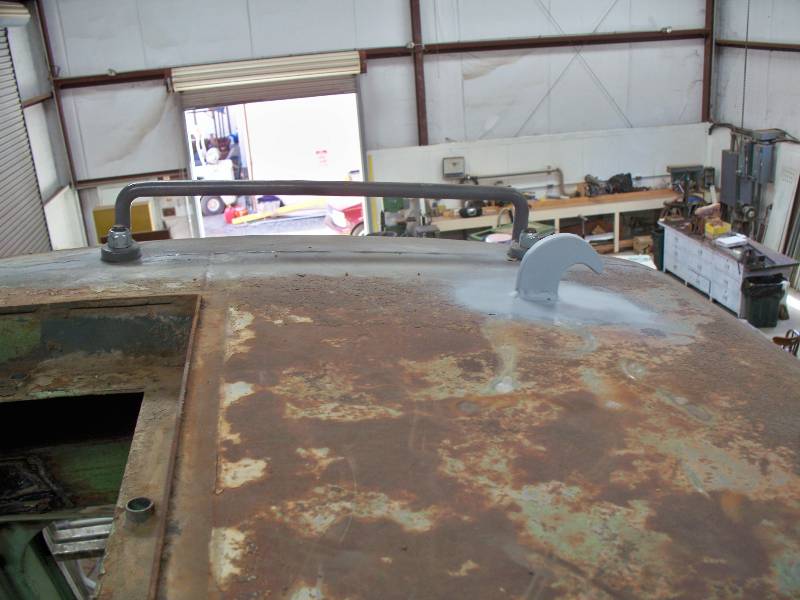
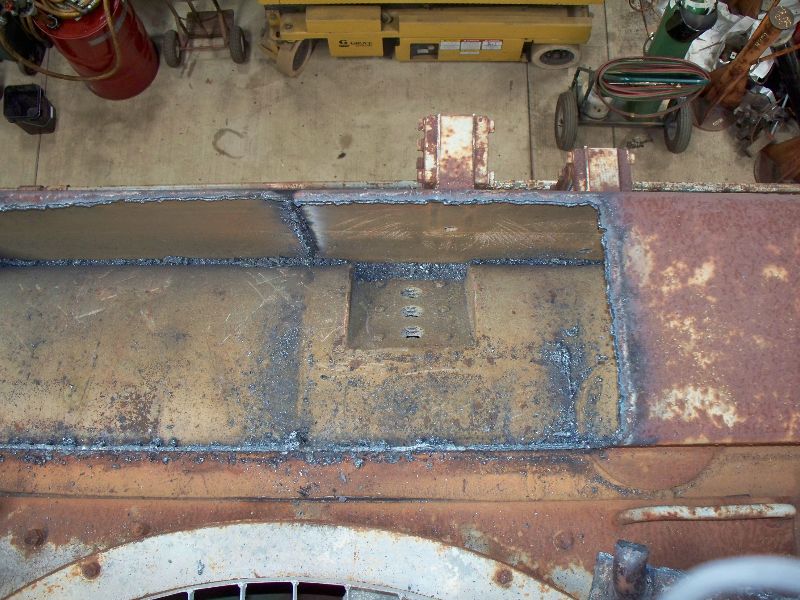
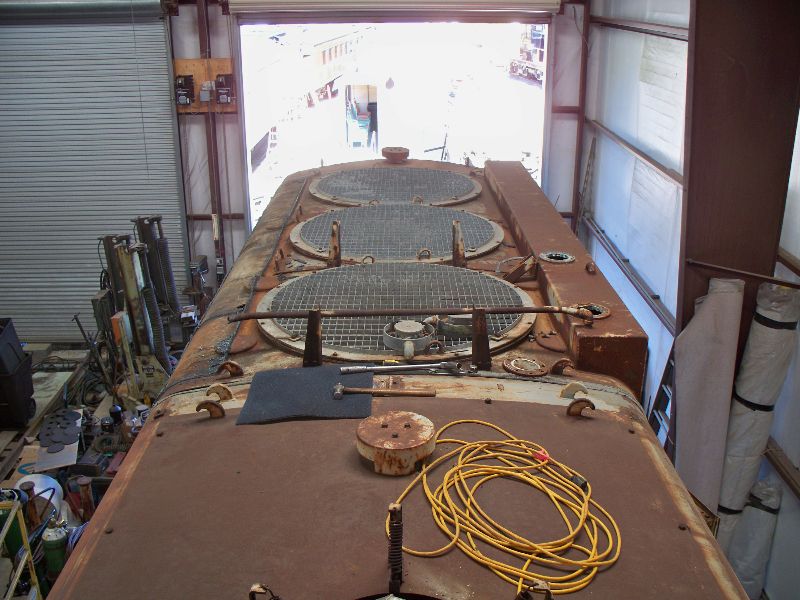
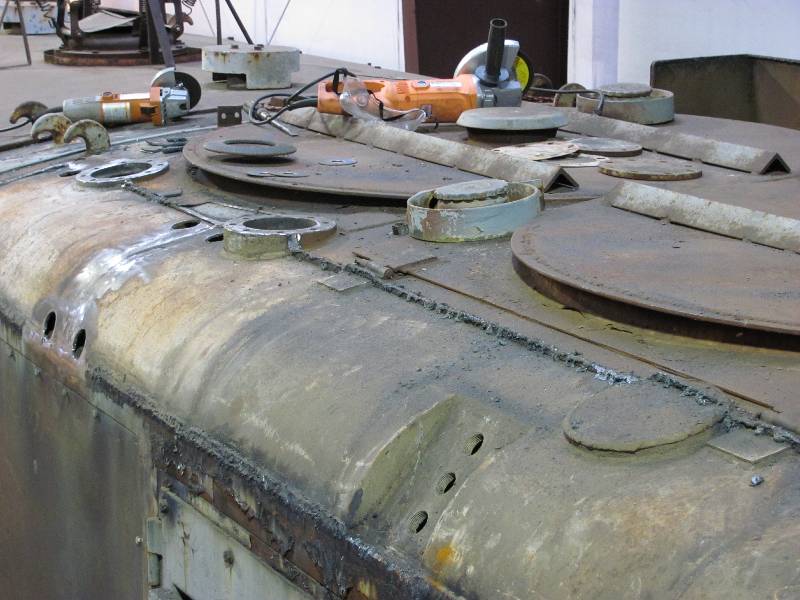
And
here is what the top looks like with the remains of that hump torched
off. There is a huge amount of grinding to do but the rear
hood
is on its way back in time.
--
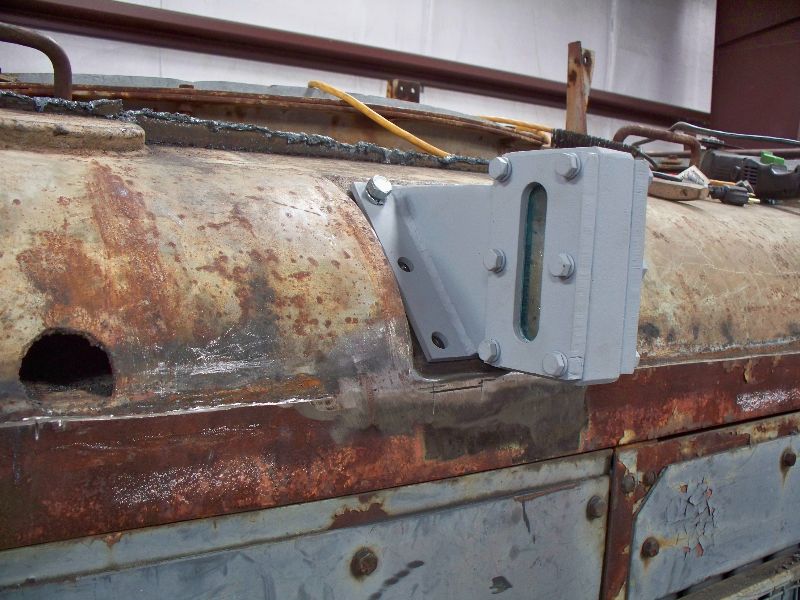
Update May 22, 2010 --
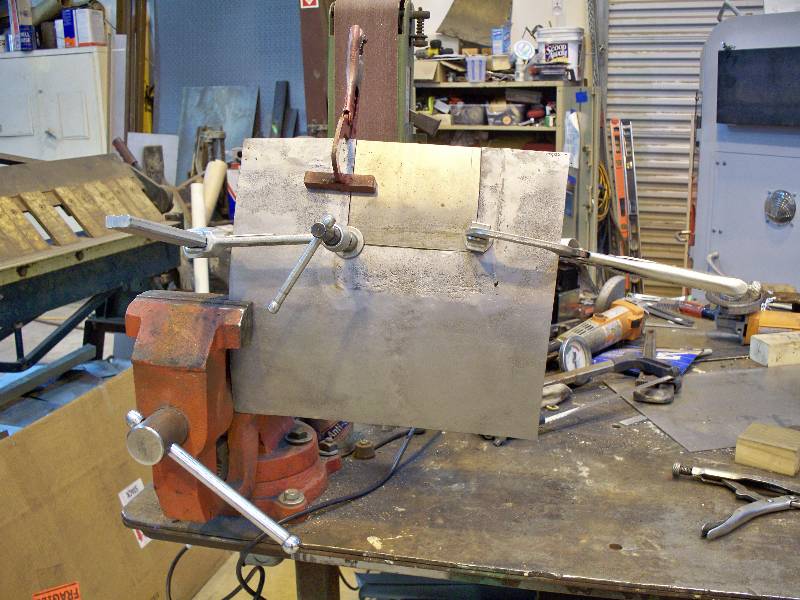
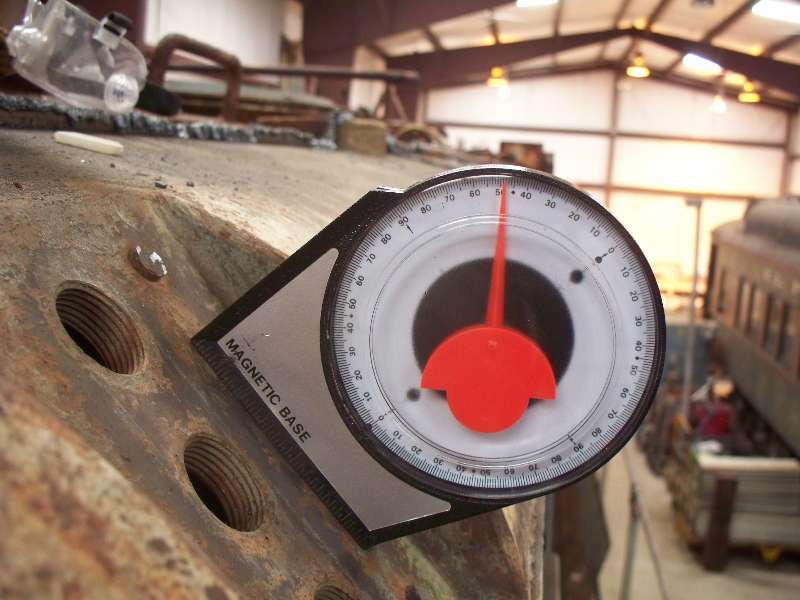
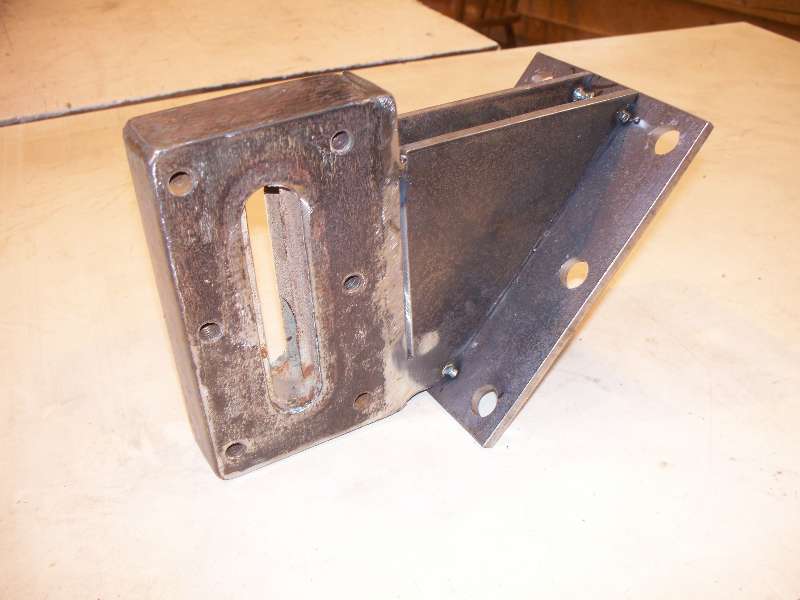
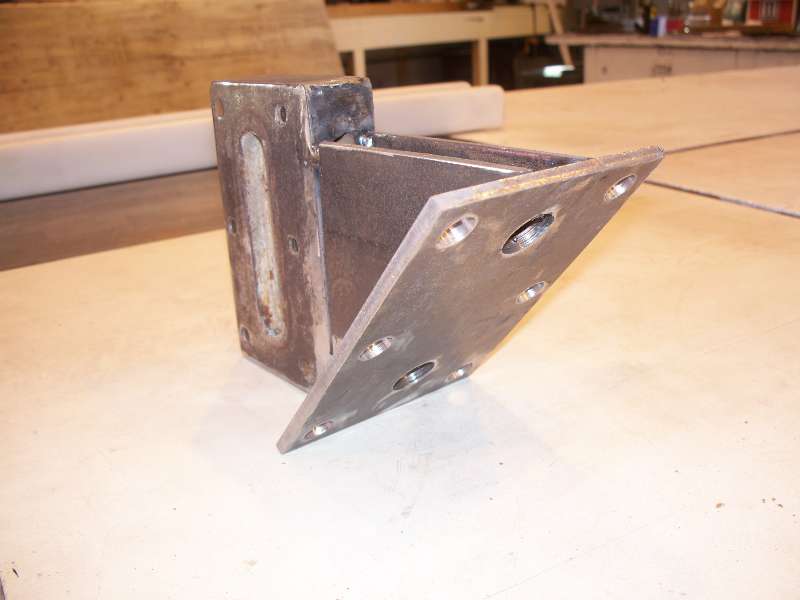
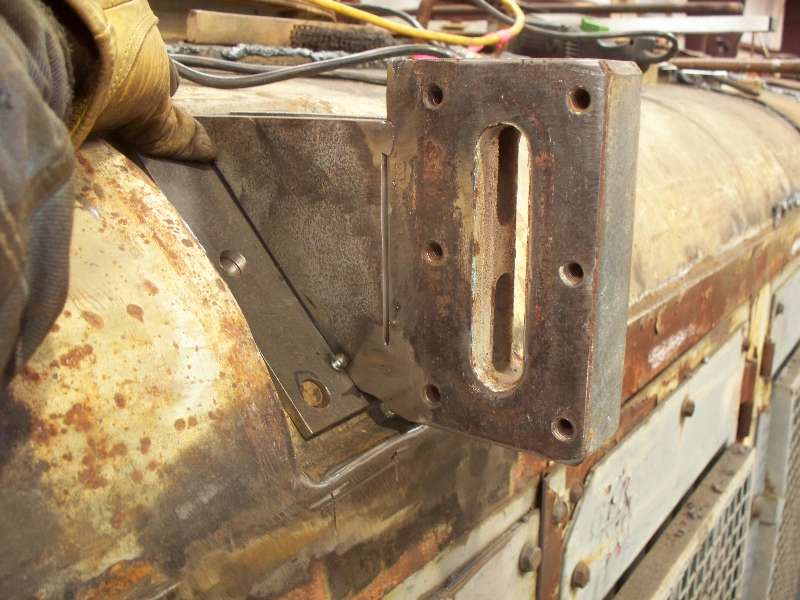
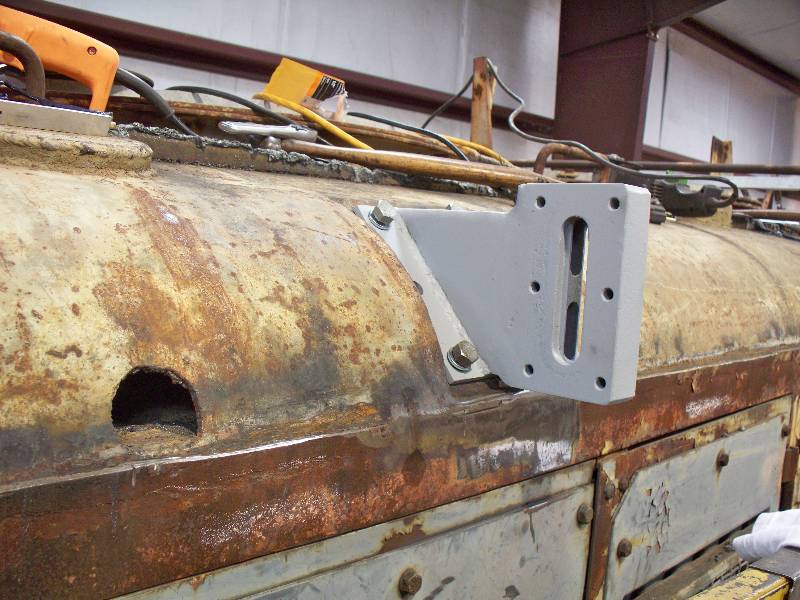
Taking
a break from grinding off the remains of the hump, I decided to figure
out new mounts for the water level sight glasses. The sight
glasses welded to the side of the humps were the remains of the
originals, with the angled "wings" cut off. Once knowing the
angle, it was fairly simple to reconstruct the wings and weld them to a
newly fabricated base. A transfer of the old sight glasses
and
cover plates plus new gaskets completed the process. One
down, 3
to go.
 |
 |
--
Update June 13, 2010 --
Work
resumes on the nasty welds on the front of the cab where the 3/4" thick
walls of the Camera Car nose were welded to the 1/8" thick plate of the
cab. We finally got all the added steel off with the
combination
of
a cutting torch and a lot of grinding but there were still many holes
which had to
be closed with the MIG welder. The Camera Car had a door
leading
from the cab to the camera room. It was hinged on the outside
wall side and had a latch in the "skirt" which will abut the new nose.
The opening for the latch had to be repaired plus, there were
a
few other spots where the "skirt" was cut away or damaged.
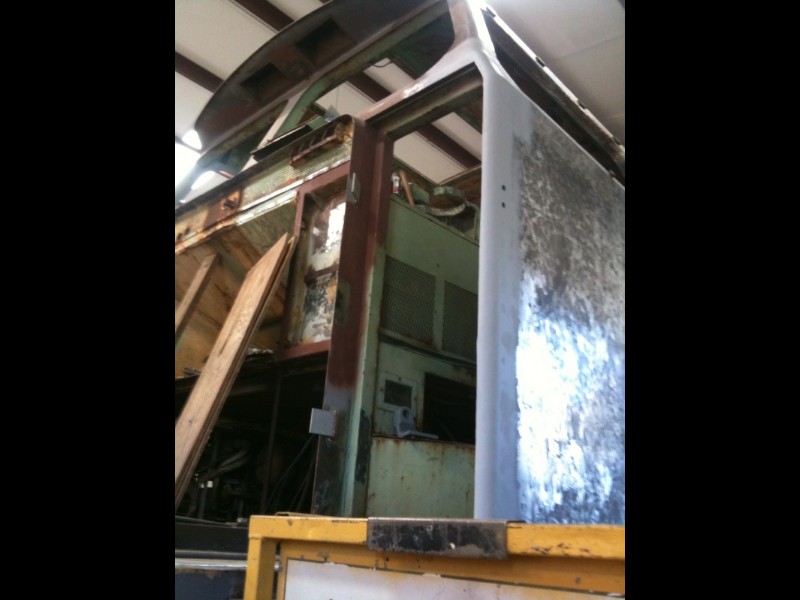
--
Update July 03, 2010 --
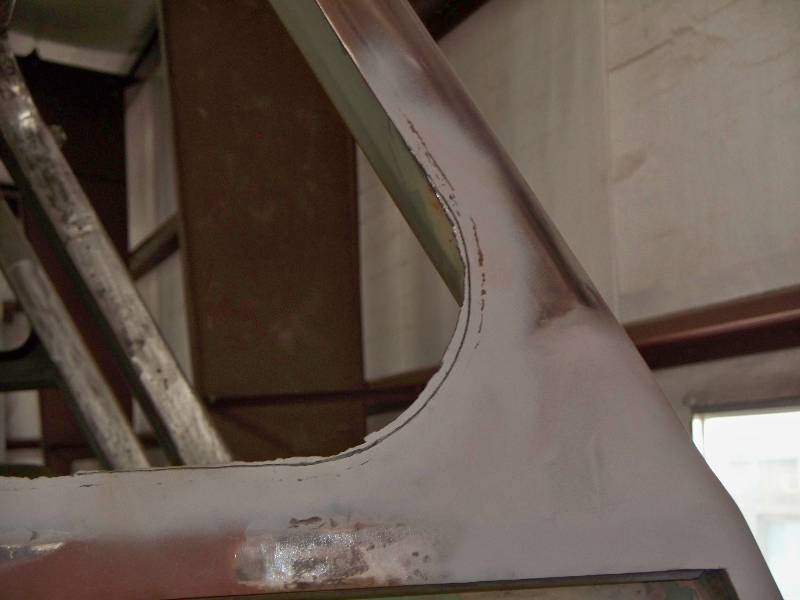
Dan continues repairing and
reforming the two front cab wall radii.
The
upper of the two brake access hatches had to be rebuilt. Part
of
the hinge was missing, the latching mechanism was gone and some
deadbolts and a drawer pull had been added during Camera Car conversion.
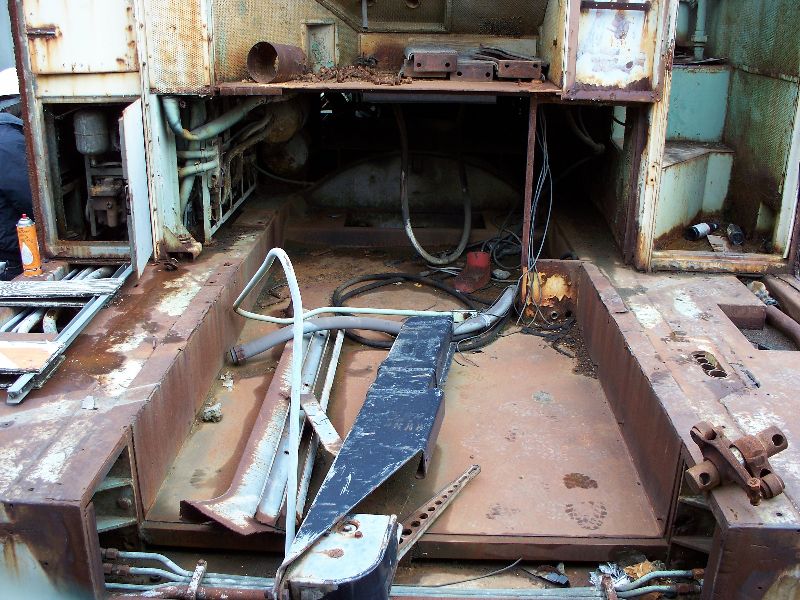
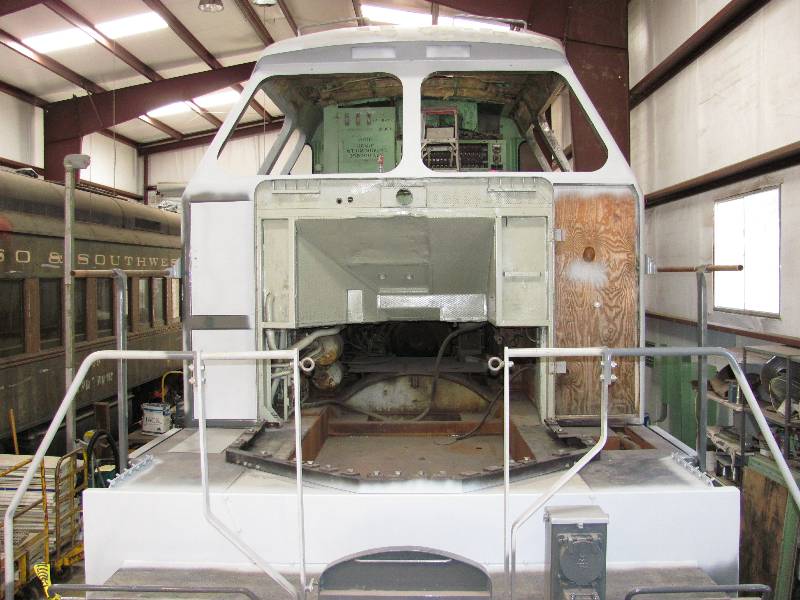
And,
all of the added parts were removed from the front transmission area.
While taking the third photo, I noticed another problem that
will
have to be addressed. The bottom opening surfaces for the
front
windows are not even from side to side. The one on the
engineer's
side
(left side of photo) is quite a bit lower than the other side.
Oh
joy!!
It
turned out that the fireman's side window had not been cut out enough
on the bottom edge and the bottom corner radii were wrong. I
found that there should be a 3/4" lip all the way around the
window upon which the window glazing rubber would sit.
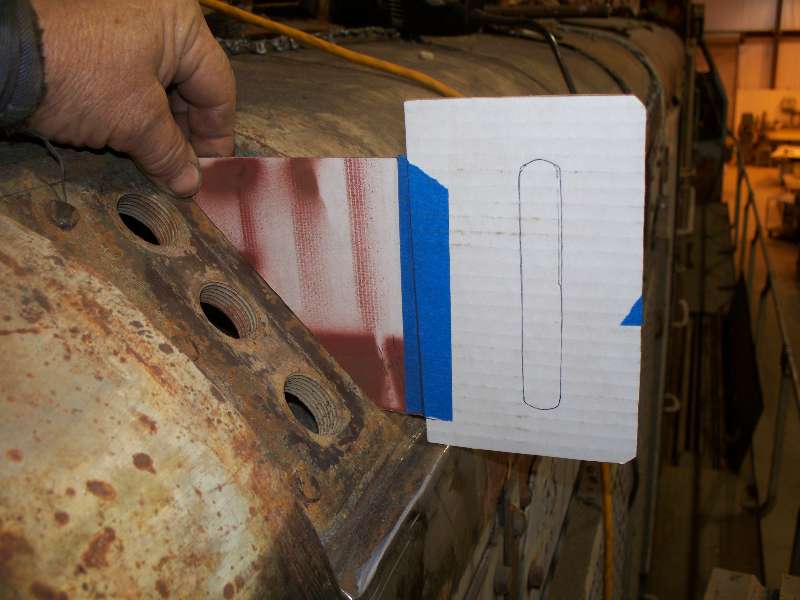
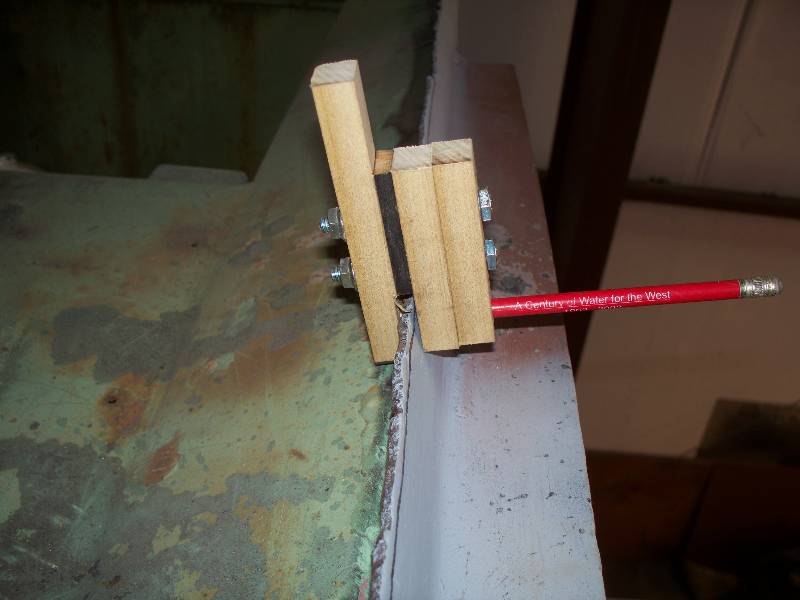
Necessity
being the mother of invention, a little marking tool was created which
allowed me to trace the proper 3/4" lip on the outside of the frame.
This window required only some grinding to come back to its
proper shape.
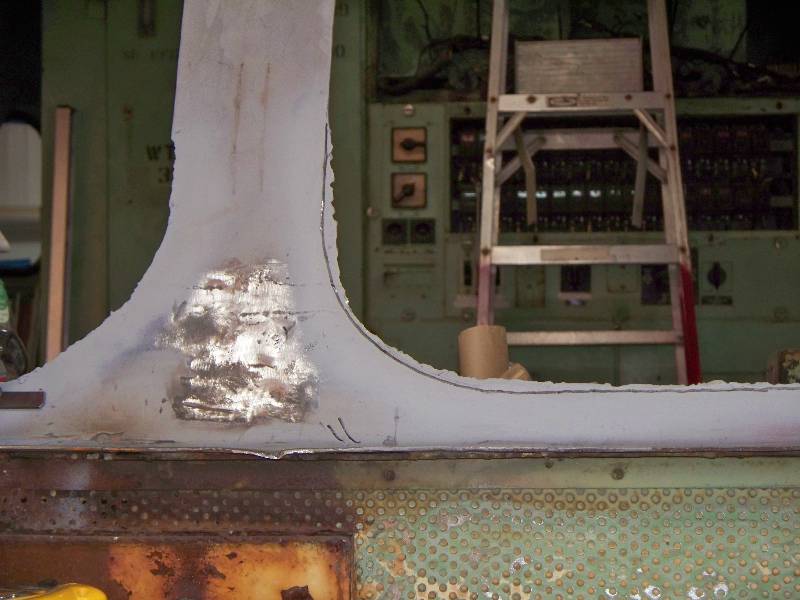
The
engineer's side window was not quite so simple. Both
bottom radii had been butchered and needed to have
some metal
added. This was also true of part of the bottom surface.
One eighth steel was welded in where needed and the little
tool
again marked the correct opening. Finally, after a bunch of
grinding, the front windows are back to the shape they had from the
factory. In the last photo, you will note a piece of tubing
welded to the cab wall. This area was the original
air duct
between the grill on top of the nose and the cab heater.
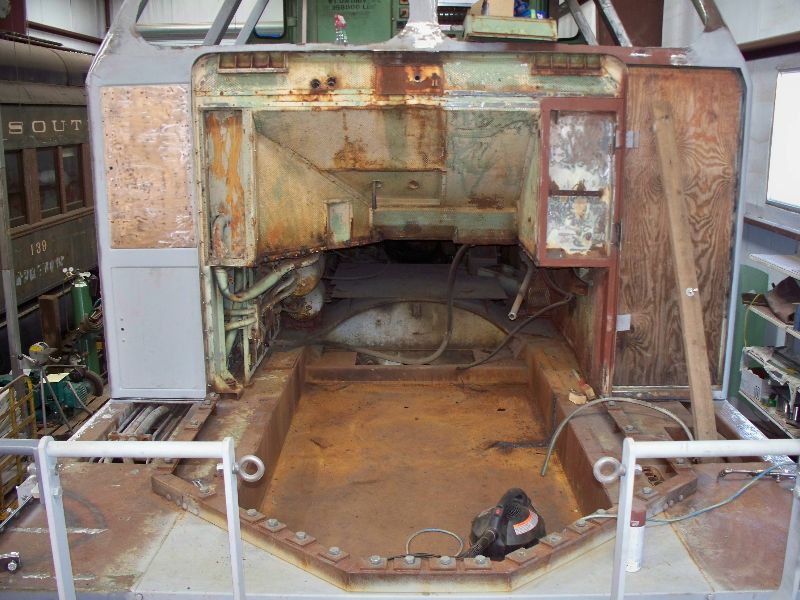
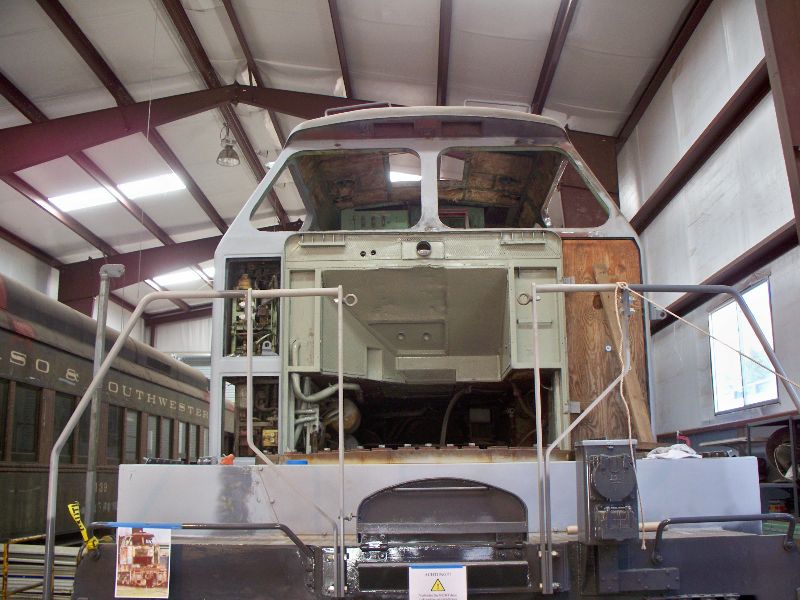
And
for the finale of this update, we did a little painting. Rich
cleaned the area under
the front of the cab, gave it a good coat of Rust Mort and
then I shot the
Suede Gray. This removed a major part of the front end
"derelict" look that has
haunted us for so long.
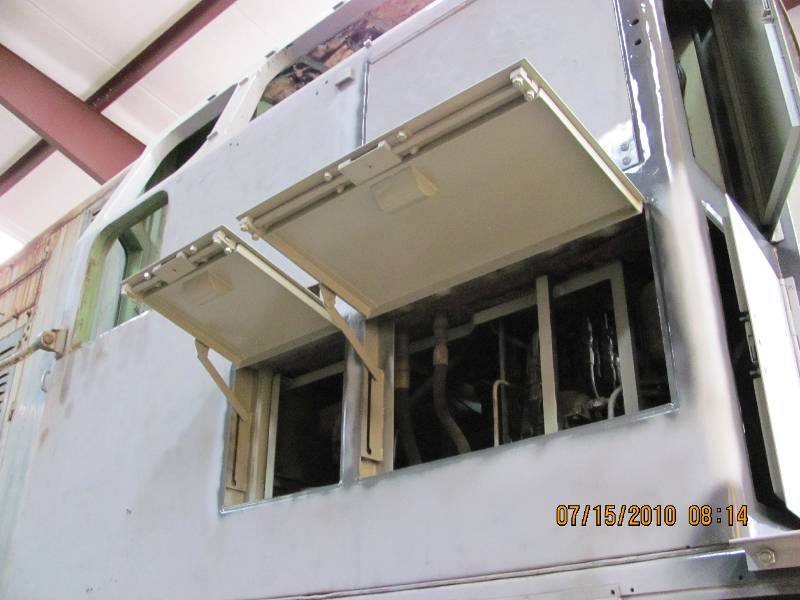
--
Update July 17, 2010 --
Once the door opening edges were painted, the
two brake access doors on the cab front were reinstalled.
And
after drilling out a lot of broken hinge screws and repairing the
frozen hinges, the two small side access doors were also reinstalled.
Dan removed the very last of the old paint on the front of the cab and
shot a coat of epoxy primer on the surface.
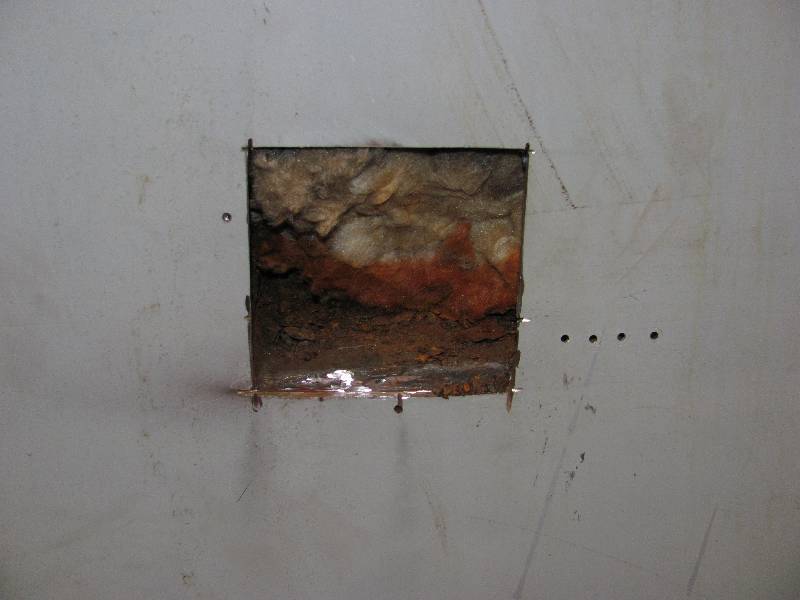
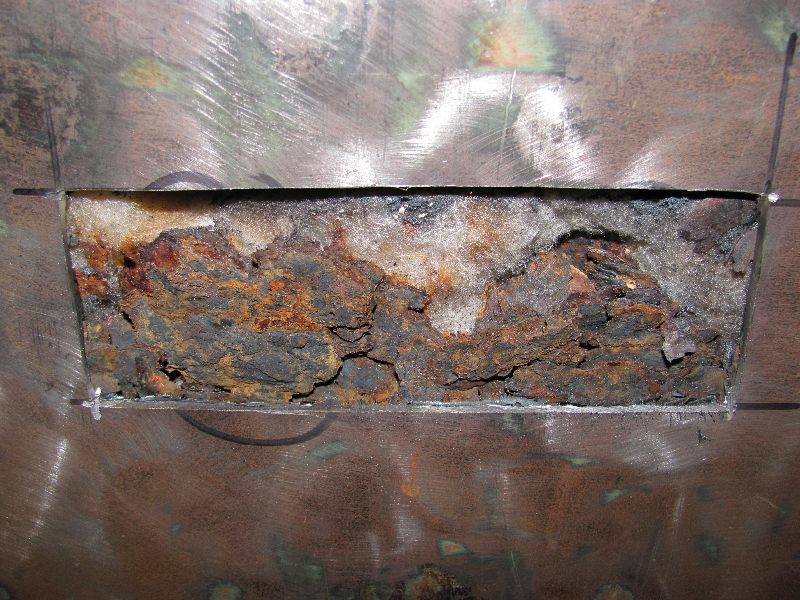
I
decided to cut into one of the rotten areas on the outside wall of the
cab. What I found was not unexpected. There is
lots of
rust and some very thin sheet metal with which to deal.
--
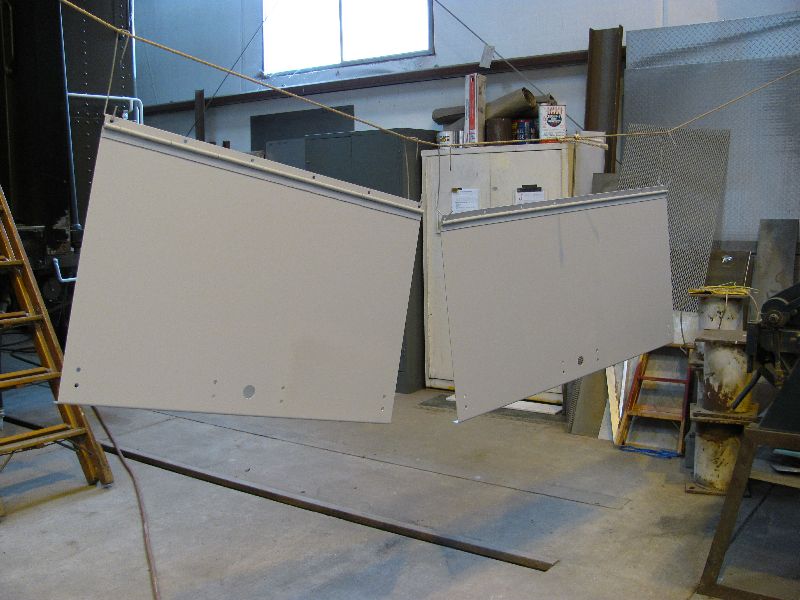
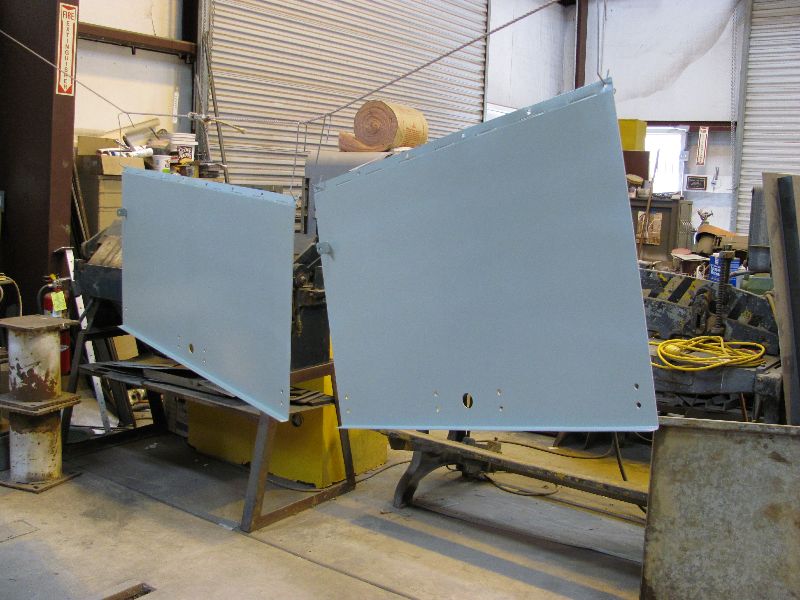
Update September 25, 2010 --
The
two front frame doors on the right side were shortened by the SP in
1966 when the handbrake was relocated to the area ahead of the cab.
In the first photo, you can see the difference between the
door
on the left and the one on the right. Two new doors were cut
and
formed and then the original hinges were removed from the old doors and
welded to the replacements.
 |
 |
--
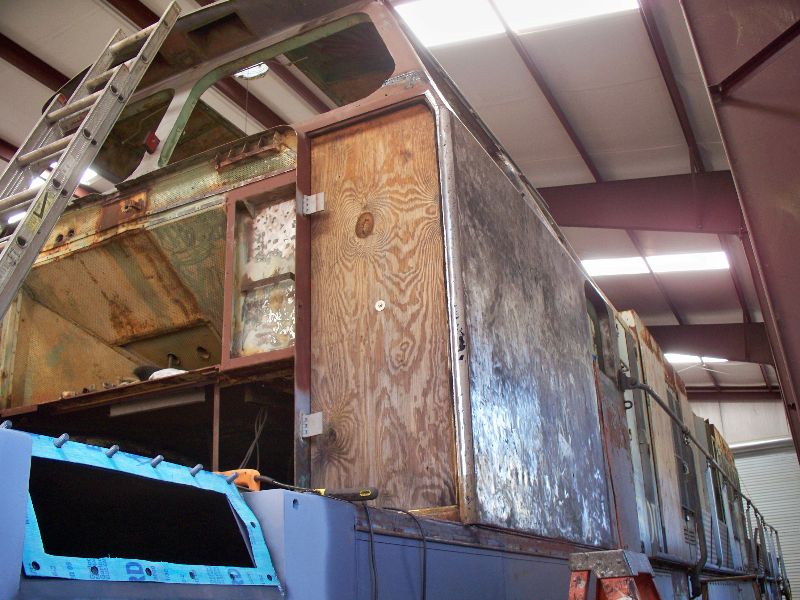
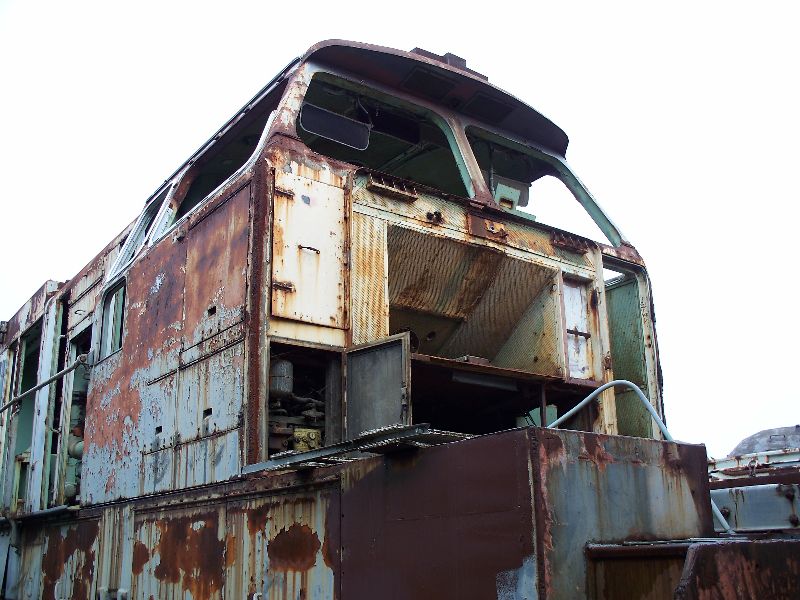
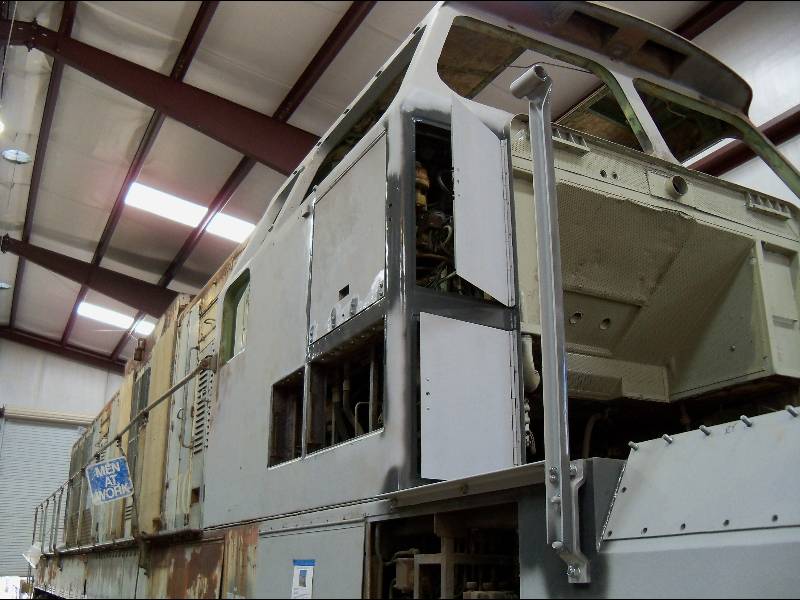
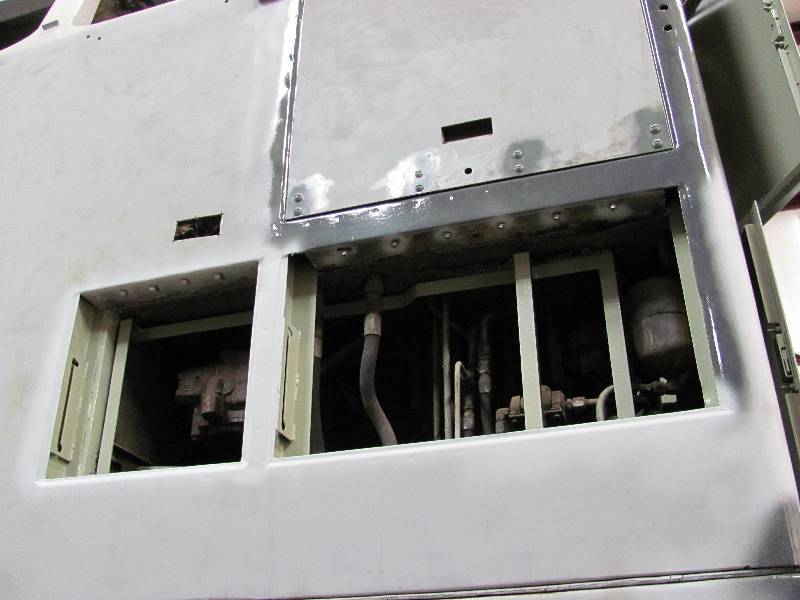
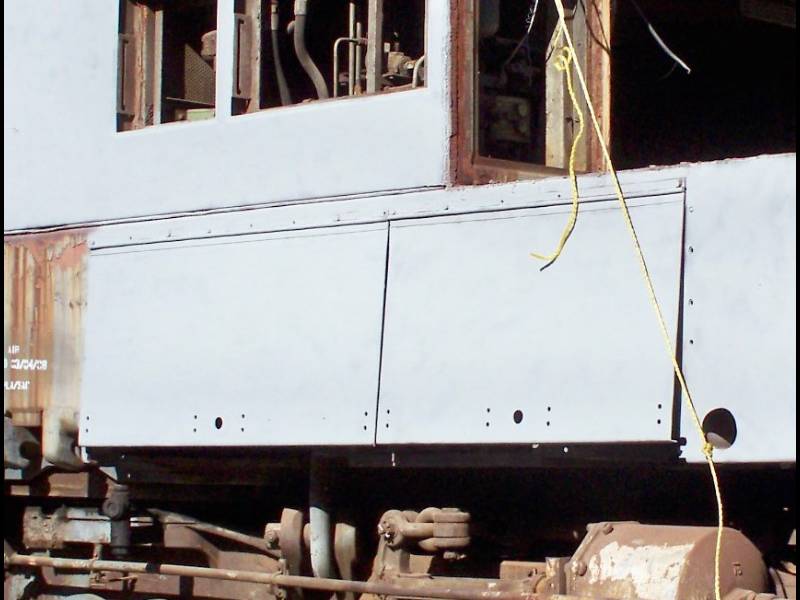
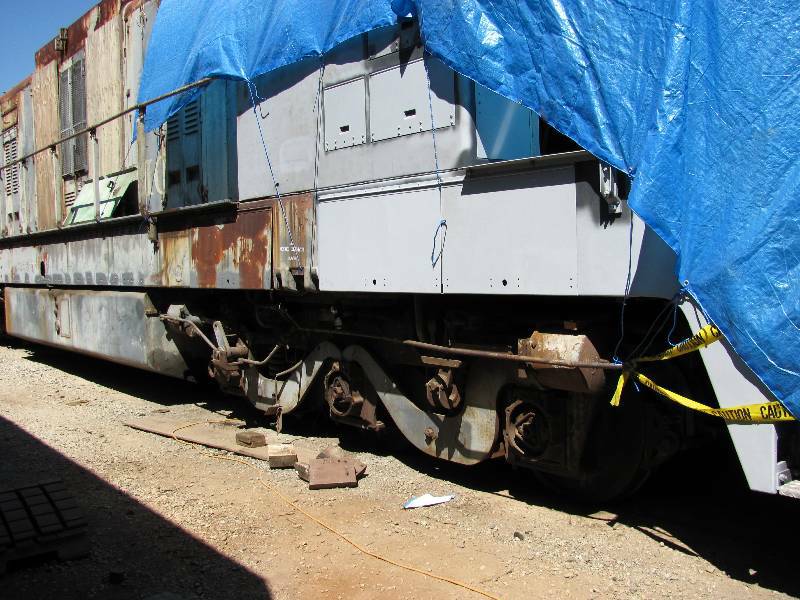
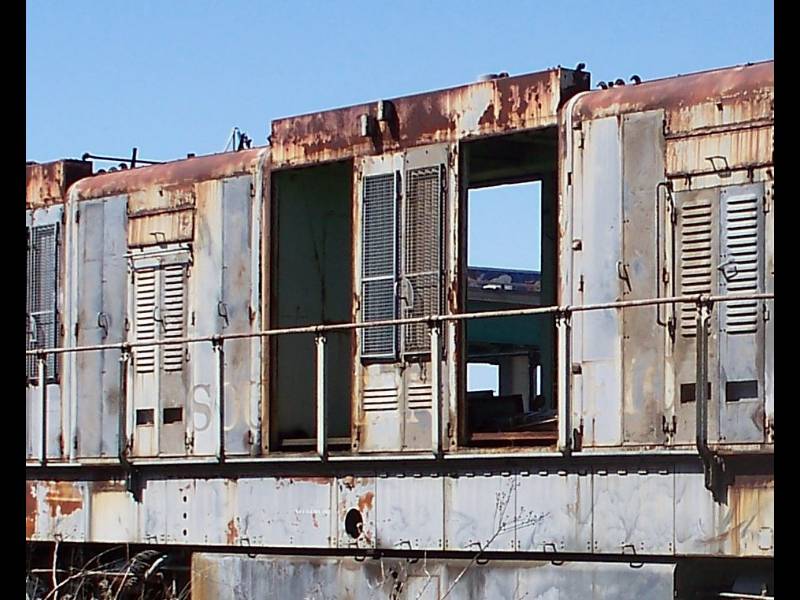
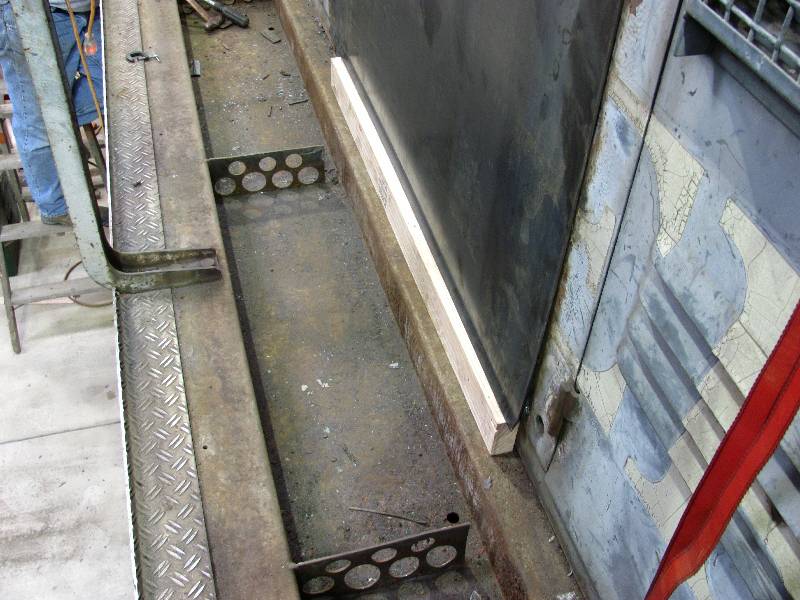
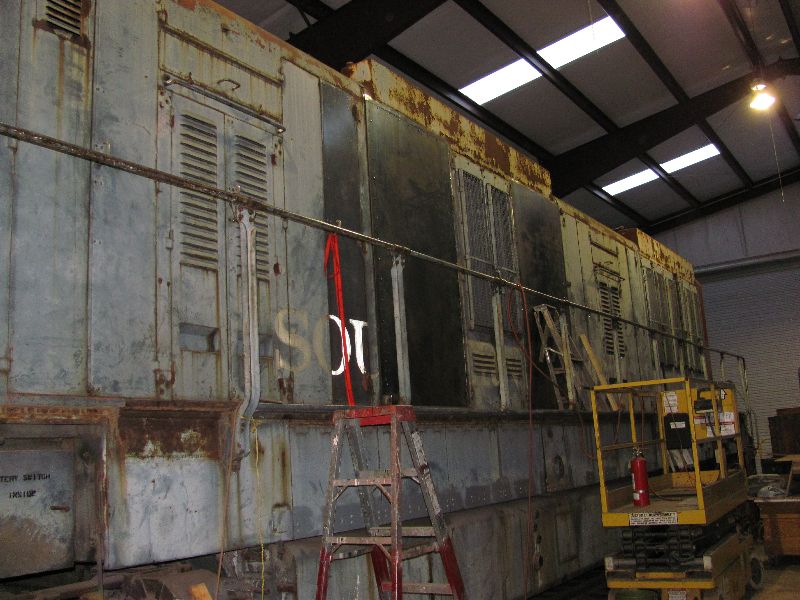
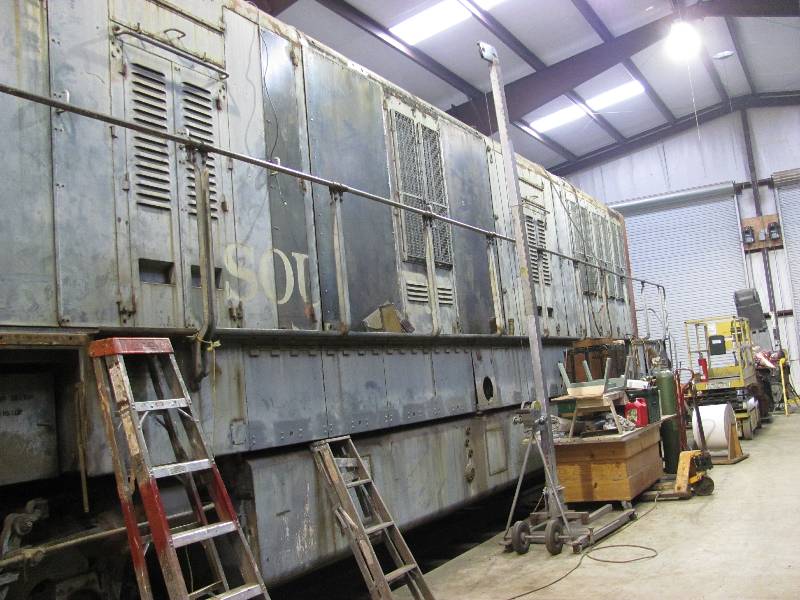
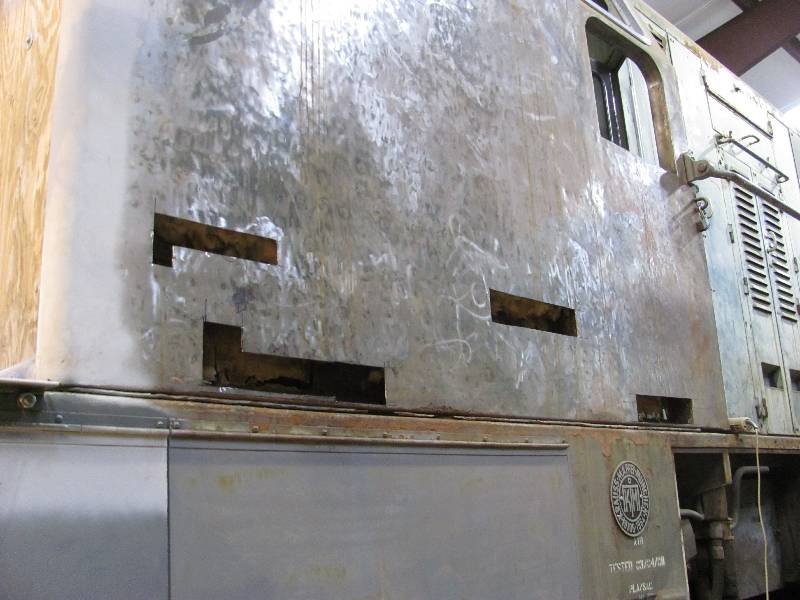
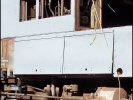
Update November 22, 2010 --
During
the Camera Car conversion, the SP removed all of the components and
radiators from the section behind the number 1 engine. They
also
removed 8 of the side doors and replaced them with 4 sheets of 1/4"
steel plate. The area was used to house a diesel generator
which
powered the equipment in the camera compartment plus other equipment
that we have not yet identified. During the aborted
restoration
at CSRM, the 1/4" plate was torched out, leaving 4 gaping holes in the
locomotives sides. The 4 holes in the hood have been covered
with
sheets of plywood for quite some time and work has finally begun on
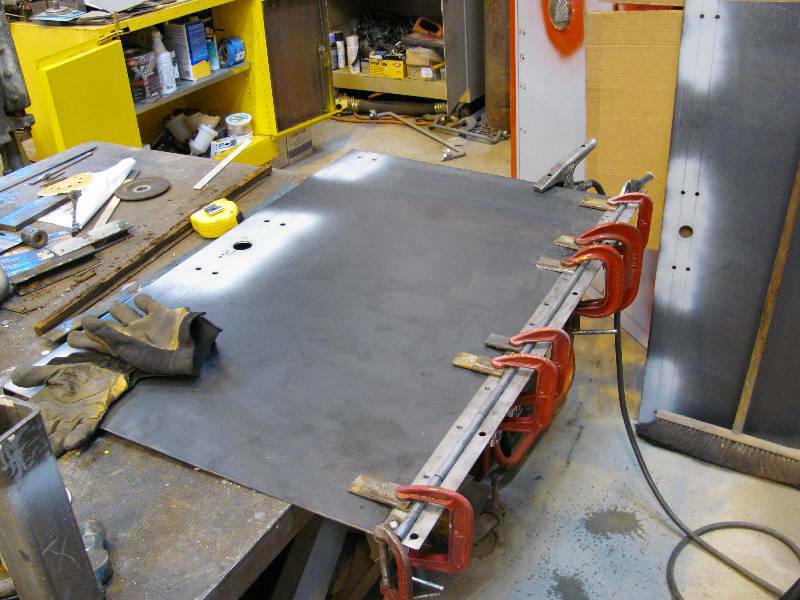
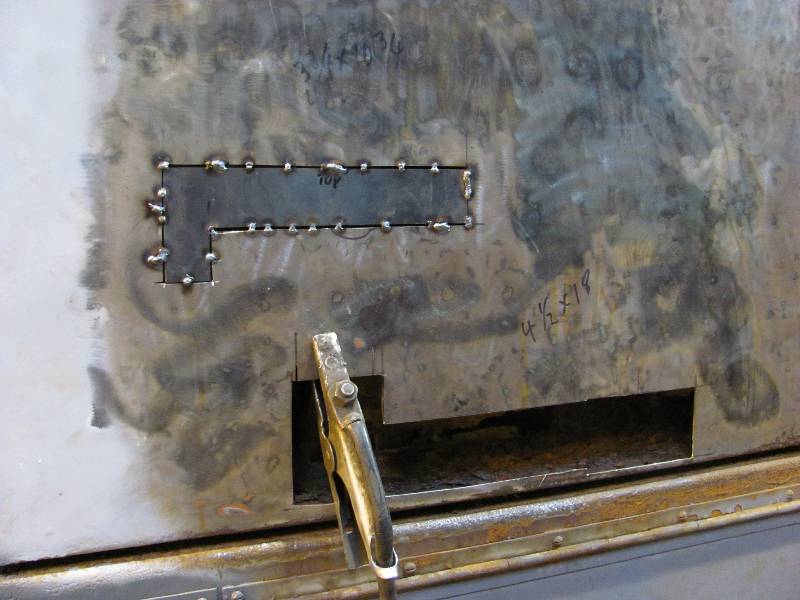
restoration of the doors. We purchased four 4X8 sheets of
1/8"
plate, had them cut to size and had the bottom edge bent up slightly to
match the "kickout" at the bottom of the other doors. The
first
step was to make cuts in the remaining original metal in order
to
create suitable openings into which the new metal will be butt
welded. The narrow side of the old opening was removed
completely.
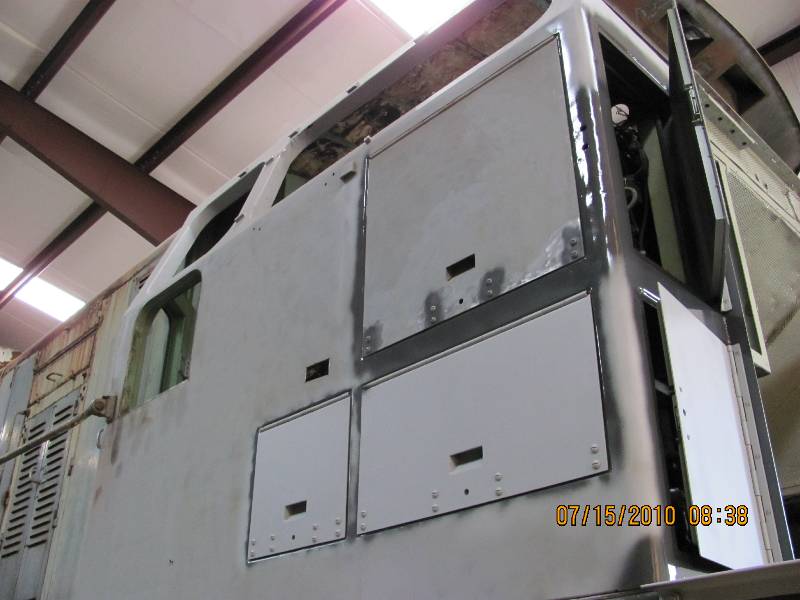
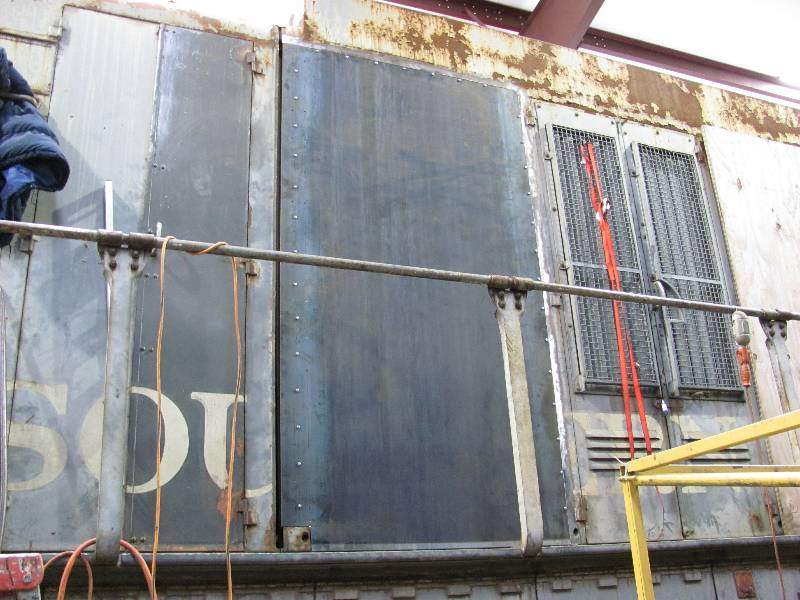
Once
the cuts were made, the new metal was bolted into its new home and will
be welded in once both panels on the firemans side are fully installed.
The grills and shutters will be fabricated at a later date.
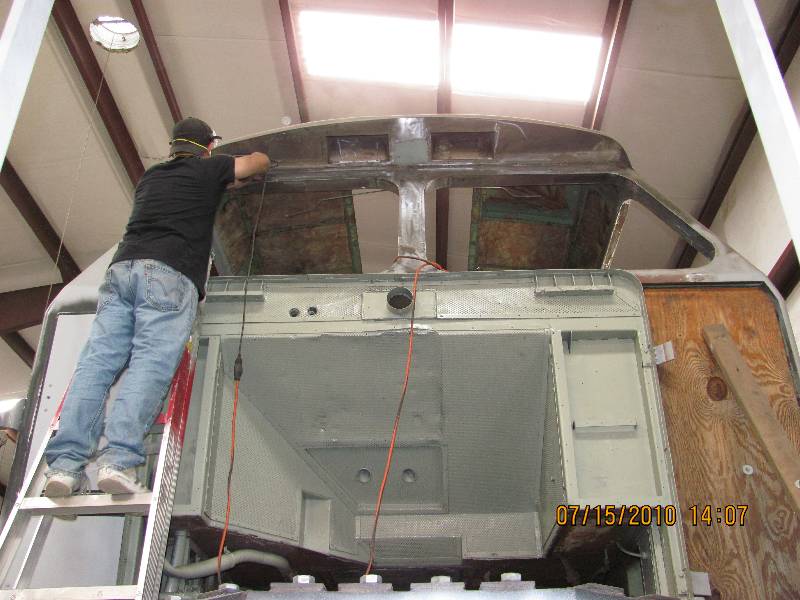
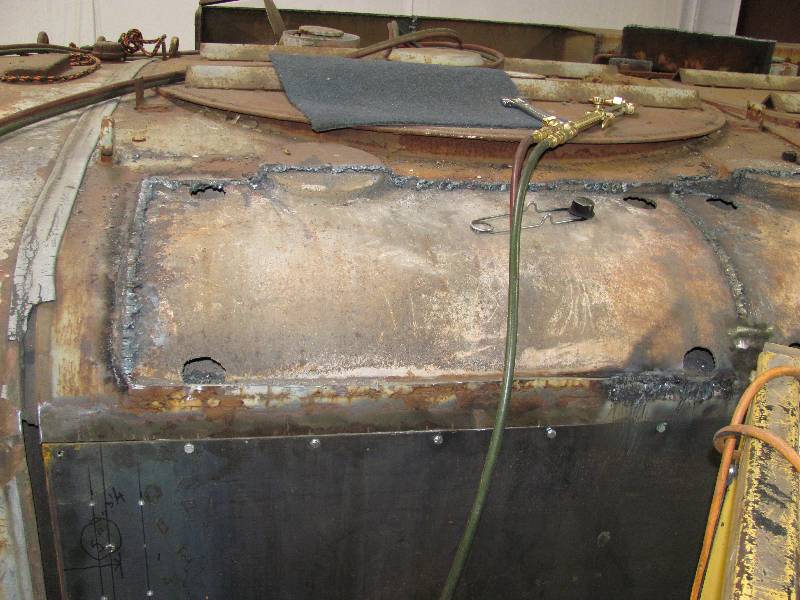
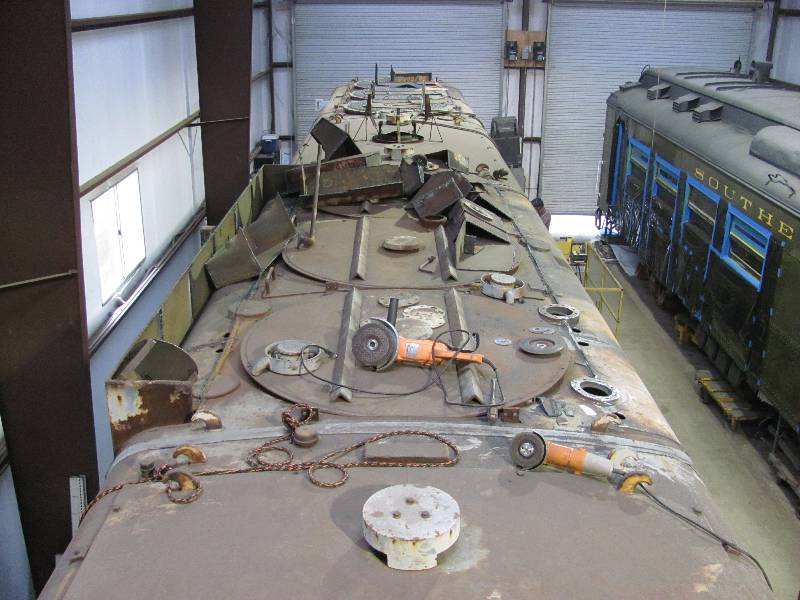
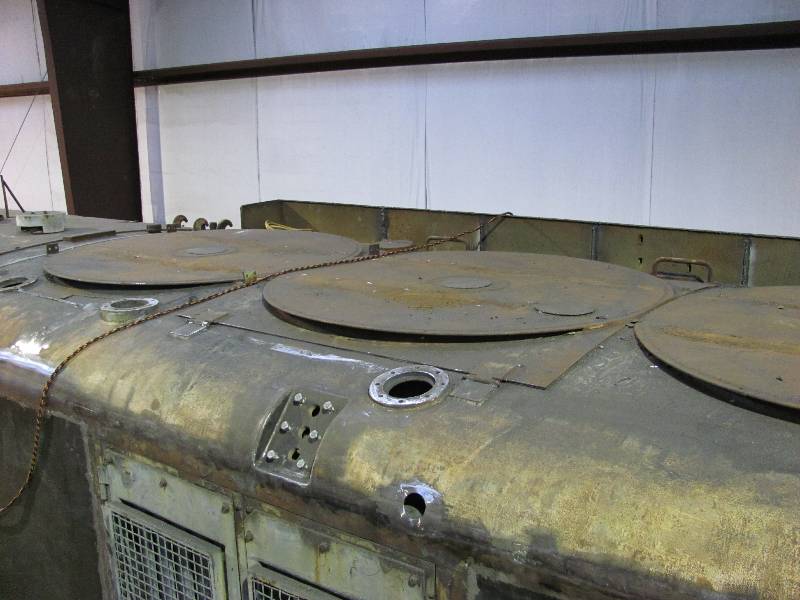
Work
has also continued on the job of removing the radiator expansion tanks
that were added by the SP. They are constructed of 1/4"
steel plate with 1/2" end plates, four 1/4" baffles and a 1/2" plate
divider between the main
tank and the turbo aftercooler section. As of now, three of
the
tanks are removed. The last will be torched off when the 9010
is
returned to the other track in the barn. Luckily,
all of the structure under the tank was intact with only a few holes to
patch and a few welded-on cover plates to remove but we face hours and
hours of grinding. The roof line is returning to 1964.
--
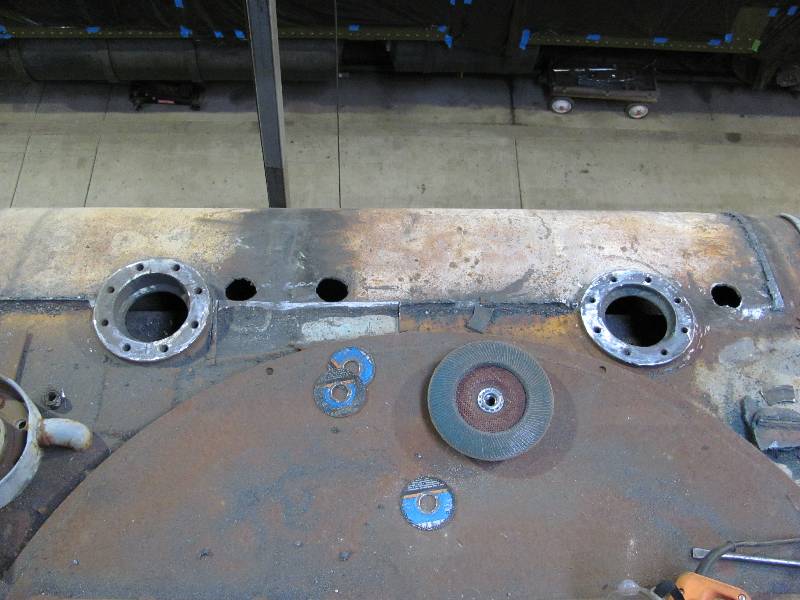
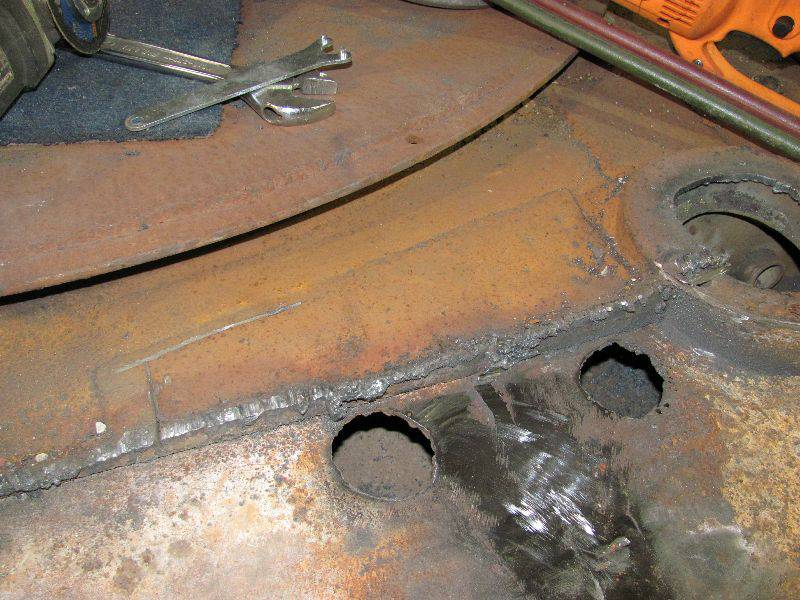
Update December 29, 2010 --
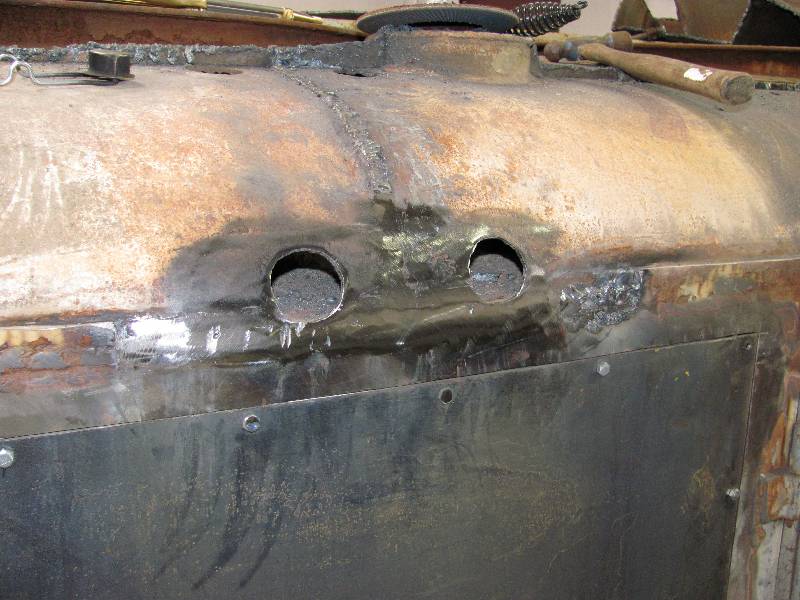
Work
on the roof never seems to end. The amount of grinding needed
is
unbelievable. And then there are those 2"
diameter water
circulation holes that the SP cut when the tanks were added.
All
told, there are 36 of them, 16 in a reasonably flat surface and 20 in
the curve at the roof edge. New crew member Mike Ohare
suggested
using a 2" hole saw to
produce a blanks and we found that they would fit nicely.
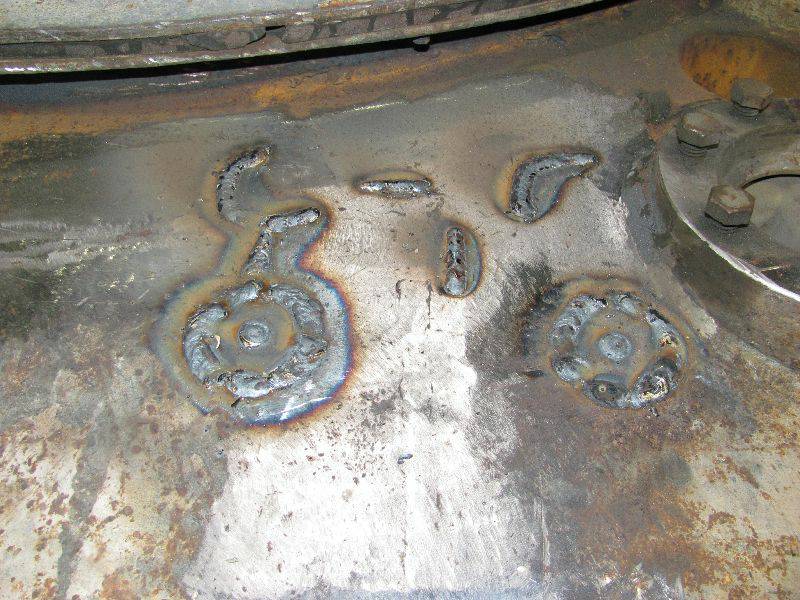
Strips
of steel were run through the roll to produced a curved blank
from which the plugs were cut for the edge. Mike looks like
he
is laying down on the job but, this was the easiest way to weld the
top plugs. During the cleaning process, we discovered a
number of
areas with severe cracks which were ground out and welded.
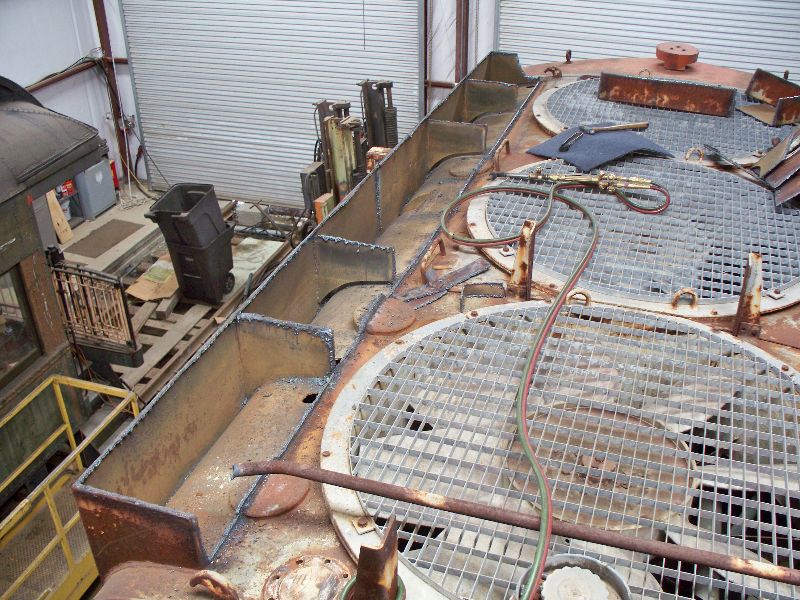
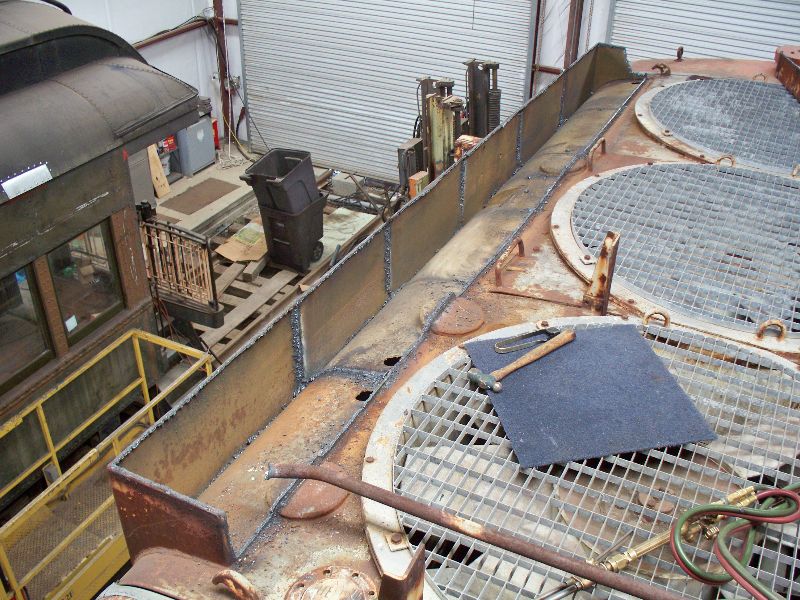
When
not making parts for the roof repair, Rich could
be found cleaning out the cable duct on which we also continue
working.
Mike
removed all the
angle iron that was welded to the plates covering the missing cooling
fans and the vents that were added to cool the generating plant that
was installed below.
Small plates were welded to the covers to keep the elements out.
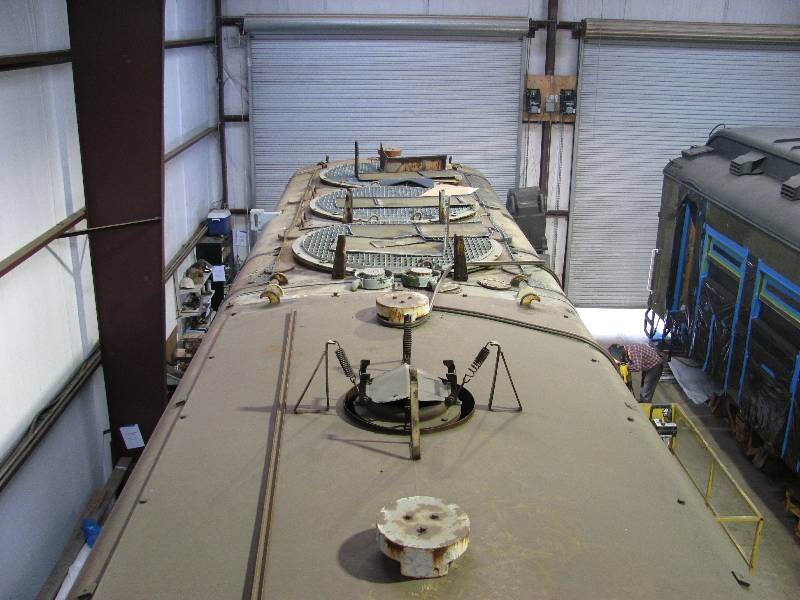
Once all the excess tank and weld was removed, the curved
surface
was treated to several passes with a belt sander to remove crap on the
surface. Thank goodness the SP was an advocate of radiator
treatment compound as there was no rust, only residue of the compound.
Once cleaned, the surface was treated with
Rust Mort and will receive a coat of epoxy primer. Meanwhile,
Mike moved on to grinding the leftover welds on the fireman's side rear.
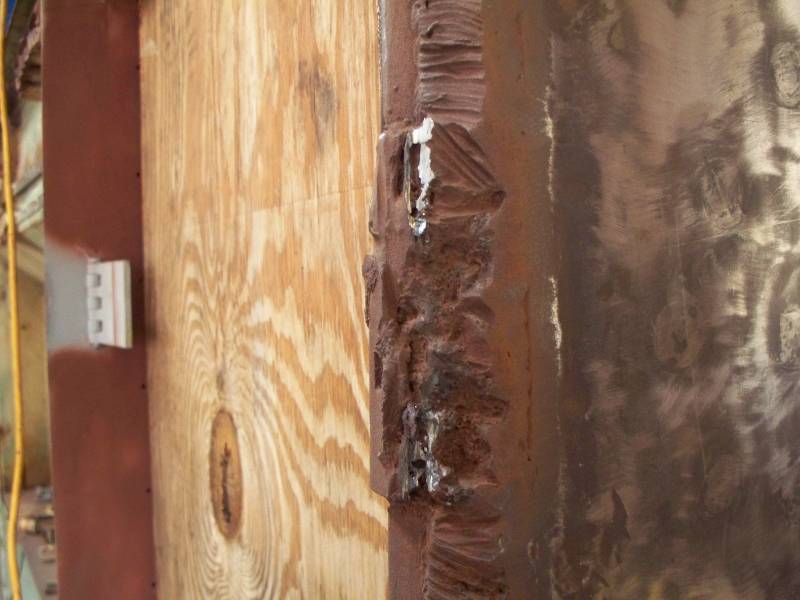
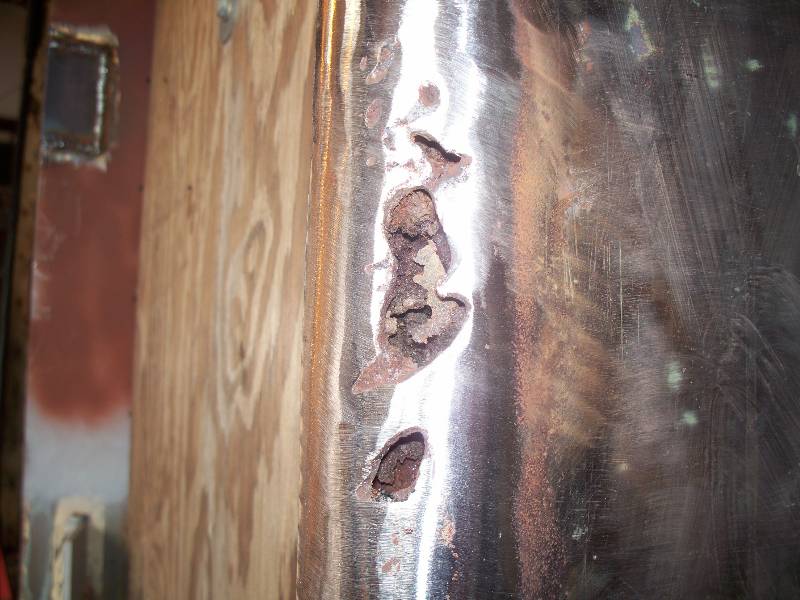
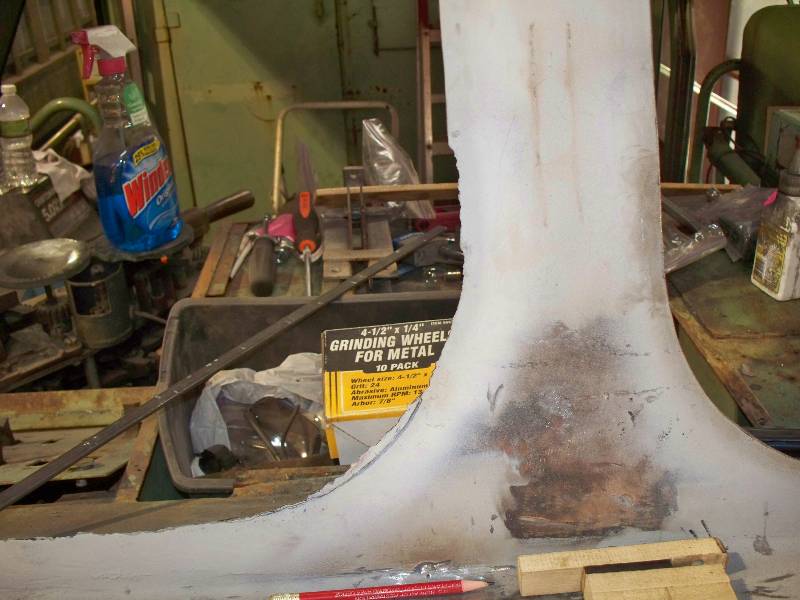
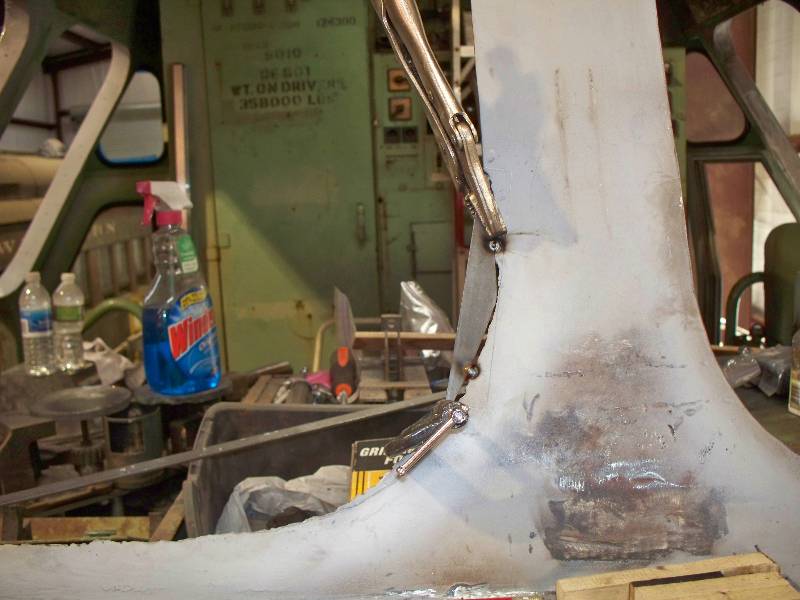
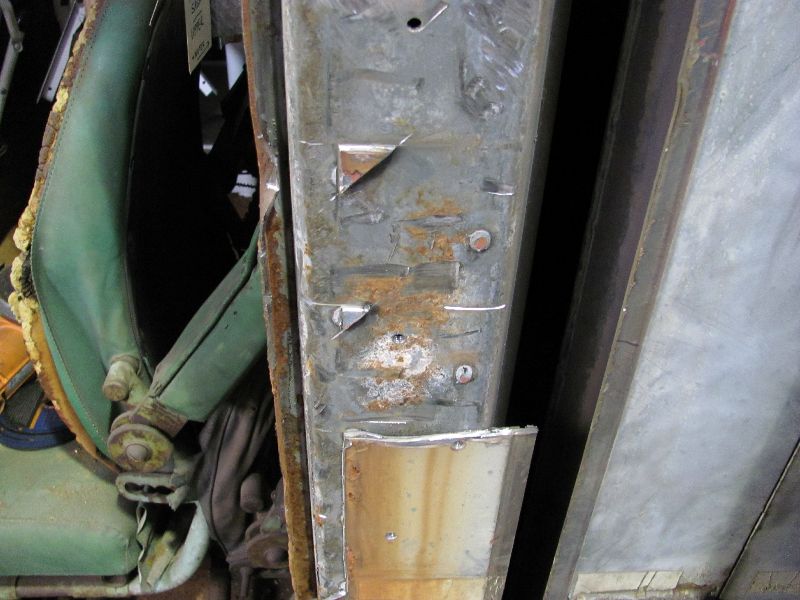
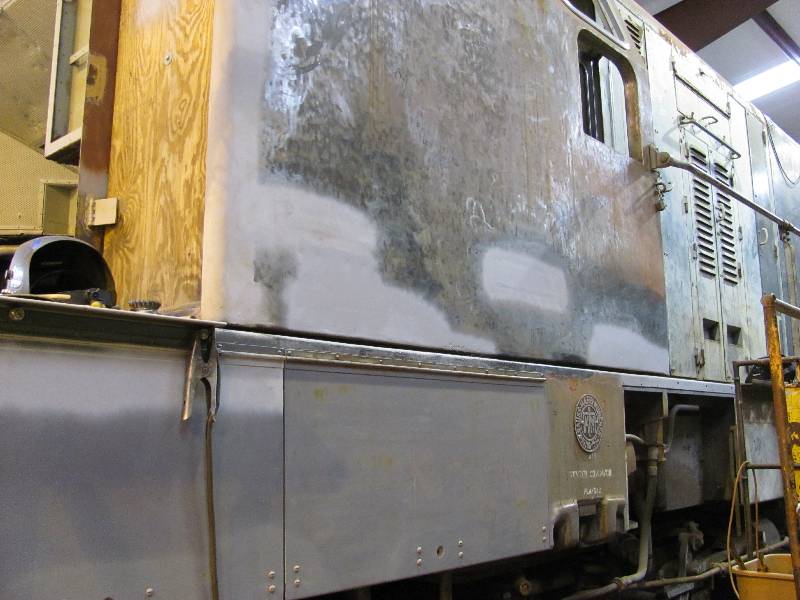
Work
continues on the rotten areas of the cab side. There were a
number of areas on the left side of the cab which were cut
away
until good metal was found. Photo two illustrates the goodies
found inside the outer wall when the bad metal was removed.
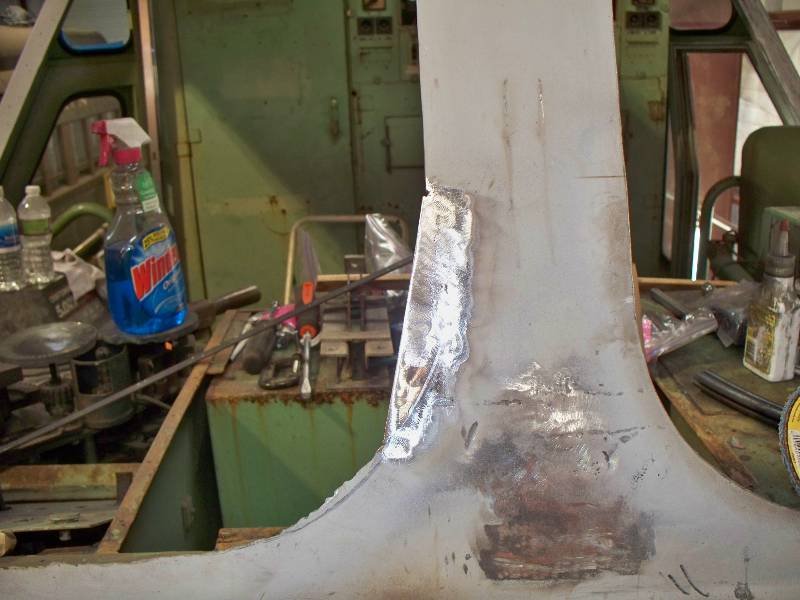
With
the patching done, the wall was cleaned, treated with Rust
Mort
and will wait for warmer weather for a coat of epoxy primer.
|